Microfreak/UG/17 Ext Gear
Properties
- logseq-entity
- Logseq/Entity/Book/Section/Level 1
17 Connecting external gear
- The MicroFreak connects to a range of vintage and modern equipment through the ports on its rear panel.
- MicroFreak Rear Panel
- Below are examples of possible setups:
...with a computer
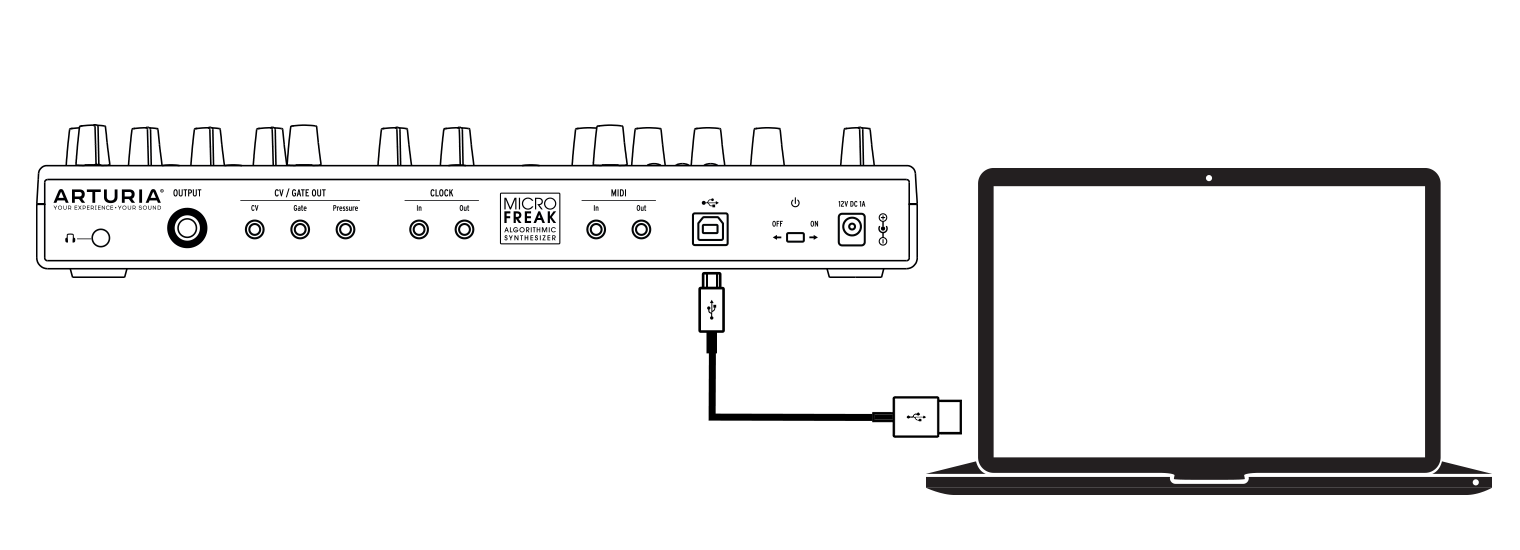
- MicroFreak-Computer connection
- The MicroFreak is a USB class-compliant controller. Connect it to a computer to use it as an input device for applications or to work with MIDI Control Center, which provides a wide range of settings.
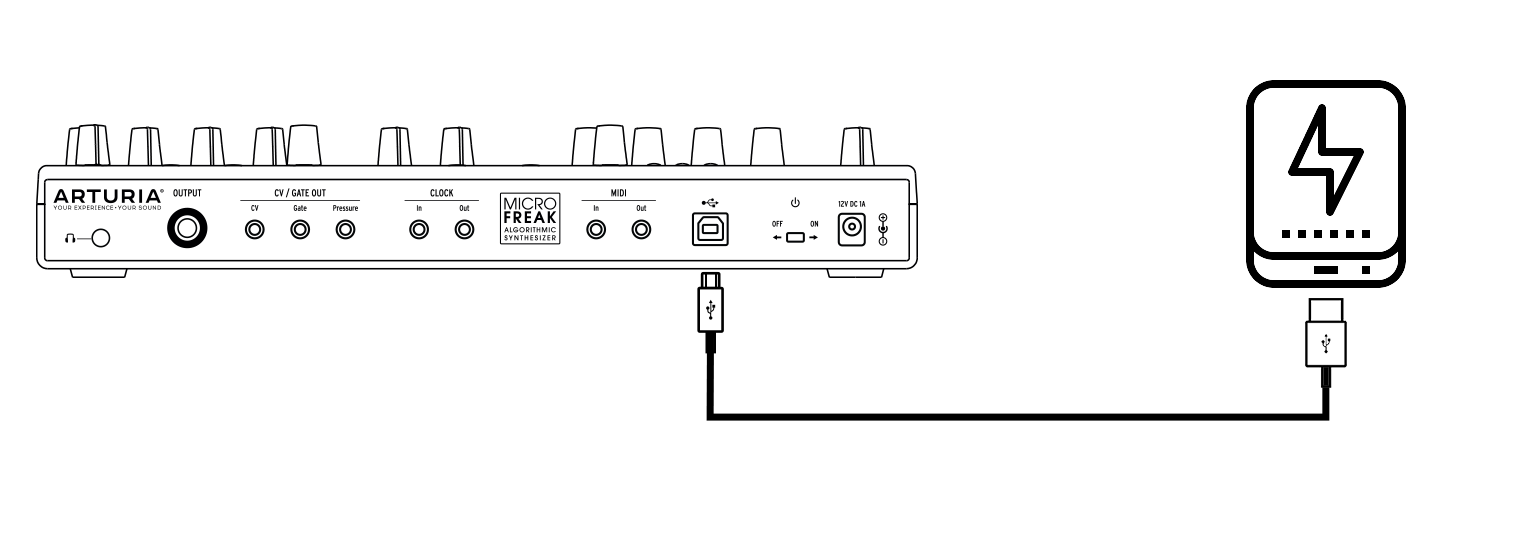
- You can also use the MicroFreak without a computer. Power it with a standard USB phone charger or a power bank, and connect other equipment as shown below.
- MicroFreak with power bank
Note/Warning The MicroFreak's touch-capacitive keyboard must be grounded to work fully. Arturia recommends using the supplied three-pin wall plug.
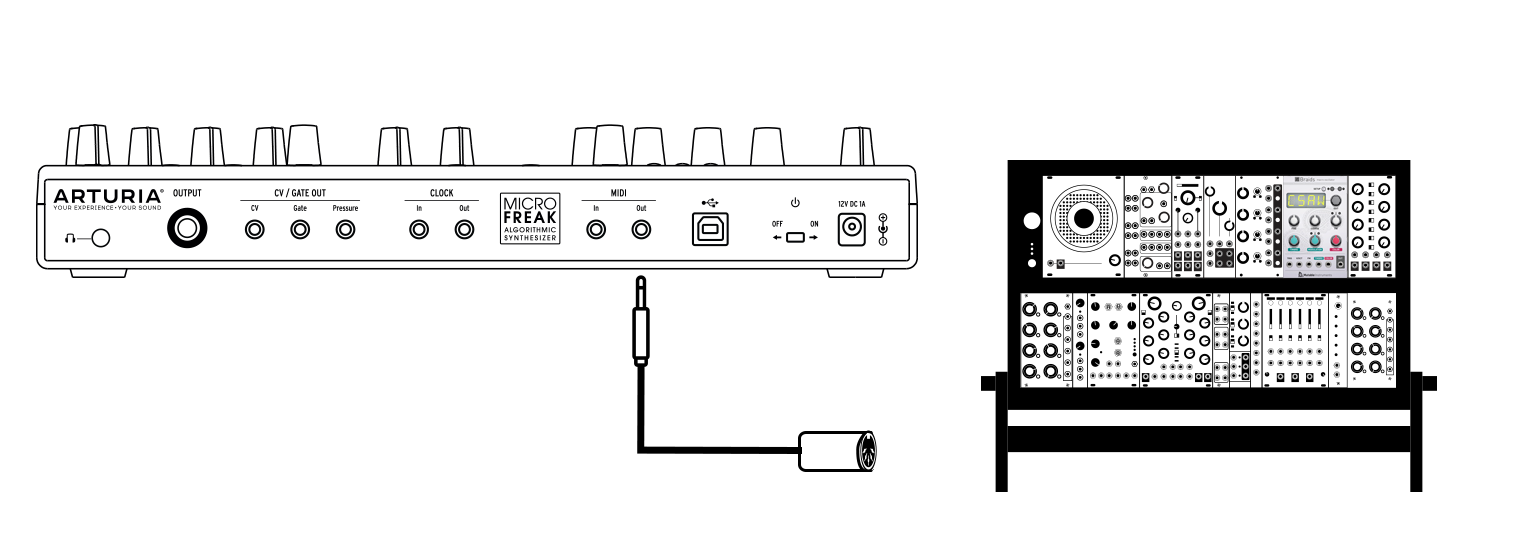
- Many devices have MIDI ports but no CV/Gate or USB connectors. The MicroFreak can send them notes and control them from its front panel with CC commands.
Note/Info Use the supplied gray 1/8-inch TRS-to-5-pin DIN adapters to connect external MIDI devices to the MicroFreak.
- The MicroFreak can also send and receive MIDI data through a computer's USB port.
- MIDI to Modular
17.1 CV/Gate functions
- The MicroFreak puts USB, MIDI, Clock, and CV/Gate outputs on its rear panel. This section describes its CV/Gate circuitry.
17.1.1 Control voltages: Pitch, Gate and Pressure
- When Sequence A or B is selected, or when you play the keyboard, notes are immediately converted to Control Voltage (CV) and Gate signals at the rear-panel outputs. In Paraphonic mode, notes played on the keyboard take priority over a running sequence.
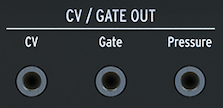
- CV Gate outputs
- Each note sends three independent voltages: Pitch, Gate, and Pressure. Pressure can send velocity or pressure, depending on the Utility setting or MIDI Control Center.
- Some analog synthesizers implement CV/Gate in ways that are not fully compatible with the MicroFreak. Check their specifications before buying to ensure they work together.
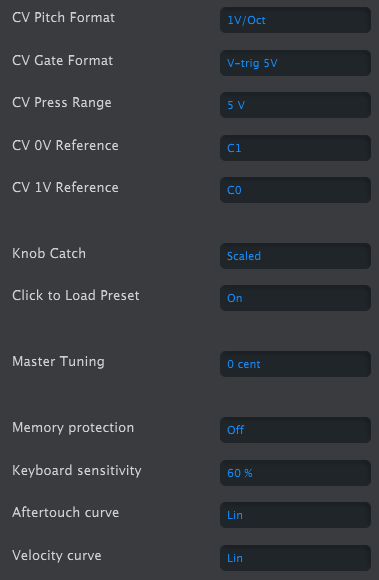
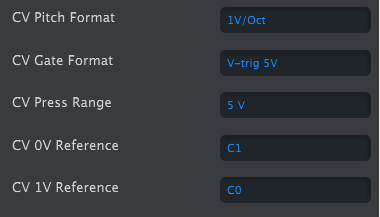
- MIDI Control Center can configure the response of the CV/Gate jacks. By default, Pitch uses the 1 V per octave standard: an octave played on the keyboard raises the connected synthesizer or Eurorack module by one octave. Some synthesizers use Hz/V or 1.2 V per octave; choose the matching Pitch Format in Utility or MIDI Control Center.
- CV Gate setting in the MIDI Control Center
- Gate output can use S-Trig, V-Trig 5 V, or V-Trig 10 V, set in Utility or MIDI Control Center. Keyboard sensitivity adjusts the CV pressure range to match an external modular synthesizer.
- The default 1 V per octave standard means that one volt raises an oscillator by one octave. It is the most common standard. If external oscillators do not track properly, check the external gear's documentation; changing the Volt/Octave setting may help.
- The Pitch control voltage can use:
- CV setting in the MIDI Control Center
17.7 Tutorial 2: Using MIDI to control modules on VCV Rack
- This example uses the MicroFreak's arpeggiator to control an oscillator and envelope generator in VCV Rack, a free virtual modular system.
- Connect the MicroFreak's USB output to the computer and open VCV Rack's demo patch.
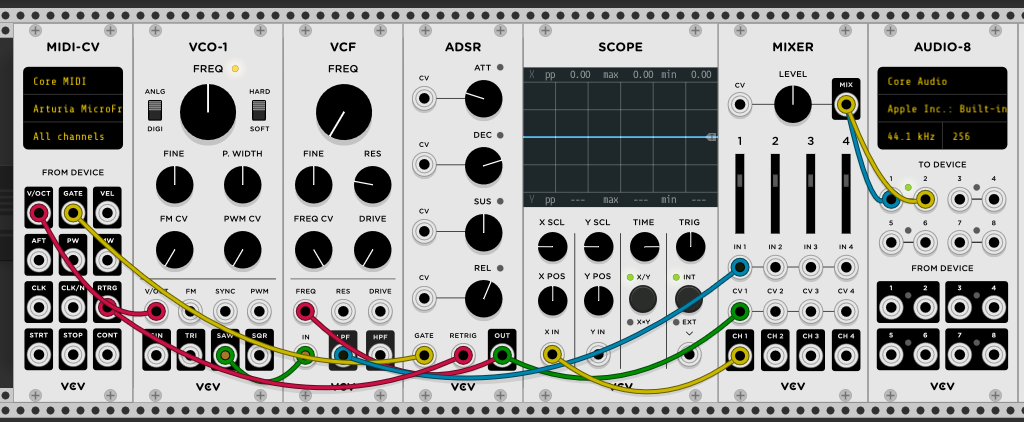
- In the first position, use a MIDI-CV module to send MicroFreak note values to an oscillator's pitch and velocity values to an ADSR envelope.
- In the MIDI-CV module, change the input from computer keyboard to Core MIDI, then select Arturia MicroFreak as the device. The module can now receive pitch and velocity from the MicroFreak.
- In the Audio-8 module, select the computer's audio output.
- VCV Rack MIDI-CV patch
- Press a MicroFreak key to hear VCV Rack. The keyboard, arpeggiator, and sequencer can now control VCV Rack oscillators and envelope generators.
17.9 Tutorial 3: sending CC# codes from the MicroFreak
- Turning a MicroFreak knob sends a CC# code. If you know the code for a dial, slider, or switch, you can use it to control an external parameter.
- This tutorial links the MicroFreak's Cyclic Envelope to the ADSR envelope in VCV Rack's demo patch. It assumes the patch from Microfreak/UG/17 Ext Gear/08 MIDI Tutorial VCV Rack is already set up to control VCO-1 and the ADSR.
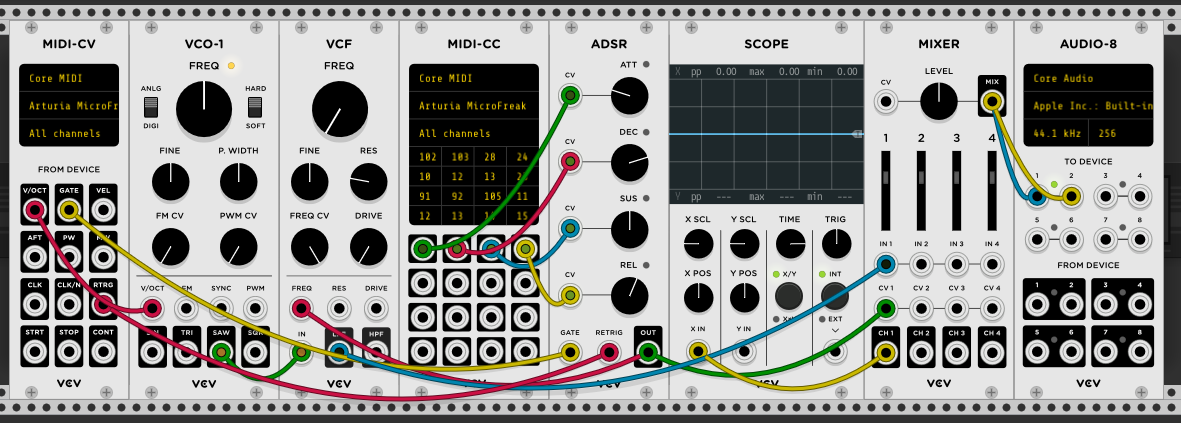
- In VCV Rack, click an empty area of the rack to open the module selector. Search for MIDI and add the MIDI-CC module.
- In the MIDI-CC module, choose Arturia MicroFreak from the device list.
- The module has 16 CC# controllers, numbered 0–15, that can link MicroFreak parameters to VCV Rack parameters. Sixteen patch points below the connection field correspond to its entries.
- Select the first entry, 0; it changes to a dash. Turn the MicroFreak's Cyclic Envelope Rise knob. The first field displays 5, the Rise parameter's CC#.
- Repeat for Fall, Hold, and Amount. Their CC# values appear in the connection fields.
- VCV Rack MIDI-CC patch
- Connect the patch points to the ADSR CV inputs:
- The Cyclic Envelope now controls the VCV Rack ADSR. Press the MicroFreak's ARP button, play a chord, and turn the Cyclic Envelope knobs to hear the result.
- The VCV Rack MIDI-CC module can identify CC# codes. Select one of its 16 fields and turn a MicroFreak knob; the module displays the CC# if that knob sends one.
- The connection works both ways: a VCV Rack output, sequencer, or modular system can control MicroFreak parameters. Use a module such as the Befaco VCMC to convert analog modular signals to MIDI CC# messages.
Note/Info Like note and velocity values, CC# values range from 0 to 127.

30 Linked References
Hierarchy
- MicrofreakUG17 Ext Gear01 Computer Connection
- MicrofreakUG17 Ext Gear01 Computer ConnectionAsset01-MicroFreak-Computer-connectionpng
- MicrofreakUG17 Ext Gear01 Computer ConnectionAsset02-MicroFreak-with-power-bankpng
- MicrofreakUG17 Ext Gear01 Computer ConnectionAsset03-MIDI-to-Modularpng
- MicrofreakUG17 Ext Gear02 CV Gate
- MicrofreakUG17 Ext Gear02 CV Gate01 Pitch Gate and Pressure
- MicrofreakUG17 Ext Gear02 CV Gate01 Pitch Gate and PressureAsset01-CV-Gate-outputspng
- MicrofreakUG17 Ext Gear02 CV Gate01 Pitch Gate and PressureAsset02-CV-Gate-setting-in-the-MIDI-Control-Centerpng
- MicrofreakUG17 Ext Gear02 CV Gate01 Pitch Gate and PressureAsset03-CV-setting-in-the-MIDI-Control-Centerpng
- MicrofreakUG17 Ext Gear03 Clock Sources and Destinations
- MicrofreakUG17 Ext Gear04 Control External Gear
- MicrofreakUG17 Ext Gear05 Local Control
- MicrofreakUG17 Ext Gear06 MIDI Channels
- MicrofreakUG17 Ext Gear06 MIDI Channels01 DAW Configuration
- MicrofreakUG17 Ext Gear07 MIDI Tutorial MINI V
- MicrofreakUG17 Ext Gear08 MIDI Tutorial VCV Rack
- MicrofreakUG17 Ext Gear08 MIDI Tutorial VCV RackAsset01-VCV-Rack-MIDI-CV-patchpng
- MicrofreakUG17 Ext Gear09 MIDI CC Control
- MicrofreakUG17 Ext Gear10 Tutorial MIDI CC
- MicrofreakUG17 Ext Gear10 Tutorial MIDI CCAsset01-VCV-Rack-MIDI-CC-patchpng
- MicrofreakUG17 Ext Gear11 MIDI CC Values
- MicrofreakUG17 Ext GearAsset01-MicroFreak-Rear-Panelpng