Launchpad/UG/10 Setup
10. Setup
- Hold Setup to choose device preferences for LEDs, pad velocity, aftertouch, MIDI, and faders.
10.1 Setup Menu
- Hold Setup to open the menu. The upper rows spell the active page name. The five leftmost Track Select buttons choose LED, Velocity, Aftertouch, MIDI, or Fader settings.
10.2 LED Settings
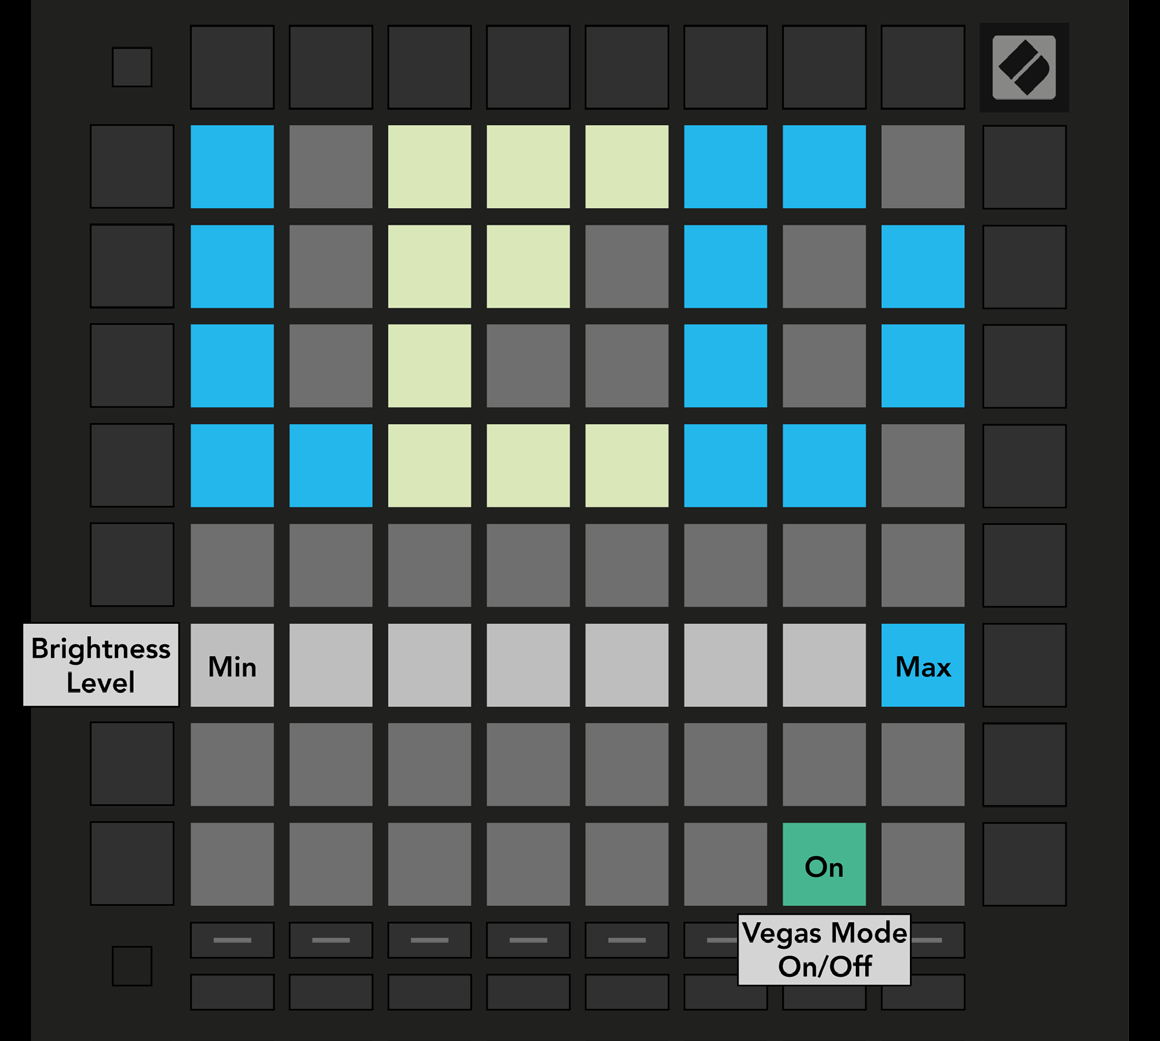
- Press the first Track Select button. Choose among eight brightness levels; the bright white pad marks the active level.
- Vegas Mode starts after five minutes without activity. Its toggle is green when enabled and red when disabled.
- 10.2.A — LED Settings view
10.3 Velocity Settings
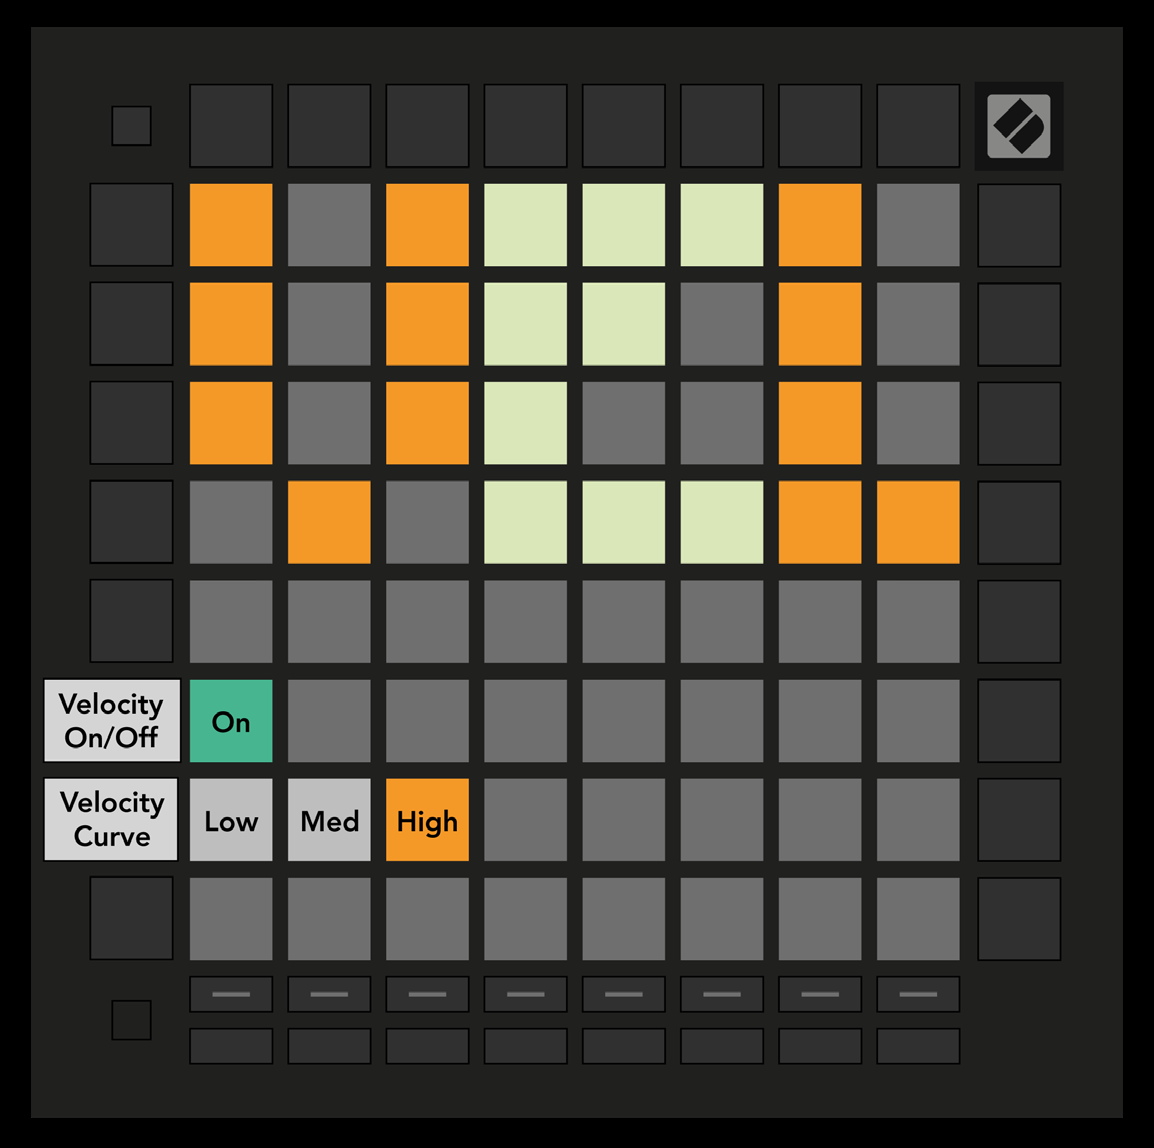
- Press the second Track Select button for VEL settings. Toggle pad velocity globally: bright green is enabled and dim red is disabled.
- Choose Low, Medium, or High velocity response. Low needs more force for a high value; High needs less. The selected curve glows bright orange; the others are dim white.
- 10.3.A — Velocity Settings view
10.4 Aftertouch Settings
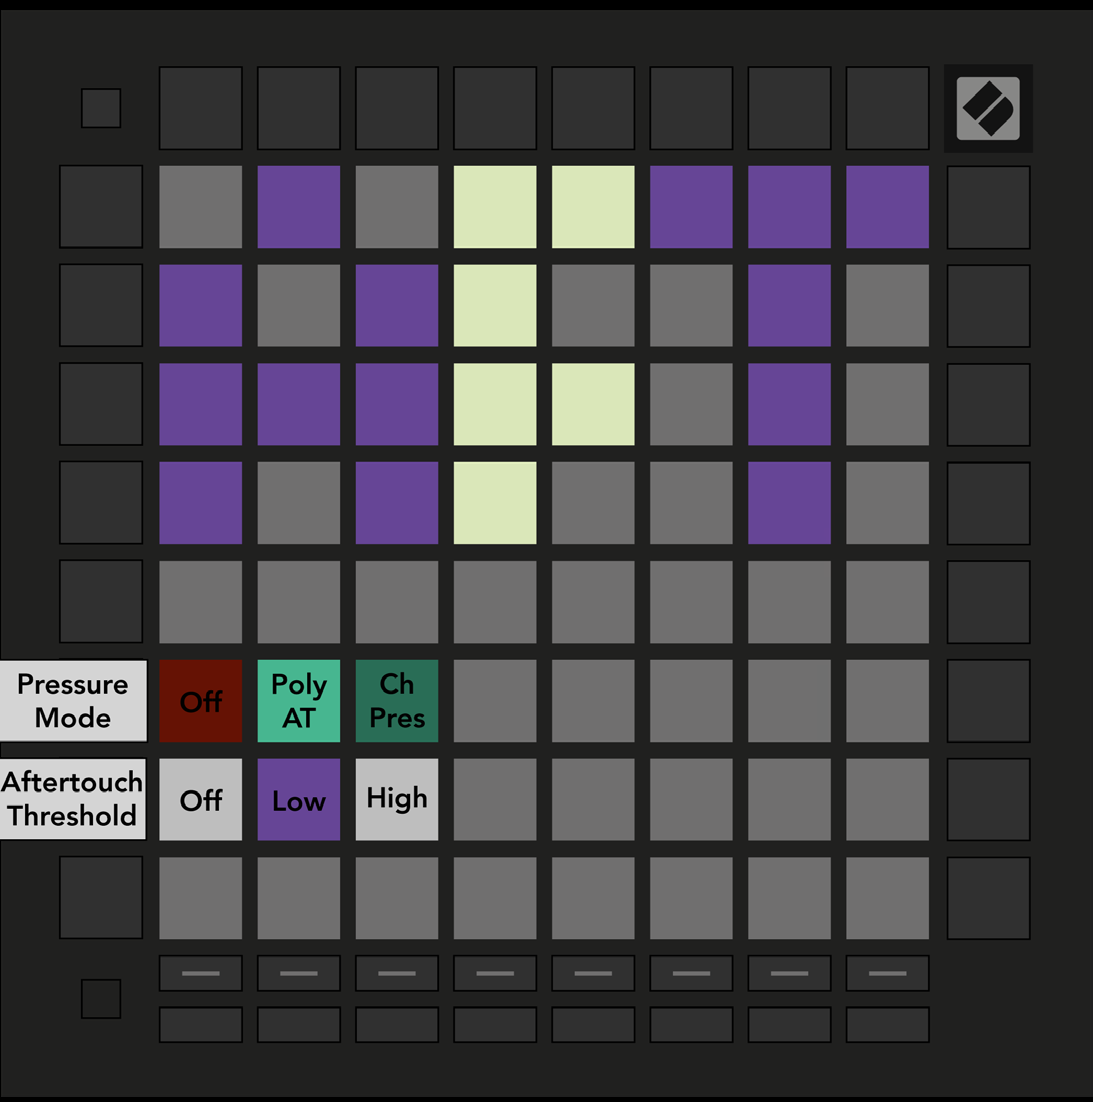
- Press the third Track Select button for AFT settings. Choose disabled pressure, Polyphonic Aftertouch, or Channel Pressure. The active choice is bright.
- Channel Pressure sends one value for all pads, using the greatest pressure on the grid. Polyphonic Aftertouch sends a separate value for each pad. The guide recommends Channel Pressure with Ableton Live, which does not support polyphonic aftertouch in the version it describes.
- Set the Aftertouch Threshold to Off, Low, or High. Off sends pressure from the start of a press; Low and High require increasing pressure before messages begin. This helps avoid engaging an assigned effect as soon as a pad is touched.
- 10.4.A — Aftertouch Settings view
10.5 MIDI Settings
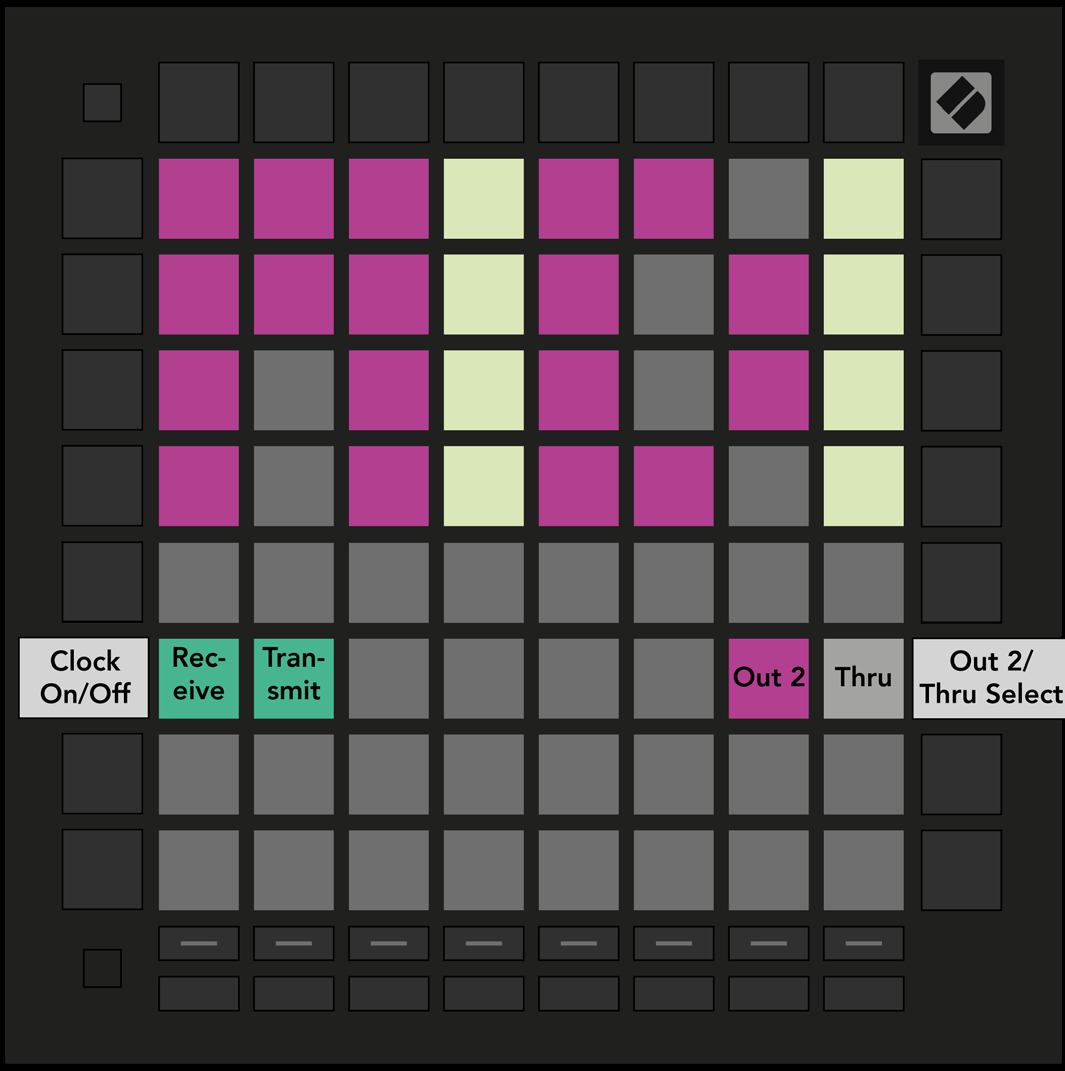
- Press the fourth Track Select button. Receive Clock controls whether incoming MIDI clock is followed; Transmit Clock controls whether Launchpad Pro sends clock. Both default to On.
- Set the second MIDI output to Out 2 to duplicate Out 1, or Thru to forward messages arriving at MIDI In.
- 10.5.A — MIDI Settings view
10.6 Fader Settings
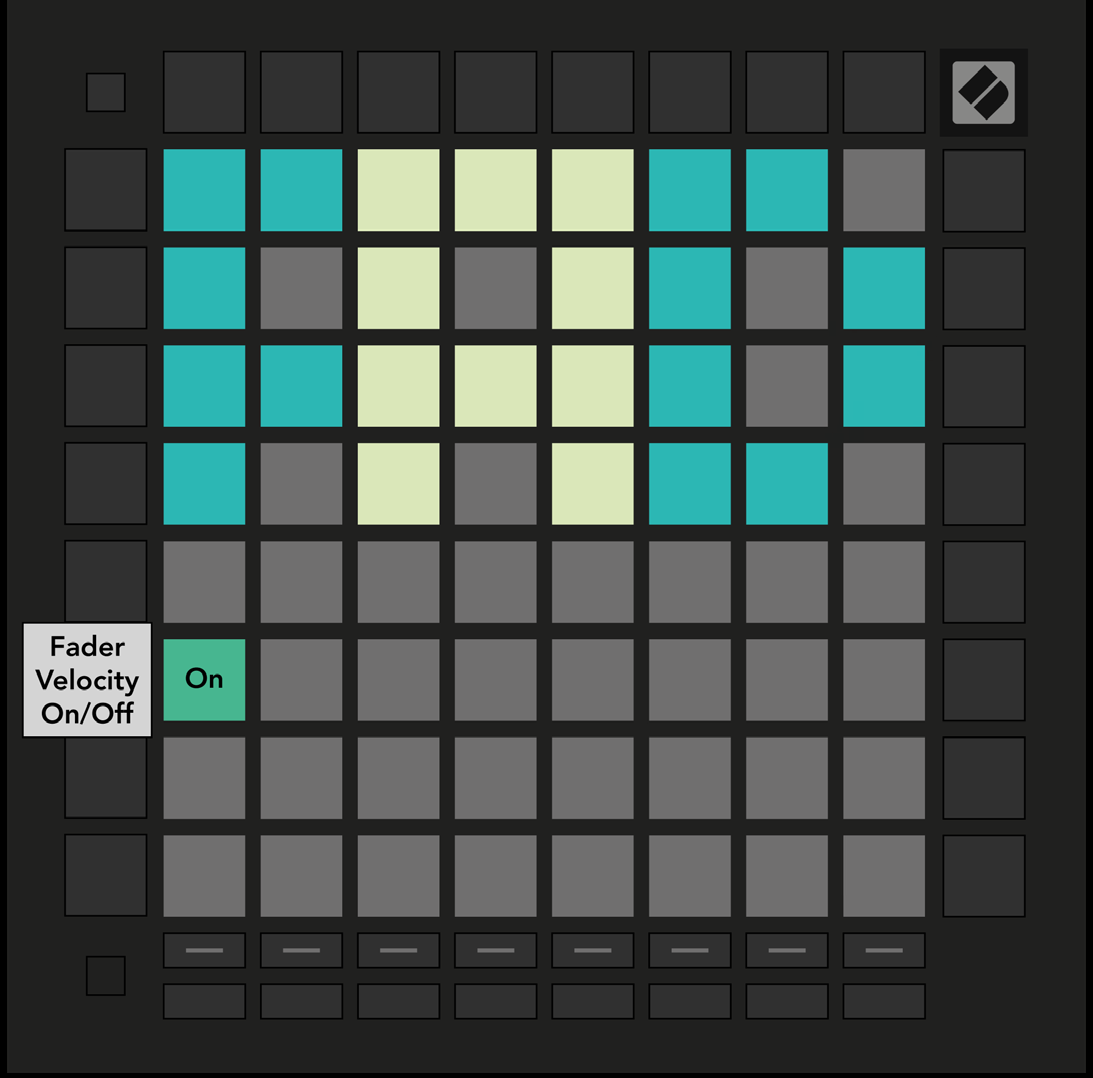
- Press the fifth Track Select button for FAD settings. Fader velocity can be enabled separately from the global pad velocity setting. The toggle is bright green when enabled and dim red when disabled.
- 10.6.A — Fader Settings view
10.7 Live and Programmer Mode
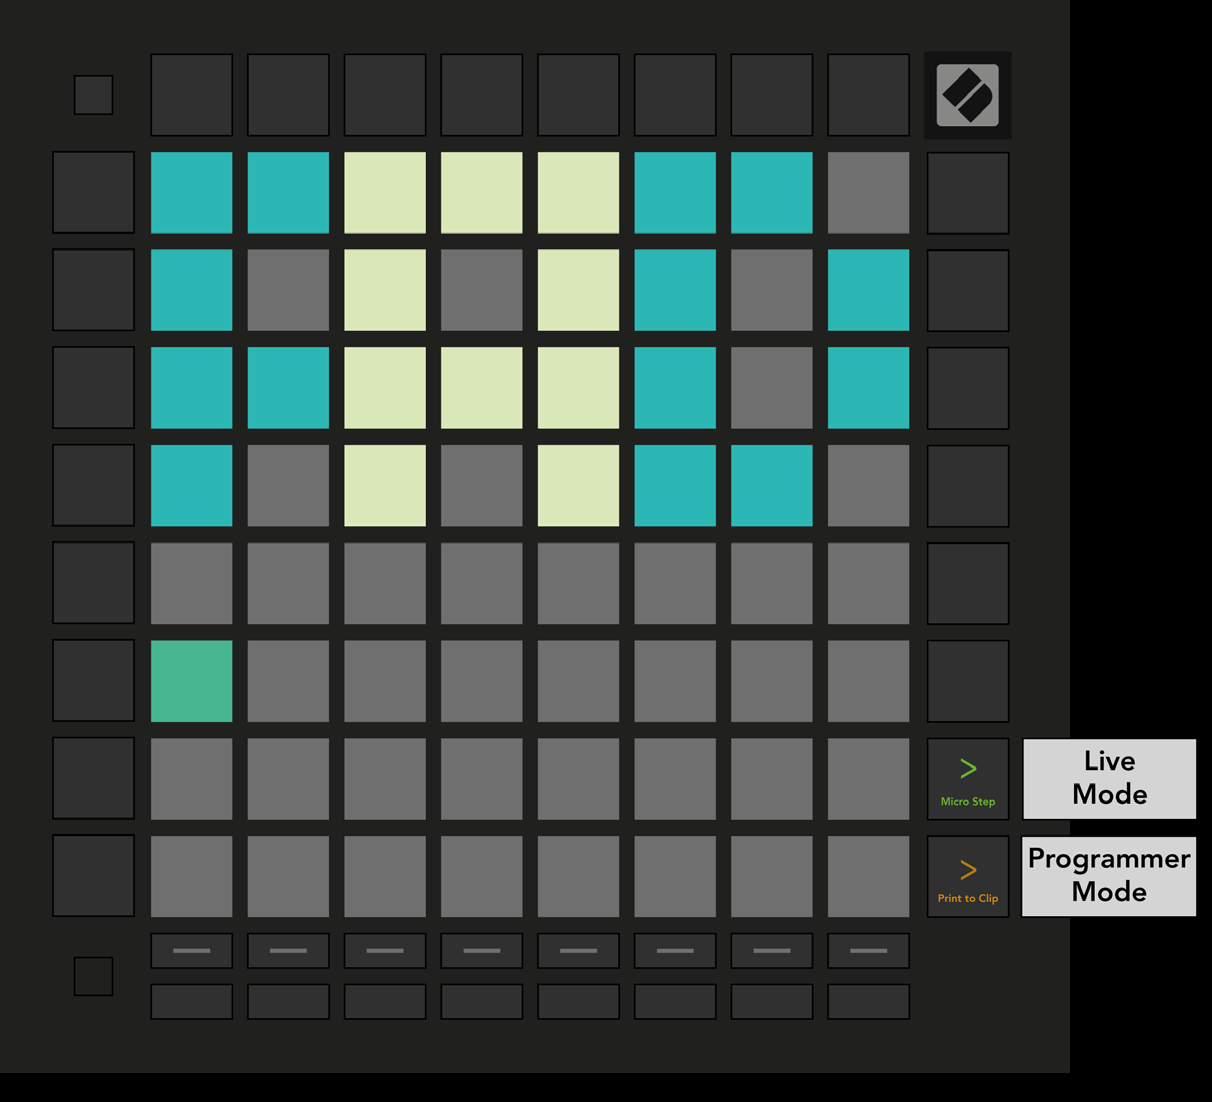
- Live Mode gives access to Session, Note, Chord, Custom, and Sequencer modes. It is the default at power-on.
- Programmer Mode lets external MIDI software control the surface. Each pad and button sends and responds to its assigned MIDI message; the other device modes are unavailable while Programmer Mode is active.
- Hold Setup and press the green Scene Launch button for Live Mode or the orange Scene Launch button for Programmer Mode. Release Setup to enter the selected mode.
- The Programmer’s Reference Guide describes the MIDI messages that light pads and buttons.
- 10.7.A — Live and Programmer Mode selection
10.8 Bootloader Menu
- Hold Setup while plugging in Launchpad Pro to open the bootloader menu.
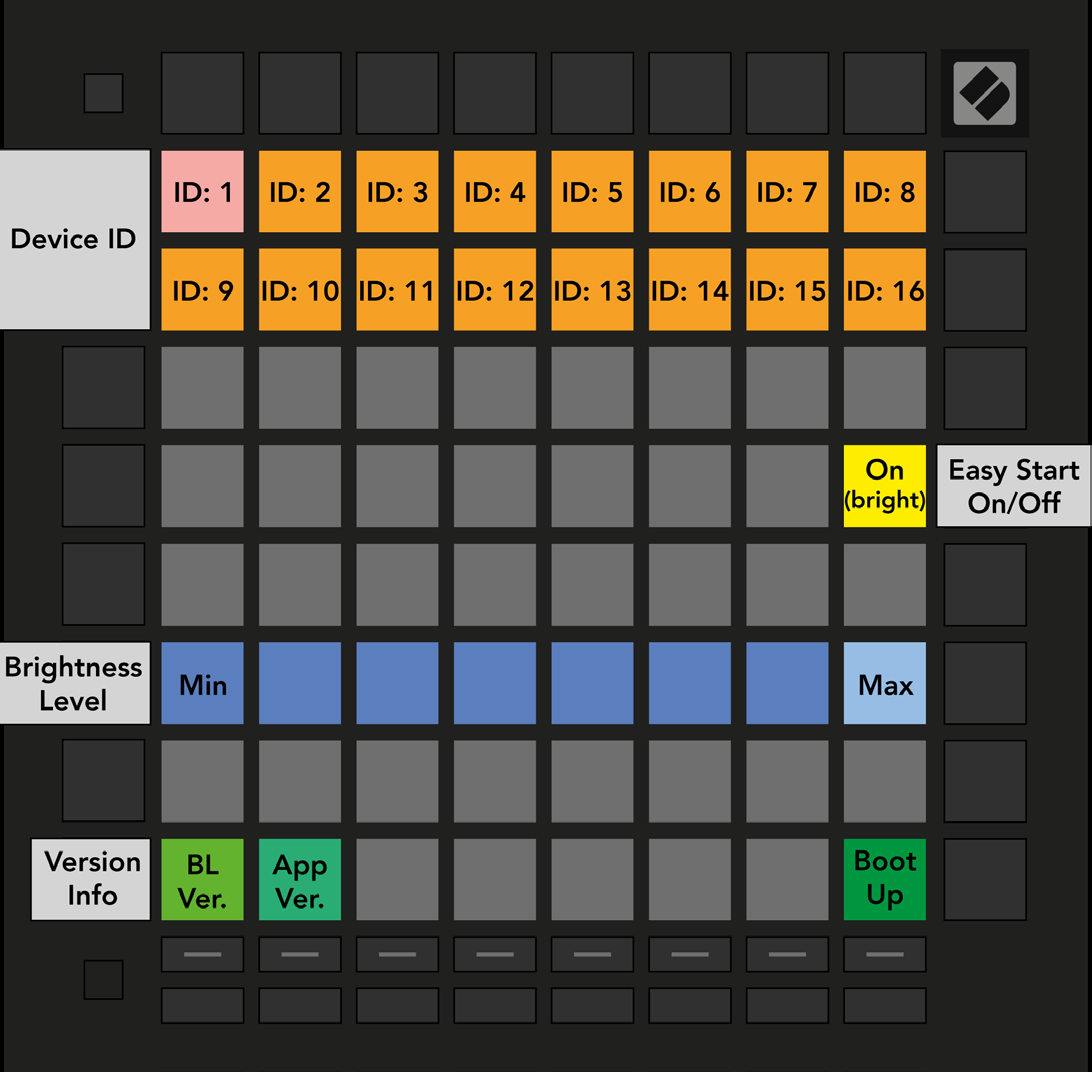
- The eight-level brightness slider can lower power use when a USB host cannot supply enough power for a full-brightness startup. The bright white pad marks the active level.
- Bootloader Version and App Version show installed versions. Boot Up exits the menu and starts the controller normally.
- Set a different Device ID on each Launchpad Pro when using several with Live. Each unit then has an independent Session View outline.
- MSD Mode controls whether the device appears as a mass storage drive. It is on by default; the bright pad means enabled and the dim pad means disabled. The LAUNCHPAD drive contains a link to the Easy Start Tool.
- 10.8.A — Bootloader menu