Launchpad/UG/05 Session Mode
5. Session Mode
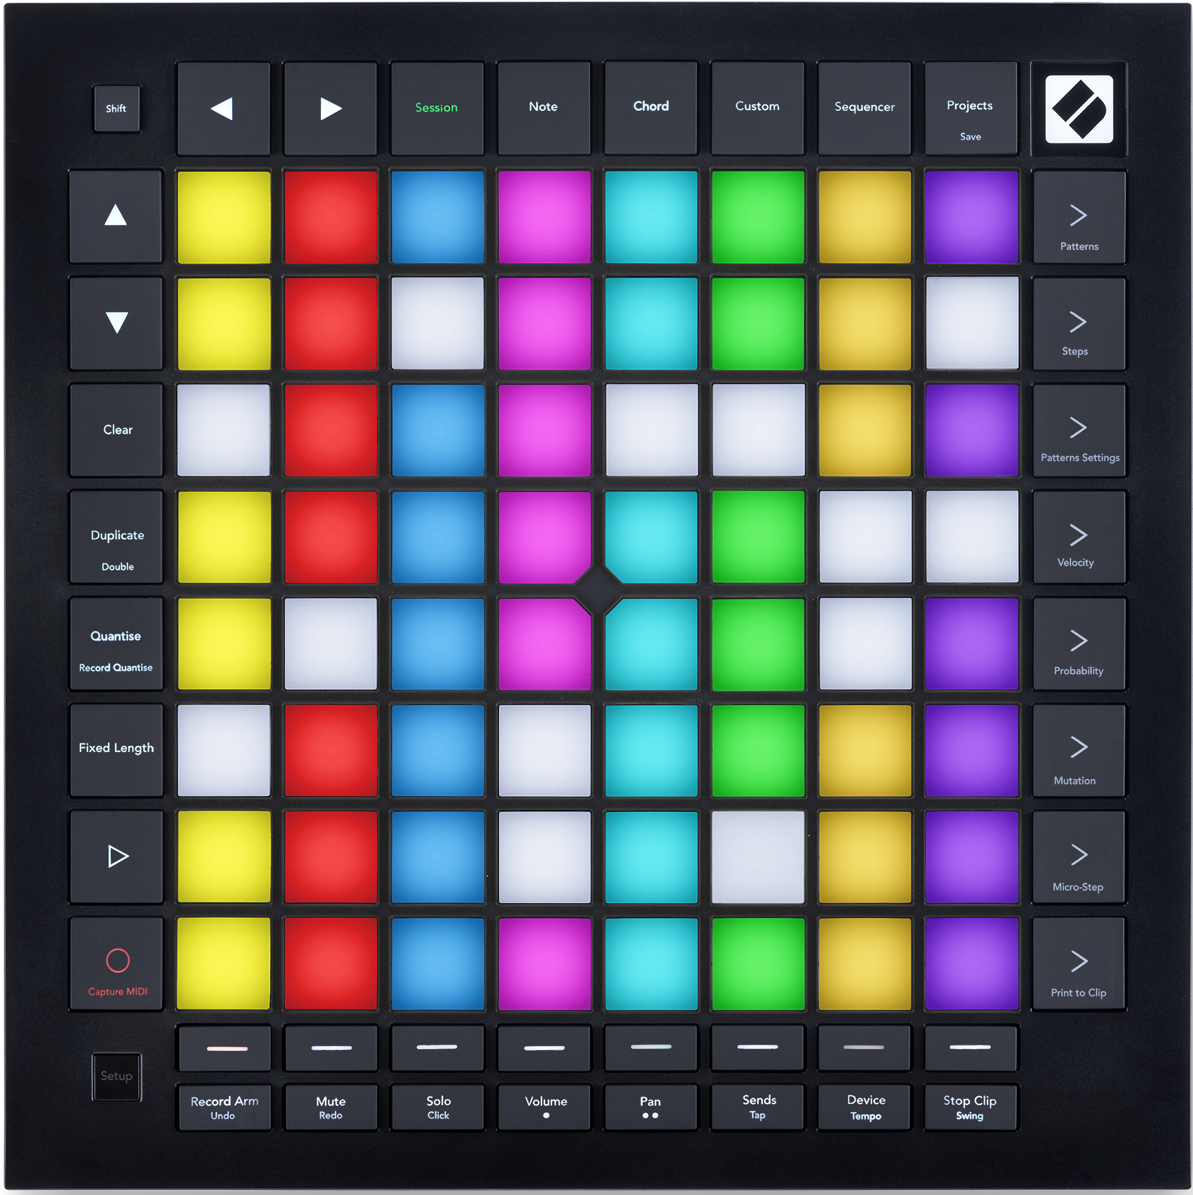
- Session Mode controls Ableton Live Session View from the Launchpad grid. The grid shows an 8 × 8 window of clips.
5.1 Ableton Live’s Session View
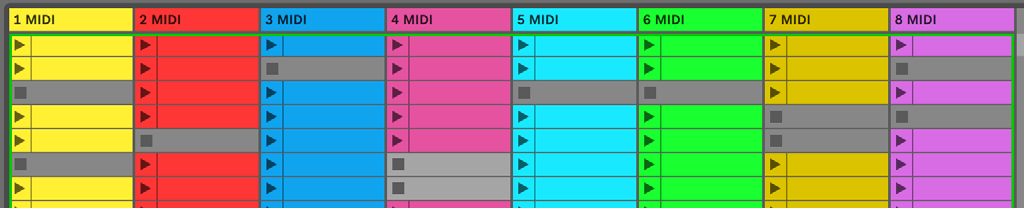
- Session View arranges clips in tracks (columns) and scenes (rows). A clip usually contains looping MIDI or audio. A track hosts an instrument or audio, and a scene launches the clips across its row.
- Use the arrow buttons to move the visible 8 × 8 window through the Live set. Live outlines the window currently shown on Launchpad Pro.
- Press a clip pad to launch it. Its color matches Live. A queued clip flashes green; a playing clip pulses green. Each track plays one clip at a time, and launching an empty slot stops its playing clip. Use the scene launch buttons at the right to launch a row.
- 5.1.B — Session View in Live and on the Launchpad grid
- For an armed track, Session Record overdubs the playing clip. Shift + Session Record calls Capture MIDI, which retrieves recently played notes from armed or input-monitored tracks into a new clip or overdubs the playing clip.
- Play starts the active clips; pressing Play during playback stops playback.
5.2 Session Overview
- Hold Session while in Session Mode to show a wider map. Each pad represents an 8 × 8 block of clips. Press a pad to jump to its block, or move with the arrow buttons.
- The current block is light brown; other blocks are blue. A block with a playing clip outside the current view pulses green.
Scroll by 8
- Launchpad Launchpad/UG/05 Session Mode/02 Session Overview
- In Session Mode, how do you move the clip window by a whole 8 × 8 block instead of one row or column? Card
- Hold Session to open Session Overview, then press an arrow button: each press moves one 8 × 8 block.
- Or, while holding Session, press a pad to jump straight to that block.
5.3 Clip Functions
- Session Mode supplies clip selection, editing, quantisation, and recording-length controls.
5.3.1 Select a Clip or Empty Clip Slot
- Hold Shift and press a clip or empty slot to select it without launching it. Live focuses that clip and its track. Select an empty slot as the destination when printing from the sequencer.
5.3.2 Clear a Clip
- Hold Clear and press a grid pad to delete its clip from Session View. In Note Mode, pressing Clear removes the selected clip.
5.3.3 Duplicate a Clip
- Hold Duplicate and press a clip pad to copy it into the slot immediately below. An existing clip in that slot is overwritten.
- In Note Mode, press Duplicate to copy the selected clip and select the copy for editing.
5.3.4 Double a Clip’s Length
- Double expands a clip to twice its length, such as a two-bar loop becoming four bars.
- In Session Mode, hold Shift + Duplicate and press the clip pad. For a selected playing clip in Note or Device Mode, hold Shift and press Duplicate once. In Note Mode, the Double control extends the selected clip for a longer loop or overdub.
5.3.5 Quantise a Clip
- Hold Quantise and press a clip pad. Its MIDI notes snap to the nearest sixteenth-note grid point.
5.3.6 Record Quantise
- Record Quantise snaps newly recorded MIDI to the current quantisation grid.
- Hold Shift to inspect the Quantise button: red means off, green means on. While holding Shift, press Quantise to toggle it. In Live, change the grid at Edit → Record Quantisation.
5.3.7 Fixed Length
- Fixed Length limits new recordings to a chosen number of bars, then stops recording and loops the clip. Press Fixed Length to toggle it: white means off and blue means on.
- Briefly hold Fixed Length until the Track Select buttons pulse blue. Press one of those buttons to choose one to eight bars.
5.4 Track Controls
- The bottom row provides Track Controls for Live. The Track Select buttons immediately above it select the tracks in the current Session View window.
5.4.1 Record Arm
- Shows record-arm toggles on the Track Select buttons. Press a track button to arm it for recording; its playing clip stops.
5.4.2 Mute
- Shows mute toggles on the Track Select buttons. Press a track button to mute it; its playing clip stops.
5.4.3 Solo
- Shows solo toggles on the Track Select buttons. Press a track button to solo it; its playing clip stops.
5.4.4 Volume
- Adjust the eight visible tracks with vertical volume faders.
5.4.5 Pan
- Adjust stereo position with horizontal faders. Rows correspond to tracks, from the leftmost track at the top to the rightmost at the bottom.
5.4.6 Send
- Adjust each visible track’s Send A level with a vertical fader.
5.4.7 Device
- The row above the mixer selects one of the first eight devices in a track’s chain. After selecting a device, use the eight vertical faders for its macro parameters.
5.4.8 Stop Clip
- Shows Stop Clip triggers on the Track Select buttons. Press a track button to stop its playing clip at the end of the phrase.
5.4.9 Fader Orientation
- Volume, Send, and Device use vertical faders, with tracks arranged across the grid. Pan uses horizontal faders, with tracks arranged from top to bottom. Press a pad along a fader to set its position.
5.5 Record Arm & Recording
- On an armed track, empty slots glow dim red. Press one to queue recording: the pad and record button flash red. During recording, the pad pulses red and the record button stays bright red.
- Press Record to queue the end of recording; the clip flashes red until it stops. Disarming the track stops recording immediately.
5.6 Production Controls
- Shift gives quick access to Live production commands.
5.6.1 Undo
- Hold Shift and press Record Arm to undo the last action. Repeat to step back through more actions.
5.6.2 Redo
- Hold Shift and press Mute to redo an undone action.
5.6.3 Tap (Tap Tempo)
- Hold Shift and repeatedly press Sends at the desired beat to set Live’s tempo.
5.6.4 Click (Metronome)
- Hold Shift and press Solo to toggle Live’s metronome.
5.7 Momentary View Switching
- Hold a Track Control button to use its view temporarily, then release it to return to the earlier view. For example, hold Volume while viewing Mute, adjust a fader, and release Volume to return to Mute.