Ableton/Live/UG/34 MIDI and Key Remote/01 MIDI Remote Control
- Live can be remote-controlled from external MIDI control surfaces such as MIDI keyboards and controller boxes, and from Push 1, Push 2 and Push 3.
- Remote control is separate from playing a MIDI track. A key or controller assigned to a Live control stops reaching the MIDI track: if C-1 launches a clip, it no longer plays C-1 on the instrument. The Control Bar's MIDI indicators show which way incoming MIDI went.
- Set up control surfaces first, in the Link, Tempo & MIDI tab of Live's Settings (
Cmd+, on Mac, Ctrl+, on Windows). - Choose control surfaces in the Control Surface column of the Link, Tempo & MIDI tab. Live can use up to six at once.

- If the controller is listed in the first Control Surface chooser, pick it by name and set its MIDI input and output ports in the next two columns. If it is not listed, set it up by hand instead — see Ableton/Live/UG/34 MIDI and Key Remote/01 MIDI Remote Control/02 Manual Control Surface Setup.
- Some controllers need a preset dump. The Dump button next to the choosers becomes active when one is needed. Put the hardware in a state to receive the dump (the hardware's own documentation says how), then press Dump.
- An instant mapping is Live's built-in assignment of its functions to a supported controller's knobs, sliders and buttons. The controls follow the selected device, reassigning themselves to whatever device is in focus.
- Manual assignments override instant mappings. For that, also turn on the Remote switches for the controller's ports in the MIDI Ports section.
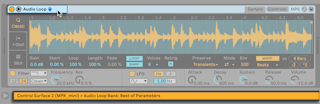
- A supported controller can be locked to one device so it stays in reach wherever the focus moves: right-click the device title bar and pick the controller under Lock to…. A hand icon in the title bar marks a locked device.
- By default, arming a MIDI track locks its instrument to the control surface.
- Some control surfaces cannot lock to devices.
- A controller that is not in the Control Surface chooser can still be mapped by hand from the MIDI Ports section of the Link, Tempo & MIDI tab.

- To use an input port for remote control, set its Remote switch to On. Any number of ports can be on; Live merges their MIDI.
- For a controller with motorized faders or LEDs, also turn on Remote for its output port so Live can send changed values back to it.
- To test, send MIDI from the controller: the Control Bar's MIDI indicators flash when Live receives a message.
- The manual suggests choosing a Takeover Mode before leaving Settings — Ableton/Live/UG/34 MIDI and Key Remote/01 MIDI Remote Control/03 Takeover Mode. Mapping then happens one parameter at a time.

- Takeover Mode decides what happens when a control that sends absolute values, such as a fader, is first moved after a bank switch has pointed it at a different parameter, so the hardware and the parameter disagree.
- None — the new value goes straight to the parameter, usually as a sudden jump.
- Pick-Up — moving the control does nothing until it passes the parameter's current value; from then on the parameter follows the control. Smooth, but the pick-up point is hard to predict.
- Value Scaling — Live compares the two values and brings the parameter toward the control smoothly as the control moves, then follows it 1:1 once they meet.