Ableton/Live/UG/33 Max for Live Devices
- The Max for Live instruments, audio effects and MIDI effects that come with Live.
- Eight drum synthesizers built in Max for Live, one per drum sound. Each has Decay and Volume controls, and clicking the upper half of its display plays a preview with the current settings.
- Ableton/Max for Live/Instrument
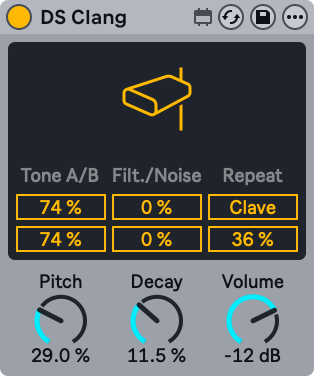
- Cowbell, clave and noise percussion from two tones, white noise and a filter.
- Tone A and Tone B — level of each cowbell tone
- Filter — high-pass and band-pass cutoff; higher is brighter
- Noise — amount of white noise
- Clave — switches to clave; Repeat then adds repeats
- Pitch, Decay (length) and Volume
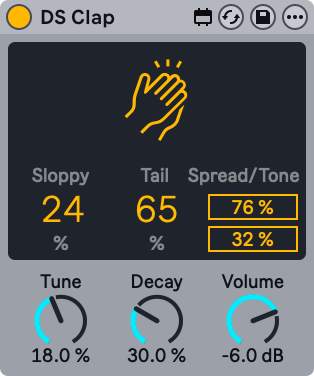
- Claps from filtered noise and an impulse sent through two panned delay lines, from tight electronic claps to looser hand claps.
- Sloppy — time between the two delay lines, so the claps line up tightly or loosely
- Tail — adds filtered noise after the impulse
- Spread — stereo width, from mono at 0% to wide at 100%
- Tone — brightness
- Tune, Decay (length) and Volume
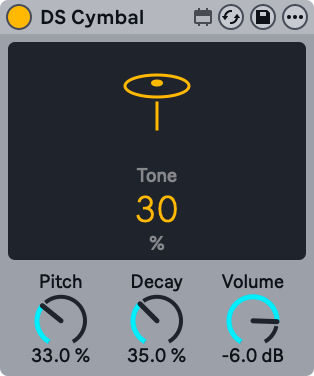
- Cymbals from sine and pulse waves plus high-passed noise, from a thin ride to a heavy crash.
- Tone — high-pass cutoff; higher is brighter
- Pitch, Decay (length) and Volume
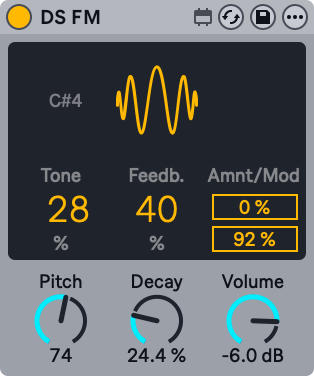
- FM percussion modeled on a classic Japanese FM synthesizer, from noise bursts to metallic zaps.
- Tone — low-pass cutoff; higher is brighter
- Feedb. — FM feedback; more is noisier
- Amnt — FM amount; Mod blends between modulation types
- Pitch, Decay (length) and Volume
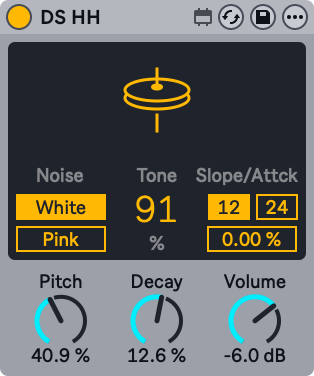
- Hi-hats from noise and sine waves, from closed to open.
- Noise — white or pink
- Tone — high-pass cutoff on the noise; higher is brighter
- The pitched part runs through a resonant high-pass filter switchable between 12 and 24 dB slopes; Attack sets its attack.
- Pitch, Decay (length) and Volume
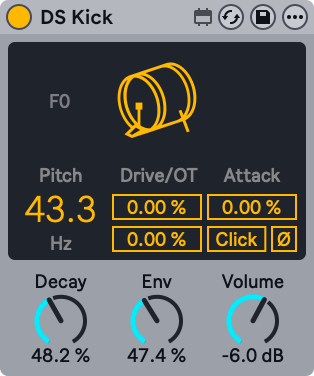
- Kick drum from a modulated sine wave.
- Pitch — tuning in Hz
- Drive — distortion; OT — added harmonics
- Attack — smooths the start of the sine
- Click — adds a click for a sharper attack
- Env — pitch modulation amount
- Decay (length) and Volume
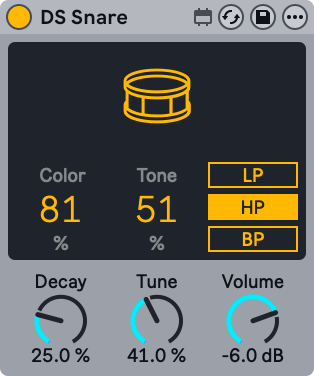
- Snare from a pitched oscillator and noise, from acoustic-style snares to gated noise snares.
- Color — tone of the pitched part
- Tone — amount of noise
- Noise filter: low-pass, high-pass or band-pass
- Tune, Decay (length) and Volume
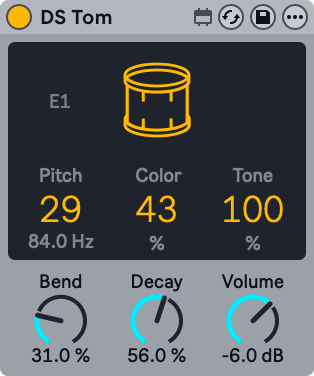
- Toms from an impulse and pitched oscillator waves, from deep to sharp.
- Pitch — tuning in Hz
- Color — filter gain and cutoff
- Tone — level of resonant band-pass filters that imitate a drum head's tuning
- Bend — pitch envelope
- Decay (length) and Volume
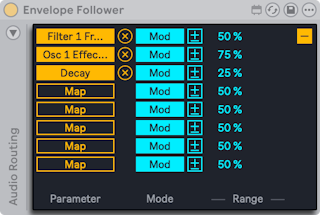
- A utility delay and three modulators. The modulators — Envelope Follower, LFO and Shaper — share one mapping system:
- Map then click any automatable parameter to make it a target; Unmap removes it. Show/Hide Multimap reveals more Map buttons, up to eight targets.
- Mod toggles between Modulation and Remote Control.
- Modulation (default) — the target can still be moved by hand. Modulation Polarity chooses Bipolar (around the base value) or Unipolar (one direction from it); Modulation Amount sets the depth.
- Remote Control — the modulator alone sets the value; Min and Max scale the range.
- Ableton/Max for Live/Audio Effect
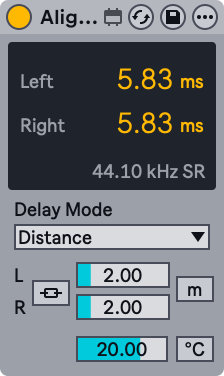
- A utility that delays a signal by time, samples or distance.
- Delay Mode:
- Time — milliseconds; for lining up with A/V gear or slight stereo widening
- Samples — for compensating latency from other devices
- Distance — meters or feet; for timing offsets between speakers in a PA. A Temperature setting (°C or °F) matches the room, since sound travels at different speeds in warm and cold air.
- Link L/R — the left channel's delay drives both channels and Delay Right is disabled
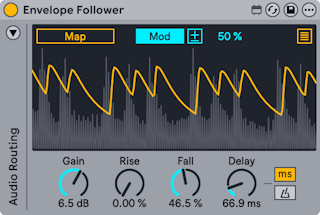
- A modulator that follows the level of the incoming audio and turns it into a smooth control curve. Auto-wah is the classic use.
- Mapping, Mod, polarity and Min/Max work as described in Ableton/Live/UG/33 Max for Live Devices/02 Max for Live Audio Effects.
- Gain — input gain
- Rise and Fall — smooth the attack and release of the curve
- Delay — delays the curve, in time or synced divisions (Delay Mode buttons)
- Sidechain: by default the curve comes from the track's own input. The triangle at the top left opens the Audio Routing panel.
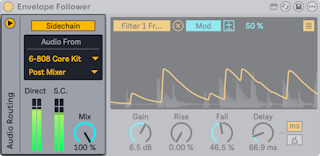
- turn on Sidechain, choose the source track in Audio From, and choose Pre FX, Post FX or Post Mixer (and a Rack channel if needed)
- Direct and S.C. meters show the track and sidechain levels
- Sidechain Mix — 0% uses only the track input, 100% only the sidechain; a Drum Rack as sidechain gives rhythmic ducking or gating
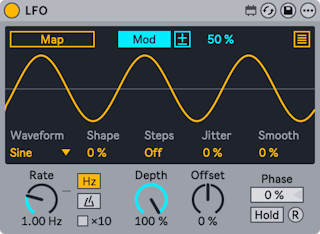
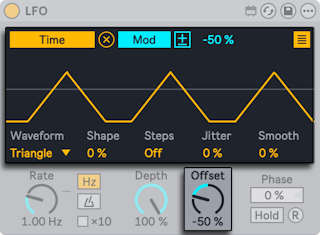
- A modulator that drives mapped parameters with a low-frequency oscillator.
- Mapping, Mod, polarity and Min/Max work as described in Ableton/Live/UG/33 Max for Live Devices/02 Max for Live Audio Effects.
- Waveform — Sine, Up, Down, Triangle, Square, Random, Bin, Stray or Glider
- Shape bends the wave; Steps quantizes it into up to 24 steps. Shape is disabled for Random, Bin, Stray and Glider; Steps for Random, Bin and Square.
- Jitter adds randomness; Smooth softens sudden changes, including jitter.
- Rate — in Hz or synced divisions (Time Mode toggles). In Hz, ×10 multiplies the rate.
- Depth — modulation amount for all targets, 0% to 100%
- Offset — moves the center of the output up or down; the horizontal line in the display marks the center
- Phase — start position in the cycle, 0% to 100%
- Hold — freezes the output; releasing Hold continues from the held value
- R — retriggers from the Phase position
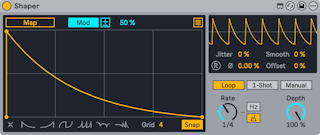
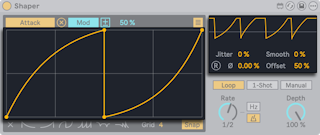
- A modulator whose output is a breakpoint envelope drawn in its display.
- Mapping, Mod, polarity and Min/Max work as described in Ableton/Live/UG/33 Max for Live Devices/02 Max for Live Audio Effects.
- Drawing:
- click to add a breakpoint;
Option-drag (Mac) or Alt-drag (Windows) between points to curve a segment; Shift-click a point to delete it - Clear erases the envelope; six presets next to it start a new one
- Grid sets grid divisions; Snap snaps points to the grid
- The small display at the top right shows the output like an oscilloscope.
- Jitter adds randomness; Smooth softens sudden changes.
- Phase — start position in the cycle; R retriggers from there (disabled in Sync time mode)
- Offset — moves the center of the output up or down
- Trigger modes:
- Loop — repeats at Rate
- 1-Shot — plays once each time the mappable T button is pressed
- Manual — the Manual control scrubs through the envelope
- Rate — in Hz or synced divisions
- Depth — modulation amount for all targets
- MIDI-triggered modulators (Envelope MIDI, Expression Control, Shaper MIDI) and MIDI utilities (MIDI Monitor, MPE Control, Note Echo). The modulators map targets the same way as the audio-effect modulators in Ableton/Live/UG/33 Max for Live Devices/02 Max for Live Audio Effects.
- Ableton/Max for Live/MIDI Effect
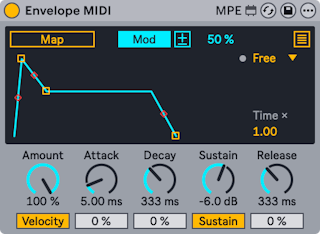
- A modulator that drives mapped parameters with an ADSR envelope triggered by notes.
- Mapping, Mod, polarity and Min/Max work as in the audio-effect modulators.
- Loop Mode, with an LED that flashes on each trigger:
- Free — triggers on every note
- Sync — retriggers at the Sync Rate division
- Loop — loops at the rate set by Global Time
- Echo — repeats every Env Echo Time; Env Feedback sets how long the echoes last
- Global Time scales the whole envelope: 1.00 matches the ADSR times, higher stretches, lower compresses.
- Amount — modulation amount for all targets
- Attack, Decay, Sustain, Release, each with a Slope slider for curved stages; the handles in the display can be dragged too.
- Velocity — scales the envelope peak by note velocity
- Sustain toggle — off makes the envelope one-shot: Attack, Decay, then Release however long the note is held
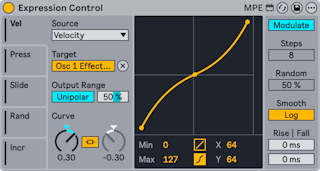
- A modulator driven by MIDI and MPE sources.
- Five Mod Source tabs, each set by its MIDI Input Source menu to one of: Velocity, Modwheel, Pitchbend, Pressure, Keytrack, Expression, Random, Increment, Slide, Sustain. Map assigns a target to each source.
- The Modulation toggle at the top right:
- Modulate — the target stays adjustable and the two values merge. A polarity toggle chooses Bipolar or Unipolar, and Output Range Max sets the output at full input.
- Remote Control — Expression Control alone sets the value, between Output Range Min and Max.
- Curve Type — linear (two breakpoints, shaped by Curve A) or S-shaped (three breakpoints; Curve A shapes the upper part, Curve B the lower). Curve Link ties both parts to Curve A, inversely. Min/Max and the middle point's X-Y sliders, or dragging in the display, also shape the curve.
- Increment Steps (1–32), active when Increment is a source, sets how many notes it takes to sweep the whole range. Stopping transport resets the count.
- Random Amount, active when Random is a source, sets how far each note's value can deviate.
- Smoothing Type — linear or logarithmic; Rise and Fall set how fast values move up or down, 0–1000 ms.
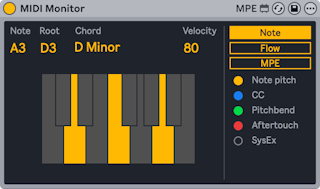
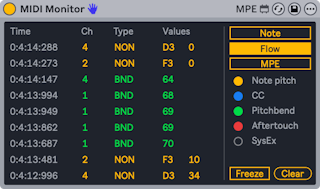
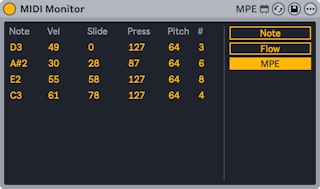
- A utility that shows incoming MIDI and MPE data.
- Note display — incoming notes on a keyboard, with root, chord name and velocity
- Flow diagram — a running list of notes and other messages such as pitch bend and aftertouch; Freeze pauses it and Clear empties it
- MPE display — a running view of note, velocity, slide, pressure and per-note pitch
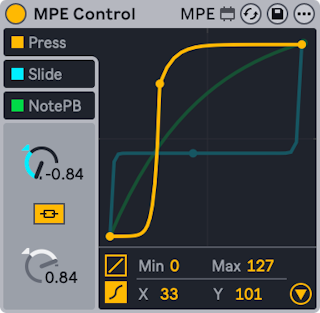
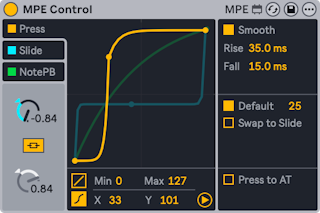
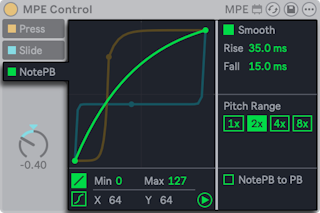
- MPE Control reshapes incoming MPE data with curves, usually ahead of a device that uses that data. It can also turn MPE into ordinary channel-wide MIDI so an MPE controller can play instruments without MPE.
- MPE sends controller data per note, so each note can be shaped on its own; ordinary MIDI CCs affect every note. More on MPE in the Editing MPE chapter.
- Example: with Expression Control mapping Slide to an instrument's filter cutoff, MPE Control can shape the slide so only high slide values open the filter fully.
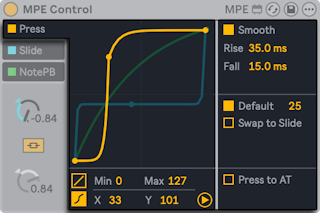
- Three sources, each with its own curve and on/off toggle: Press (pressure), Slide, and NotePB (per-note pitch bend). The selected source's curve is drawn in front.
- Curve types, chosen at the bottom left of the display:
- Linear — two breakpoints. Curve bends it to compress (easier to stay low) or expand (easier to reach high values). Min and Max, or dragging the end points, set the range.
- S-shaped — a third, movable breakpoint in the middle splits the curve in two. The halves are linked; Curve Link off gives each its own Curve dial. The X-Y controls also move the middle point.
- The triangle at the bottom right opens the advanced settings. Each source has a Smooth toggle with its own Rise and Fall, plus source-specific controls.
- MPE pressure: per-note pressure on a key or pad after the initial strike, like polyphonic aftertouch.
- Default — a value to use for notes that carry no MPE data
- Swap to Slide — sends pressure to the Slide source instead, for controllers that only have polyphonic aftertouch
- Press to AT — converts pressure to channel aftertouch for instruments without MPE
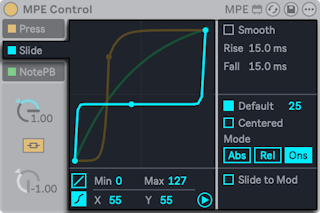
- MPE slide: the finger's vertical position on a key or pad, sent as CC 74.
- Default — a value for notes without MPE data
- Centered — for pad controllers: the middle of the pad gives zero, rising as the finger moves away vertically
- Mode:
- Abs (default) — values are absolute
- Rel — every note starts in the middle of the range and moves only as the finger slides
- Ons — the value updates only on Note On; this turns off smoothing
- Slide to Mod — converts slide to Mod Wheel (CC 1) for instruments without MPE
- MPE per-note pitch bend: horizontal movement on a key or pad, bending only that note.
- Pitch Range — matches a controller and an instrument with different bend ranges. At 2x, a controller with ±48 semitones drives an instrument set to ±24. When per-note bend is mapped to something other than pitch, higher values cover more range with less movement.
- NotePB to PB — converts per-note bend to ordinary pitch bend for instruments without MPE
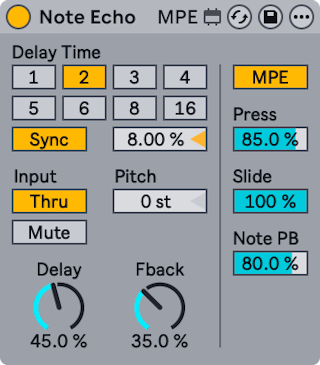
- A MIDI echo: repeats each note at set intervals with falling velocity.
- Sync on — the delay is chosen in 16th notes from numbered switches; 4 is one beat. The Delay Time percentage nudges the repeats off the grid for a drum-machine swing.
- Sync off — the delay is in milliseconds; drag the Delay Time slider or type a value.
- Input — Thru plays the original note and the echoes; Mute plays only the echoes.
- Pitch — transposition added on each repeat
- Delay — velocity of the echoes; Fback — how much output feeds back into the delay
- MPE — echoes MPE data with the notes (otherwise it is filtered out). Press, Slide and Note PB then set feedback for each; below 100% the echoed MPE data fades with each repeat.
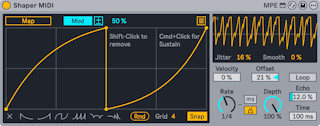
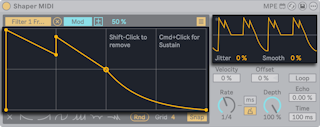
- A modulator with a breakpoint envelope that restarts on every MIDI note and can respond to velocity — unlike the audio-effect Shaper.
- Mapping, Mod, polarity and Min/Max work as in the audio-effect modulators.
- Drawing:
- click to add a breakpoint;
Cmd-click (Mac) or Ctrl-click (Windows) adds the single sustain breakpoint, drawn larger. The envelope holds there while the note is held. Option-drag (Mac) or Alt-drag (Windows) between points to curve a segment; Shift-click a point to delete it- Clear erases the envelope; six presets next to it start a new one
- Grid and Snap as in Shaper
- The small display shows the output; its LED flashes on each trigger.
- Jitter adds randomness; Smooth softens sudden changes.
- Velocity — how much note velocity scales the envelope; 0% ignores velocity
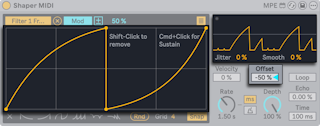
- Offset — moves the center of the output up or down
- Loop — repeats the envelope at Rate while a note is held, ignoring the sustain breakpoint
- Rate — in Hz or synced divisions
- Depth — modulation amount for all targets
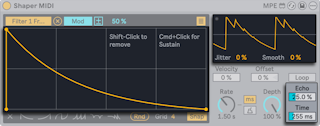
- Echo — how much each echo of the envelope feeds the next; Time — the echo interval