Ableton/Live/UG/29 Audio Effect Reference
- A reference entry for each built-in audio effect, from Amp to Vocoder.
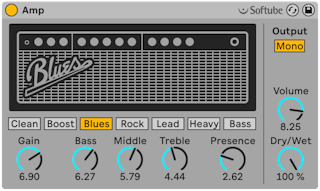
- Amp models seven classic guitar amplifiers, built with Softube using physical modeling. Every model uses the same controls.
- Models:
- Clean — the "Brilliant" channel of a 1960s amp associated with the British Invasion
- Boost — the "Tremolo" channel of the same amp; edgy rock riffs
- Blues — a bright 1970s amp popular in country, rock and blues
- Rock — a classic 45-watt 1960s amp
- Lead — the "Modern" channel of a high-gain metal amp
- Heavy — the "Vintage" channel of that amp; metal and grunge
- Bass — a rare 1970s PA with strong lows and fuzz at high volume
- Gain drives the preamp and is the main distortion control. Volume sets the power amp stage; on Blues, Heavy and Bass, high Volume adds distortion too.
- Bass, Middle and Treble shape the tone. As on real amps they interact with each other and with the rest of the amp in non-linear ways; raising EQ can add distortion.
- Presence — extra mid/high tone control in the power amp stage, adding or removing edge; its effect varies by model
- Output — mono or stereo (Dual); Dual uses twice the CPU
- Dry/Wet — balance of processed and dry signal
- Amp behaves like analog hardware, so results are not always predictable.
- An amp's circuits share a fixed amount of power, so raising one control can take energy from another. Turning up Treble can reduce bass and mids, so getting a sound may mean adjusting controls that seem unrelated.
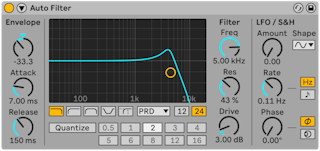
- Auto Filter applies a choice of filter types and analog-modeled filter circuits, moved by an LFO and an envelope follower. The envelope follower can track the filtered signal or an external sidechain.
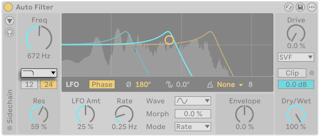
- Filter Type offers ten filters:
- Low-pass — cuts above the cutoff; 12 or 24 dB slope
- High-pass — cuts below the cutoff; 12 or 24 dB
- Band-pass — passes a band around the cutoff; 12 or 24 dB
- Notch — cuts a narrow band; 12 or 24 dB
- Morph — sweeps from low-pass through band-pass to high-pass; 6, 12, 24 or 48 dB
- DJ — one bipolar control: above zero removes lows, below zero removes highs, with resonance rising toward ±100%
- Comb — a series of peaks or notches across the spectrum; flanger-like when modulated
- Resampling — resamples at a rate set by the cutoff, giving aliasing and degradation
- Notch + LP — a notch plus a low-pass roll-off; 12 or 24 dB
- Vowel — emphasizes formants so the sound resembles a voice
- Freq sets the cutoff. The DJ filter has Control instead; Vowel has Pitch, which shifts the formants in semitones.
- Res sets emphasis at the cutoff; it does nothing on Resampling. Vowel has Formant instead, moving through the vowels a, e, i, o, u.
- Morph, on Morph, Comb, Notch + LP and Vowel:
- Morph filter — low values low-pass, middle band-pass, high values high-pass
- Comb — from peaks (low) to notches (high) at multiples of the cutoff
- Notch + LP — moves the notch closer to the low-pass cutoff as the value rises, reaching it at 100%
- Vowel — increasingly evens out the formant gains
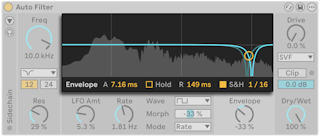
- The center display shows the filter curve, the modulated curves for left and right, and a live spectrum of the output. Dragging the handle sets Freq and Res (Pitch and Formant for Vowel).
- Below the display are the LFO controls and the Envelope control. Selecting either shows its extra parameters at the bottom of the display.
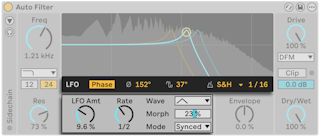
- The left and right channels each get their own LFO. LFO Stereo Mode sets how they differ:
- Phase — same rate, offset by LFO Phase in degrees; 180° puts them fully opposite
- Spin — the two rates are detuned by LFO Spin percent
- Phase 0° or Spin 0% modulates both channels the same
- LFO Phase Offset moves both LFOs' start point; it only works in synced or sixteenth time modes.
- LFO Quantization Mode — Steps splits each cycle into LFO Steps stepped values; S&H quantizes to the beat value in LFO S&H.
- LFO Amt — how much the LFOs move the filter, alongside or instead of the envelope
- Rate — in Hz, seconds (shown as Time), synced divisions or sixteenths, set by Mode
- Wave — Sine, Triangle, Saw, Square, Ramp Up, Ramp Down, Wander, S&H. Spin has no effect with Wander or S&H.
- Morph reshapes the wave; with S&H it becomes Smooth.
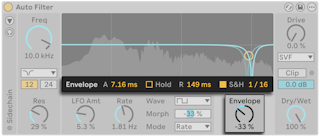
- These controls set how the envelope follower moves the cutoff.
- Envelope Attack — how quickly the envelope follows rising levels; higher values respond more slowly
- Envelope Hold — when on, the attack finishes before the release starts
- Envelope Release — how quickly it follows falling levels; higher values lengthen the decay
- Envelope S&H and Envelope S&H Rate — quantize the envelope to beat values
- Envelope (below the display) — direction and amount of envelope modulation
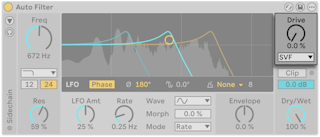
- Drive adds input gain before the filter for saturation; 0% leaves the sound unchanged.
- Filter Circuit models analog filter designs. It applies only to Low-pass, High-pass, Band-pass, Notch and Morph.
- SVF — clean, though it distorts with Drive above zero
- DFM — feeds back more of its distortion; from gentle sweeps to warm drive
- MS2 — Sallen-Key design with soft-clipped resonance, modeled on a well-known Japanese semi-modular monosynth
- PRD — ladder design without resonance limiting, modeled on a vintage American two-oscillator monosynth
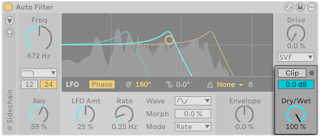
- Clip — soft-clips the output to tame resonant peaks; its LED flashes when clipping
- Output — output level, to make up for loudness changes from Drive
- Dry/Wet — balance of processed and dry signal
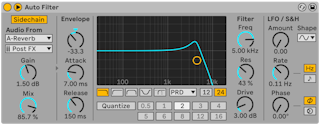

- By default the envelope follower listens to Auto Filter's own input. The Sidechain Section toggle at the top left opens external sidechain controls.
- External turns on the external sidechain; External Source picks the source and External Tapping Point picks Pre FX, Post FX or Post Mixer.
- Mix — 0% uses only the internal signal, 100% only the external one
- SC Gain — sidechain input level; it only affects triggering, not volume
- Sidechain Listen — replaces the output with the sidechain signal for monitoring
- SC Filter limits the sidechain to a frequency range, so Auto Filter reacts only to it.
- Sidechain Filter Frequency sets the cutoff; Type is low-shelf, peak, high-shelf, low-pass, band-pass or high-pass.
- Shelves boost or cut on one side of the cutoff to a level set by Shelf Gain; peak boosts or cuts around the cutoff by Peak Gain.
- Sidechain Filter Q sets the bandwidth.
- The sidechain is summed to mono by default, so both channels get the same envelope. Mono Sidechain in the device's context menu turns that off.
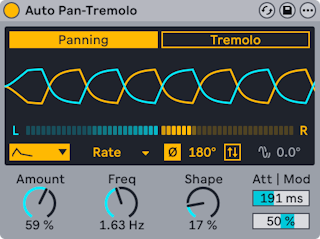
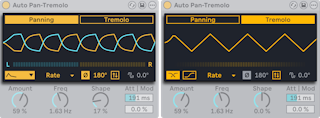
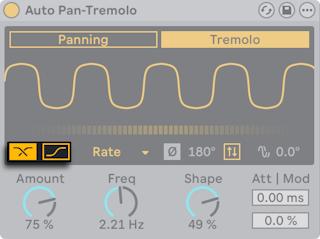
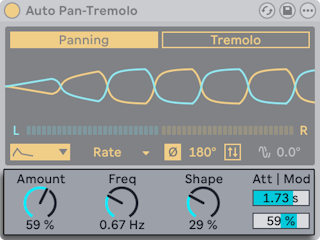
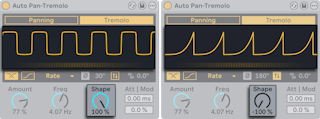
- Auto Pan-Tremolo uses LFOs to move a signal across the stereo field or vary its level: auto-panning, tremolo and gating.
- Modes:
- Panning — two LFOs shift level between left and right
- Tremolo — one LFO varies level
- The display shows the wave and, below it, the live pan position or level.
- Waveform — Sine, Triangle, Shark Tooth, Saw Up, Saw Down, Square, Random, Wander, S&H
- Time modes — Rate (Hz), Time (100 ms to 200 s, for long cycles), Synced, Dotted, Triplet, 16th
- Stereo offset:
- Phase — offsets the left and right waves in degrees; 180° is fully opposite
- Spin — runs the two channels at rates that differ by a percentage
- Random, Wander and S&H allow Phase only.
- Phase Offset, in the beat-based time modes, moves each LFO's start against the beat grid. With Random, Wander or S&H it widens the stereo spread instead.
- Invert flips the wave. With ramp waves, inverted gives ducking and normal gives gating.
- Tremolo-only options:
- Harmonic — splits the signal at a fixed 600 Hz and modulates highs and lows in alternation
- Vintage — adds a non-linear curve for a warmer, grittier tremolo
- Controls below the display:
- Amount — modulation depth
- the rate control, labeled Freq, Time or Rate depending on time mode. Amount and rate are shared by both modes.
- Shape — in Panning, pushes the waves toward their limits for harder switches between channels; in Tremolo, rounds or sharpens the peaks. At the extremes it makes ramps for gating (Invert off) or pumping (Invert on).
- Attack Time — how long after a transient the modulation reaches full depth, so attacks stay centered or keep their punch
- Dynamic Frequency Modulation — louder input speeds up the LFO (positive) or slows it (negative)
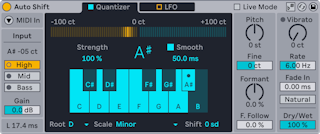
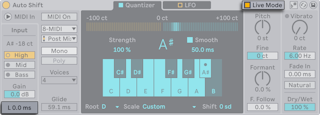
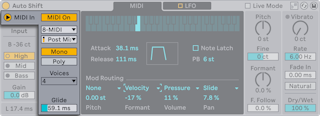
- Auto Shift tracks and corrects pitch in real time, with vibrato, pitch shifting and formant shifting. Built mainly for vocals, it works on any monophonic audio. It corrects to a scale or to MIDI notes from another track, and has its own LFO.
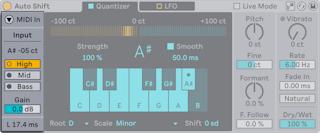
- Auto Shift takes both audio and MIDI input.
- Input Pitch shows the detected pitch in notes and cents.
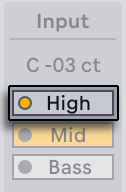
- Pitch Range — High, Mid or Bass, to match the source; each has an LED that lights when the input falls in its range. Each range has a different latency.
- Input Gain — −24 to +24 dB
- The Latency Readout shows latency in ms. Live Mode in the title bar lowers latency for performance, at the cost of small glitches at note starts and fast pitch changes.
- MIDI input corrects pitch to notes from another MIDI track instead of to a scale.
- MIDI In shows the MIDI Input panel; MIDI On turns MIDI input on and swaps the Quantizer tab for the MIDI tab.
- External Source picks the track; Tapping Point takes the notes before (Pre FX) or after (Post FX, Post Mixer) that track's MIDI effects.
- Voice mode:
- Mono — one note at a time; Glide sets how long overlapping notes take to slide
- Poly — up to 2, 4 or 8 voices (Voice Count), for harmonies
- With MIDI input on, Auto Shift is silent unless notes arrive.
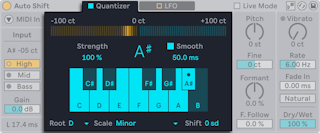
- The Quantizer corrects pitch to the notes of a scale.
- Pitch Correction Meter — how far, in cents, the input is being moved, with the target note below it
- Correction Strength — how hard pitch is pulled to the target
- Smooth and Smoothing Time (0–200 ms) — smooth transitions between notes and keep natural vibrato. Together with Correction Strength they range from subtle to hard, stepped correction.
- Included Notes in Scale — click notes to build a scale, or use Root and Scale
- Pitch Shift — transposes by scale degrees after correction
- Use Current Scale in the title bar follows the clip's scale, shows its notes in purple, and disables Root and Scale.
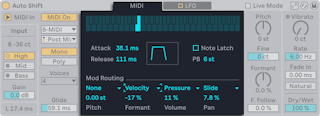
- The MIDI tab replaces the Quantizer tab when MIDI input is on. A keyboard shows the notes arriving from the source track.
- Scale awareness is off with MIDI input. To keep notes in a scale, put a Ableton/Live/UG/30 MIDI Effect Reference/07 Scale effect on the source track and set Tapping Point to Post FX or Post Mixer.
- Attack Time (0–1000 ms) and Release Time (0–5 s) shape each note's envelope.
- Note Latch — holds each note until the next Note On
- Pitch Bend Range — 0 to 48 semitones
- Mod Routing — Pitch, Formant, Volume and Pan can each take one source (Velocity, Pressure, Mod Wheel, Pitch Bend, Note PB, Slide) with its own Mod Depth.
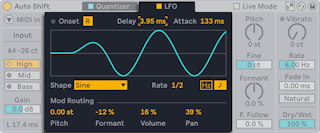
- The built-in LFO modulates pitch, formants, volume and pan, whether or not correction is active.
- LFO Reset — restarts the LFO at each onset. With the Quantizer, an onset is pitched audio after unpitched audio; with MIDI input, a new note. An indicator LED flashes on each restart.
- LFO Delay (0–1.5 s) and LFO Attack (0–2 s) delay the LFO and fade it in.
- LFO Waveform — Sine, Triangle, Triangle 8, Triangle 16, Saw Up, Saw Down, Rectangle, Random, Random S&H
- LFO Rate — in ms or synced divisions (LFO Sync)
- Mod Routing — separate depth for Pitch, Formant, Volume and Pan
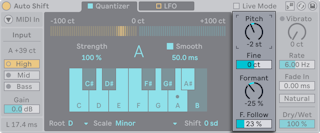
- Pitch Shift — transposition in semitones; Pitch Shift Fine in cents
- Formant Shift — −100% to 100%. Formants are the resonances that give a sound its character; shifting them makes a voice sound higher or lower without changing its pitch.
- Formant Follow — how much the formants move with the pitch shift; more sounds more natural
- These work with or without pitch correction.
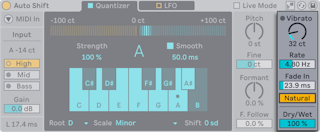
- Vibrato Amount — 0 to 200 cents
- Vibrato Rate — 2 to 15 Hz
- Vibrato Fade In — fade-in time in ms
- Natural Vibrato — varies speed and depth for a more realistic vibrato
- Vibrato works with or without pitch correction.
- Dry/Wet — 0% is uncorrected, 100% only corrected; 50% gives a doubling effect.
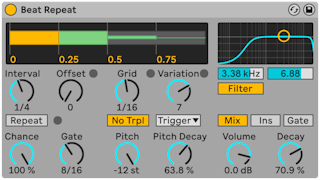
- Beat Repeat captures slices of the incoming audio and repeats them, on a schedule or at random.
- When to repeat:
- Interval — how often new material is captured, synced from 1/32 to 4 bars
- Offset — moves that point later; Interval 1 Bar with Offset 8/16 captures on beat three of each bar
- Chance — probability that a scheduled repeat happens; 100% always, 0% never
- Gate — total length of the repeats in sixteenths; 4/16 lasts one beat
- Repeat — ignores the above and repeats right away until switched off
- What repeats:
- Grid — slice length; large values give rhythmic loops, small ones give glitchy artifacts. No Triplets keeps the grid binary.
- Variation — randomizes the grid size around Grid. Its mode sets when: Trigger (each time repeats start), 1/4, 1/8, 1/16 (at regular intervals) or Auto (after every repeat, the most varied).
- Pitch — lowers the repeats by resampling, which also stretches them, so high values blur the rhythm. Pitch Decay makes each repeat lower than the last; the manual calls it the most obscure control in the device.
- Filter — a combined low-pass and high-pass with center frequency and width
- Mix mode:
- Mix — original plus repeats
- Insert — original muted while repeats play
- Gate — repeats only; suits a return track
- Volume sets the output and Decay fades successive repeats.
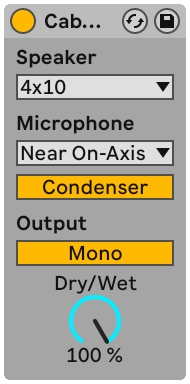
- Cabinet models five classic guitar speaker cabinets with tuned microphones and mic placement, built with Softube using physical modeling.
- Speaker — number and size of speakers, e.g. 4x12 is four 12-inch speakers. More and larger speakers usually means louder in real life.
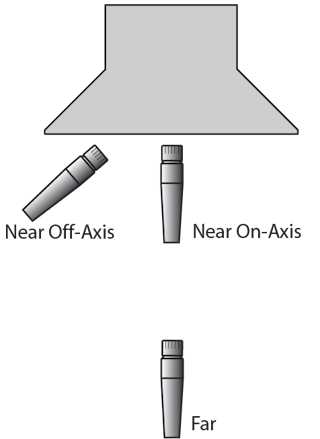
- Microphone — position:
- Near On-Axis — bright and focused
- Near Off-Axis — more resonant, less bright
- Far — balanced, with some room sound
- Mic type switch — Dynamic (grittier, usual for close miking loud cabinets) or Condenser (more accurate, usual at a distance)
- Output — mono or stereo (Dual); Dual uses twice the CPU
- Dry/Wet — balance of processed and dry signal
- To blend several mics on one cabinet, as studios do:
- 1. Set up one Cabinet.
- 2. Put it in an Audio Effect Rack.
- 3. Duplicate its chain as often as needed.
- 4. Give each copy a different Microphone position or mic type.
- 5. Balance the chains in the Rack's mixer.
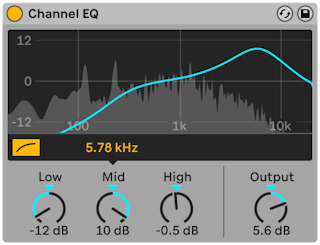
- Channel EQ is a simple three-band EQ modeled on mixing-desk channel EQs.
- HP 80 Hz — high-pass filter for removing rumble
- Low — ±15 dB low shelf at 100 Hz; the curve adapts to the amount of gain
- Mid — ±12 dB sweepable peak; the slider above it sets the frequency, 120 Hz to 7.5 kHz
- High — boosts up to 15 dB with a high shelf. Cutting also lowers a low-pass filter from 20 kHz toward 8 kHz as it goes to −15 dB.
- A spectrum display shows the curves and the processed signal.
- Output — gain to make up for level changes
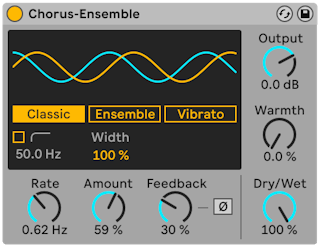


- Chorus-Ensemble is a two-delay-line chorus with an optional three-line mode, from light thickening through flanging and vibrato to string-ensemble chorus.
- Buttons in the display choose the mode; the display draws the active delay lines.
- Chorus — two modulated delays added to the input for classic light movement
- Ensemble — modeled on a thick 1970s three-line chorus pedal; three delays with evenly spaced phase offsets for a richer, smoother chorus
- Vibrato — modulates pitch more strongly with no added delayed copy; the wave morphs from sine to triangle, which can make a police-siren sound
- Every mode has an optional high-pass filter: the modulation is reduced below the High-Pass Frequency (20 Hz to 2 kHz).
- Chorus and Ensemble have Width: stereo width of the wet signal, 0% mono, 100% even, 200% twice as loud in the sides as in the middle.
- Chorus only:
- Delay Time — Auto scales the delay with the modulation amount; a fixed value keeps it steady, avoiding phasing and pitch wobble on bass or guitar
- Taps — one or two taps; one tap gives a simpler, broader chorus like classic pedals
- Vibrato only: Offset (left/right phase; 180° is fully opposite) and Shape (0% sine to 100% triangle).
- Modulation:
- Rate — speed in Hz; drag in the display or turn the dial
- Amount — depth of delay-time modulation
- Feedback — output fed back to input for a more extreme, brighter sound that keeps echoing after playback stops. Feedback Invert gives a hollow sound at high feedback. Not available in Vibrato.
- Global:
- Output — output gain
- Warmth — light distortion and filtering; more gives crunch
- Dry/Wet — set to 100% on a return track; not available in Vibrato
- On dry guitar, Ensemble at 1–1.8 Hz with Amount 100% gives a surf-rock sound.
- With Feedback above 90%, automating Feedback Invert produces bursts of decaying oscillation.
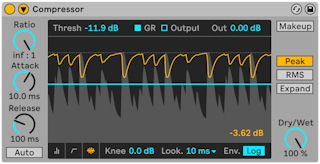
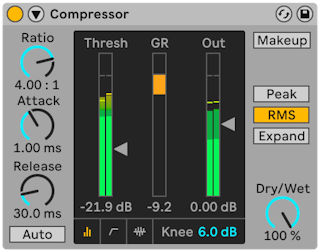
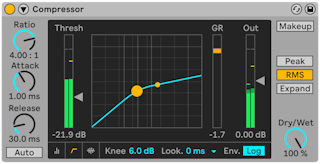
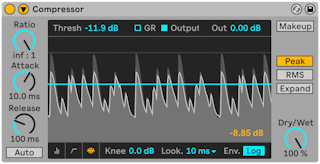
- A compressor turns down signal above a threshold. Lower peaks leave room to raise the overall level, so the result sounds louder and punchier.
- Threshold sets where compression starts. Ratio sets how much: at 3, a 3 dB rise above the threshold comes out as 1 dB. A ratio of 1 does nothing.
- The orange Gain Reduction meter shows the current reduction. The manual warns that more than about 6 dB changes the sound a lot and can flatten dynamics in a way that cannot be undone later — especially on the Main track.
- Out raises the level again after compression; Makeup does it automatically as Threshold and Ratio change.
- Dry/Wet — 0% bypasses, 100% is fully compressed
- Knee — how gradually compression starts. 0 dB is a hard knee, which can sound harsh at high ratios. A 10 dB knee with a −20 dB threshold starts gently at −30 dB and reaches full compression at −10 dB.
- Display views, chosen in the corners of the display:
- Collapsed — only the main controls
- Transfer Curve — input level against output level, with the knee as dotted lines
- Activity — input level in light gray, with GR or Output showing reduction in orange or output in dark gray over time
- Attack — time to reach full compression once over the threshold; Release — time to recover after the signal drops. Auto Release sets release from the material.
- 10–50 ms of attack lets the start of each hit through and keeps it lively; very short attack can sound lifeless or buzzy.
- Short release can cause pumping, sometimes used on drums on purpose.
- The manual suggests practicing with a drum loop, adjusting Attack, Release, Threshold and Gain.
- Lookahead — 0, 1 or 10 ms of delay so compression can start on time
- Mode:
- Peak — reacts to short peaks; precise, good for limiting
- RMS — reacts only to sustained level; closer to perceived loudness and usually more musical
- Expand — raises level above the threshold instead: at 1:2, each dB over becomes 2 dB. See Ableton/Live/UG/29 Audio Effect Reference/26 Multiband Dynamics for the types of dynamics processing.
- Envelope shape (hidden in Collapsed view):
- Lin — speed set entirely by Attack and Release
- Log — heavily compressed peaks release faster, for smoother, less obvious compression
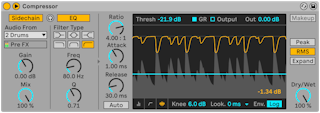

- The title bar button unfolds the sidechain controls. A sidechain lets another signal, or one frequency band, decide when to compress.
- Left side, external:
- Sidechain on — choose any internal routing point as the trigger
- Gain — trigger level only; the sidechain is never heard
- Dry/Wet — 100% triggers only from the sidechain, 0% ignores it
- Automatic Makeup is unavailable with an external sidechain.
- Right side, sidechain EQ — triggers from one frequency band, of this track or of the external source.
- The headphones button between them plays only the sidechain signal, to hear what drives the compressor.
- Ways to use Compressor's sidechain.
- To make background music duck under a narrator, put Compressor on the music track and pick the narration track as the external sidechain.
- Put Compressor on the bass (or Main) track with the kick as the sidechain, so the bass makes room for each kick.
- With only a mixed drum track: use it as the sidechain, enable the sidechain EQ with the low-pass filter, and tune Frequency and Q until only the kick triggers it. Sidechain listen helps.
- Compressor's algorithms were updated in Live 9 with Dr. Joshua D. Reiss of the Centre for Digital Music, Queen Mary University of London.
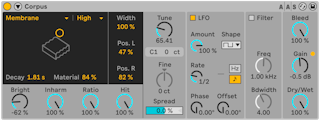
- Corpus simulates seven kinds of resonant objects, built with Applied Acoustics Systems using physical modeling.
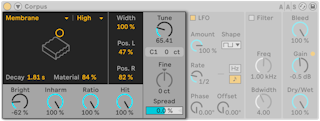
- Resonance Type:
- Beam — beams of various materials and sizes
- Marimba — a beam tuned like arch-cut marimba bars
- String — strings of various materials and sizes
- Membrane — a rectangular membrane such as a drum head
- Plate — a flat rectangular plate
- Pipe — a tube open at one end, with a variable opening at the other
- Tube — a tube open at both ends
- Resonator Quality — fewer overtones (Eco) for less CPU, more (High) for richer resonance; not for Pipe or Tube
- Decay — internal damping and so decay time
- Material — how damping varies with frequency: low values let lows ring longer (wood, nylon, rubber), high values let highs ring longer (glass, metal). Pipe and Tube show Radius instead: a wider tube rings longer and brighter, and at extremes changes pitch.
- The X-Y controller also sets Decay and Material/Radius.
- Bright — level of higher frequencies; not for Pipe or Tube
- Inharm — squeezes (negative) or stretches (positive) the harmonics; not for Pipe or Tube
- Opening (Pipe only) — 0% closed at one end, 100% open at both
- Ratio (Membrane and Plate) — proportions of the x and y axes
- Hit — strike point, from center (0%) toward the edge; not for Pipe or Tube
- Width — stereo spread of the left and right resonators, mono at 0%
- Pos. L / Pos. R — where each resonator is "listened to", from center toward edge; Pipe and Tube are always heard at the open end
- Tune — resonator frequency in Hz, or coarse offset when MIDI Frequency is on in the sidechain
- Fine — fine offset in cents for MIDI Frequency
- Spread — detunes the two resonators in opposite directions
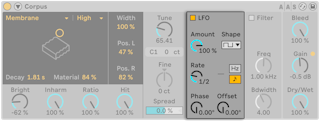
- An LFO modulates the resonant frequency; Amount sets how much.
- Rate — in Hz or synced to tempo
- Waves — sine, square, triangle, saw up, saw down, and stepped or smooth noise
- There are two LFOs, one per channel:
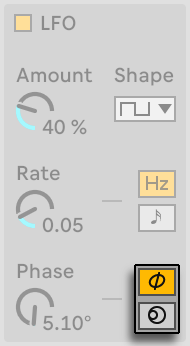
- Phase — same rate, offset in degrees; 180 is fully opposite, 0 or 360 in step
- Spin (Hz mode only) — runs the two at different rates
- Neither affects the noise waves.
- The LFO Stereo mode icons choose Phase or Spin in Hz mode.
- Offset (synced mode) — moves the LFO's start point
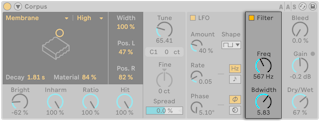
- Filter switches a band-pass filter on the output; Freq sets its center and Bdwidth its width.
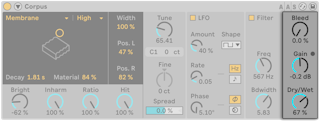
- Bleed — mixes in some of the unprocessed signal, which restores highs lost at low tunings or low quality; off for Pipe and Tube
- Gain — output level. A built-in limiter engages when the level is too high, shown by the LED next to Gain.
- Dry/Wet — balance of dry input and processed signal. Turning it down stops new input from being processed but lets current resonances ring.
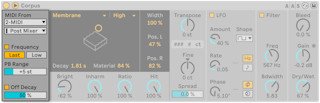

- The title bar button opens the sidechain, which lights while it is active. Its MIDI From choosers pick a MIDI track and tapping point.
- Frequency — incoming notes tune the resonance. Last/Low picks the last or the lowest held note; Transpose and Fine offset it; PB Range sets pitch bend range in semitones. With Frequency off, Tune sets a fixed frequency in Hz, shown with its MIDI note and cents below.
- Off Decay — Note Off damps the resonance; its slider sets how much. At 0% only Decay matters, like a marimba or glockenspiel; at 100% Note Off cuts the sound at once.

- Delay has a separate delay line for each stereo channel, a band-pass filter, and LFO modulation.
- Delay Time Mode — Sync (beat divisions) or Time (1 ms to 5 s)
- In Sync, numbered buttons set the delay in sixteenths; 4 is one beat. Offset sliders move each delay slightly early (negative) or late (positive), for swing.
- Stereo Link — one delay time for both channels; Offset stays separate
- Feedback — output fed back into each channel's own delay line; left and right do not cross
- Freeze — loops whatever is in the buffer at that moment and ignores new input until released
- Filter — band-pass before the delay. Drag in the display: horizontal for frequency, vertical for width; or use Freq and Width.
- An LFO can modulate delay time and filter frequency, from chorus to chopped glitches. The LFO Controls toggle expands the full LFO section; its LED flashes at the LFO rate.


- Delay — LFO amount on delay time; Filter — on filter frequency
- Rate mode — Rate, Time, Synced, Triplet, Dotted, Sixteenth
- Wave — Sine, Triangle, Ramp Up, Ramp Down, Square, S&H, Wander; Morph reshapes it
- Smoothing, for when the delay time changes during playback:
- Repitch (default) — pitch bends like an old tape delay
- Fade — crossfades old and new times; gradual changes can sound granular
- Jump — switches at once, possibly clicking
- LFO modulation sounds different in each mode.
- Ping Pong — bounces the delay between left and right
- Dry/Wet — set to 100% on a return track
- In the context menu or the title bar's Show Options menu:
- Hi-Quality — better interpolation in Repitch and Fade, and tape-style smoothing of time changes in Repitch
- Dry/Wet - Equal-Loudness — keeps perceived loudness steady across the Dry/Wet range, so 50/50 sounds as loud as either end
- Two starting points from the manual.
- Stereo Link on, Sync time 6, Feedback 50%
- Filter on at 2.86 kHz, Width 2.50
- LFO S&H at 0.93 Hz; Delay 66%, Filter 19%
- Fade smoothing, Ping Pong off, Dry/Wet 50–80%
- Stereo Link off; left 12.0 ms, right 30.0 ms; Feedback 0%
- Filter on at 2.56 kHz, Width 8.50
- LFO Triangle at 0.65 Hz; Delay 58%, Filter 0%
- Repitch smoothing, Ping Pong on, Dry/Wet 45–65%
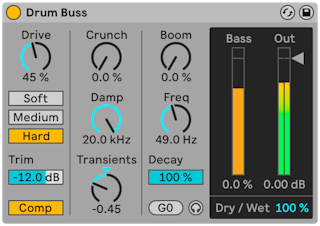
- Drum Buss is an analog-style processor for adding body and character to a group of drums and holding them together in a mix.
- Trim — lowers the input before processing
- Comp — a fixed compressor before the distortion, tuned for drum groups: fast attack, medium release, moderate ratio, plenty of makeup gain
- Distortion types, increasingly strong:
- Soft — waveshaping
- Medium — limiting
- Hard — clipping with a bass boost
- Drive — how hard the input hits the distortion
- For clarity and presence on snares and hats.
- Crunch — sine-shaped distortion on the mid-highs
- Damp — low-pass filter to remove harsh highs after distortion
- Transients — above 100 Hz: positive values add attack and sustain for a fuller, punchier sound; negative values add attack but cut sustain for tighter, drier drums
- A resonant filter that strongly boosts the bass, plus a decay control.
- Boom — amount of low-end boost; the Bass Meter shows it even when it is hard to hear
- Freq — frequency of the boost; Force To Note snaps it to the nearest MIDI note
- Decay — how fast the lows decay. At Boom 0% it affects only the incoming (post-distortion) signal; above 0% it also affects the boost.
- Boom Audition (headphone icon) — solos the low-end boost
- Dry/Wet — balance of processed and dry signal
- Output Gain — output level
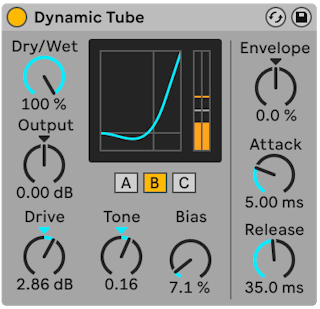
- Dynamic Tube adds tube saturation, with an envelope follower that varies the tone with input level.
- Tube models:
- A — clean at low Bias, adding bright harmonics once the input passes a threshold
- B — between A and C
- C — a poor tube that always distorts
- Tone — moves the distortion toward the highs or down through the mids and lows
- Drive — how much signal reaches the tube; more is dirtier
- Bias — tube intensity; very high values make the signal break up
- Envelope — lets input level move the Bias. Positive values make loud parts dirtier; negative values clean them up, an expansion effect.
- Attack and Release — envelope response; no effect when Envelope is 0
- Output — final level
- Hi-Quality in the title bar's context menu reduces aliasing, especially on high frequencies, for slightly more CPU.
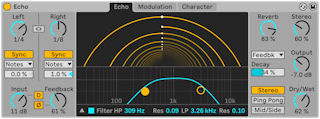
- Echo is a modulated delay with two independent delay lines, envelope and filter modulation, and character controls.
- Channel Mode — Stereo, Ping Pong or Mid/Side; Mid/Side replaces the Left and Right knobs with Mid and Side.
- Left / Right — delay times, in beat divisions or ms depending on Sync
- Sync Mode — Notes, Triplet, Dotted or 16th; only heard while Sync is on
- Stereo Link — changes to time, Sync and Sync Mode apply to both sides
- Delay Offset — nudges each line slightly for swing; independent even when linked
- Input — gain on the dry signal; D distorts it
- Feedback — output fed back into the delay lines; Ø inverts the fed-back signal
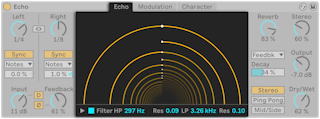
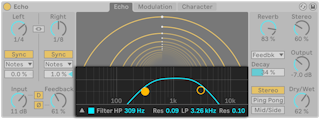
- The Echo Tunnel draws each repeat as a ring moving toward the center; spacing shows time between repeats, and white dots mark a fixed 1/8 grid. Drag in it to change delay times.
- Filter turns on a high-pass and a low-pass:
- HP and its Res — high-pass cutoff and resonance
- LP and its Res — low-pass cutoff and resonance
- The triangle button shows the Filter Display, where the filter dots can be dragged.
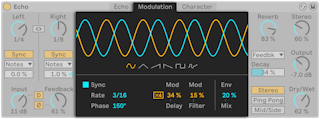
- An LFO modulates filter frequency and delay time, and can be blended with an envelope follower.
- Waves — sine, triangle, saw up, saw down, square, noise; drag the wave in the display to change its rate
- Sync on — Rate in beat divisions; off — Freq in Hz
- Phase — offset between left and right; 180° is fully opposite
- Mod Delay — modulation of delay time; Modulation x4 multiplies it by four, giving deep flanging at short times
- Mod Filter — modulation of the filter
- Env Mix — 0% LFO only, 100% envelope follower only
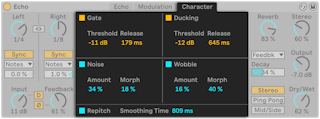
- Dynamics and imperfections:
- Gate — input gate with Threshold and Release
- Ducking — turns the wet signal down while input is above Threshold; Release sets how fast it recovers
- Noise — adds vintage-style noise; Amount and Morph between noise types
- Wobble — irregular delay-time modulation like a tape delay; Amount and Morph between wobble types
- Repitch — pitch bends when delay time changes; off, the change crossfades
- To save CPU, Echo turns off at least eight seconds after its input goes silent — unless both Noise and Gate are on.
- Reverb — reverb amount; Reverb Location puts it before the delay, after it, or inside the feedback loop; Decay sets its length
- Stereo — width of the wet signal; 0% mono, above 100% wider
- Output — output gain
- Dry/Wet — set to 100% on a return track. Its context menu has Equal-Loudness, which makes a 50/50 mix as loud as either end.
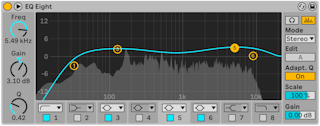
- EQ Eight has up to eight parametric filters per channel.
- Modes:
- Stereo — one curve for both channels
- L/R — separate curves for left and right
- M/S — separate curves for mid and side
- In L/R and M/S both curves are drawn, but only the one chosen with Edit can be changed.
- Each band's chooser offers, top to bottom: low cut (48 or 12 dB/octave), low shelf, peak, notch, high shelf, high cut (12 or 48 dB/octave). Each band has an on/off switch; turn unused bands off to save CPU. Stacking identical bands gives very steep filtering.
- Editing:
- drag a dot: sideways for frequency, up and down for gain;
Option-drag (Mac) or Alt-drag (Windows) for Q - for low cut, notch and high cut, vertical dragging sets Q, since they have no gain
- drag a box around several dots to move them together, with the mouse or arrow keys
- or click near a band's number and use Freq, Gain and Q
- The title bar button moves the display into Live's main window, where all eight bands can be edited at once.
- Analyze — shows the output spectrum behind the curves; turn it off to work by ear
- Adaptive Q — Q rises with the amount of boost or cut, like classic analog EQs, for steadier output level
- Audition (headphone icon) — click and hold a dot to hear only that band
- Gain — overall output level
- Scale — scales the gain of every band that has gain
- Oversampling — processes at twice the sample rate for smoother behavior at high frequencies, for slightly more CPU
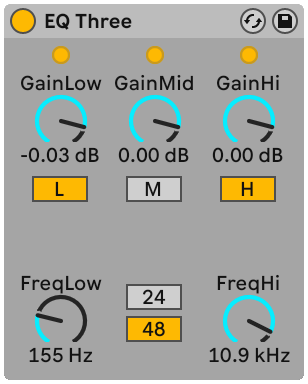
- EQ Three is a DJ-mixer-style EQ with separate level controls for low, mid and high.
- Each band's gain goes from −∞ to +6 dB, so a bass line or kick can be removed entirely.
- On/Off buttons under each band are handy mapped to computer keys.
- An LED per band lights when there is signal in it above −24 dB, even when the band is off.
- FreqLo and FreqHi set the crossovers. At 500 Hz and 2000 Hz: low is 0–500 Hz, mid 500–2000 Hz, high above 2000 Hz.
- 24 dB / 48 dB — crossover steepness; 48 dB is steeper and uses more CPU.
- The filters are made to sound like a powerful analog filter cascade, so 48 dB mode colors the sound slightly even with every band at 0 dB. For more neutral behavior use 24 dB mode or Ableton/Live/UG/29 Audio Effect Reference/15 EQ Eight.
- Ableton/Audio Effects/EQ Three
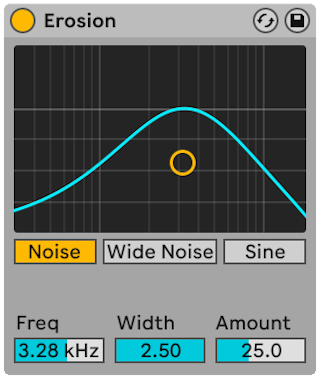
- Erosion degrades the signal digitally by modulating a short delay with a sine wave and filtered noise, from noisy artifacts to downsampling-like distortion.
- The display shows the input spectrum and the modulation, and works as an X-Y pad: horizontal sets Freq (sine frequency and noise filter center), vertical sets Amount.
Option (Mac) or Alt (Windows) makes vertical dragging set the noise filter width. - Noise Blend — 0% sine only, 100% noise only. The sine is drawn as a solid vertical line and the noise as horizontal dotted lines; icons below brighten to show which dominates.
- Filter Width — bandwidth of the noise filter; disabled at Noise Blend 0%
- Stereo Width — mono (0%) to stereo (100%) modulation
- Sets made before Live 12.4 load the older device, now called Erosion Legacy.
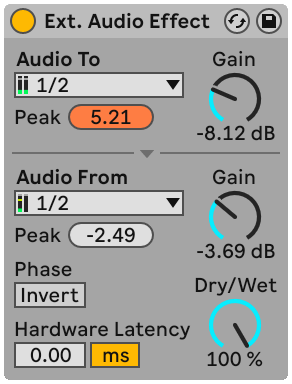
- External Audio Effect brings a hardware effects unit into a track's device chain.
- Audio To — audio interface outputs feeding the hardware; Audio From — inputs bringing it back. "Configure…" at the bottom of each chooser opens the Audio Settings.
- Peak indicators under each chooser hold the highest level; click to reset.
- Gain knobs — send and return levels; set them to avoid clipping in the hardware and on the way back in
- Dry/Wet — set to 100% on a return track
- Invert — flips the phase of the returning signal
- Hardware Latency — manual compensation for the hardware's delay, which Live cannot detect.
- Use samples for digital connections, so the value holds when the sample rate changes; use ms for analog connections.
- Samples are finer, so analog setups can be fine-tuned in samples — then switch back to ms before changing sample rate.
- Disabled when Delay Compensation is off in the Options menu.
- The Knowledge Base article "Driver Error Compensation FAQ" explains how to measure it.
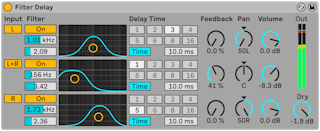
- Filter Delay has three delay lines, each behind its own linked low-pass and high-pass filters, so only part of the spectrum is delayed. Feedback also runs back through the filters.
- Delay 1 takes the left input, delay 2 both channels, delay 3 the right. Each outputs on its source channel unless its Pan control overrides it. Each delay can be switched on and off.
- Each filter has an On switch and an X-Y controller: horizontal sets frequency, vertical sets bandwidth.
- Sync on — delay in sixteenths from numbered buttons (4 is one beat); the Delay Time percentage nudges it for swing. Sync off — delay in ms, dragged or typed.
- Feedback — output fed back into each delay; very high values can run away into loud oscillation, so protect ears and speakers.
- Volume per delay, up to +6 dB, makes up for heavy filtering.
- Dry — dry level; set to minimum on a return track
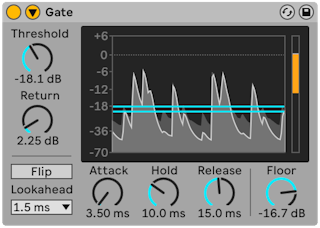
- Gate passes only signal above a threshold. It removes noise between sounds, such as hiss or hum, or shapes sounds by cutting off reverb or delay tails and natural decays.
- The display shows input in light gray and output in darker gray with a white outline, so the gating can be seen.
- Threshold — sensitivity; a blue line in the display that can be dragged
- Return (hysteresis) — gap between the opening level and the closing level, shown as an orange line. More return stops the gate chattering open and shut near the threshold.
- Flip — reverses the gate so only signal below the threshold passes
- Lookahead — 0, 1 or 10 ms of delay so the gate can open on time
- Attack — time to open; very short can click, long softens the attack
- Hold — time the gate stays open after the signal falls below the threshold; then Release sets how long it takes to close
- Floor — how much a closed gate turns the signal down; −∞ dB mutes, 0 dB does nothing
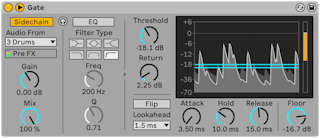
- Sidechain: the title bar button unfolds it.
- Sidechain on — another track's signal opens the gate. Gain sets the trigger level (never heard); Dry/Wet mixes sidechain and own signal as the trigger.
- Example: put Gate on a held pad and use a drum loop as the sidechain, so the pad plays in the drums' rhythm.
- The sidechain EQ on the right triggers from one frequency band.
- The headphones button plays only the sidechain signal, and the display shows its level in green.
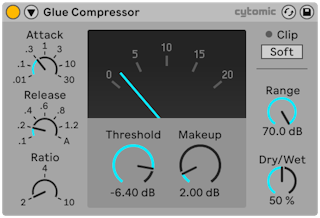
- Glue Compressor is an analog-modeled bus compressor made with Cytomic, based on the bus compressor of a famous 1980s mixing console. It works on single tracks but is aimed at the Main track or Group Tracks, to "glue" several sources into one mix.
- Threshold and Ratio work as in Ableton/Live/UG/29 Audio Effect Reference/09 Compressor. There is no knee control; the knee gets harder as the ratio rises.
- Attack — in ms
- Release — in seconds. A (Auto) uses a slow release for the overall level and a fast one for transients; gentle on most material but slow on sudden level changes.
- Dry/Wet — 0% bypasses, 100% fully compressed
- Range — limits how much compression can happen. −60 to −70 dB behaves like the original hardware; −40 to −15 dB works as an alternative to Dry/Wet; 0 dB does nothing.
- Makeup — set it near the needle's reading to get back roughly the original level.
- Soft clip — a fixed waveshaper capping output at −0.5 dB to catch loud transients. It colors and distorts the sound, so the manual suggests leaving it off unless that is wanted. With Oversampling, peaks can still pass 0 dB.
- The needle shows gain reduction in dB. The Clip LED turns red above 0 dB, or yellow when Soft clip is catching peaks.
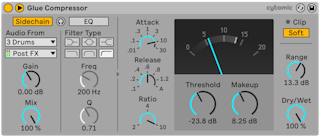
- The title bar button unfolds the sidechain controls.
- Left, external: Sidechain picks any internal routing point as the trigger. Gain sets trigger level only (never heard); Dry/Wet mixes sidechain and own signal as the trigger.
- Right, sidechain EQ: triggers from one frequency band, of this track or the external source.
- The headphones button between them plays only the sidechain signal.
- Oversampling — processes at twice the sample rate to reduce aliasing and harsh transients, for slightly more CPU. Output may then exceed 0 dB even with Soft clip on.
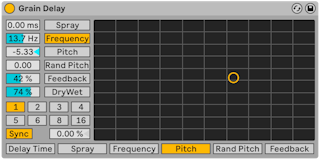
- Grain Delay chops the input into tiny grains and delays each one, optionally at a different pitch. Randomizing pitch and timing creates textures that may barely resemble the source.
- Any parameter can be put on the X-Y controller: pick the X parameter from the row below it and the Y parameter from the row at its left. Delay time can go on X and dry/wet on Y.
- Sync on — delay in sixteenths from numbered buttons (4 is one beat); the Delay Time percentage nudges it for swing. Sync off — delay in ms.
- Spray — random delay-time changes; low values smear and add noise, high values break the source into rhythmic chaos
- Frequency — sets grain size and length, and so shapes how Pitch and Spray sound
- Pitch — transposes the grains, like a rough pitch shifter
- Random Pitch — random pitch per grain; low values give a warped chorus, high values make the original pitch unrecognizable
- Feedback — output fed back into the delay; very high values can run away into loud oscillation
- Dry/Wet — balance of processed and dry signal
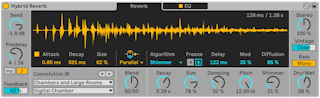
- Hybrid Reverb combines convolution reverb with several algorithmic reverbs, for natural spaces, drones or heavy transformation.
- The convolution engine comes with impulse responses (IRs) and accepts any audio file as an IR, with controls to shape it.
- The algorithmic engine has several modes, from clean and smooth to metallic and gong-like.
- The two engines run alone, in series or in parallel with an adjustable balance. An EQ can be applied to either, and a Vintage control imitates old digital reverbs.
- Signal runs left to right: input section, the two reverb engines (combined by the routing section), the EQ, then the output.
- Convolution controls are yellow; algorithmic controls are blue.
- Send — gain into the reverb; the dry signal passes unchanged
- Predelay — delay before the first early reflection. It affects how big a room sounds; natural values are about 1–25 ms. Predelay Sync chooses time or beat-synced values.
- Feedback — predelay output fed back into its input; time and synced modes each keep their own setting
- The main window has Reverb and EQ tabs. In the Reverb tab, Routing offers:
- Serial — convolution feeds the algorithmic engine. Blend sets how much convolution goes on; 100/0 is pure convolution, 0/100 pure algorithmic fed by the convolution.
- Parallel — both engines side by side; Blend sets the balance
- Algorithm — only the algorithmic engine
- Convolution — only the convolution engine
- Controls for an unused engine are grayed out. Blend has no effect in Algorithm or Convolution routing.
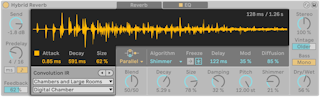
- Convolution reverb uses recordings of real spaces, called impulse responses, to put a sound in that space. Any recording can be an IR — a famous hall, a snare drum, a garbage can, a voice.
- Convolution IR: the upper menu picks a category, the lower one an IR. Arrow buttons step through IRs and on into the next category. The display draws the IR, reflecting Attack, Decay and Size.
- Categories: Early Reflections, Real Places, Chambers and Large Rooms, Made for Drums, Halls, Plates, Springs, Bigger Spaces, Textures, User.
- Drag an audio file onto the display to add it to User; dragging from a folder adds every audio file in it. User IRs are forgotten if the device is removed and added again, and must be dragged back in.
- Attack, Decay — envelope of the IR; Size — relative size of the IR
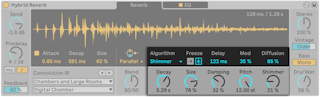
- The algorithmic engine is built only from digital delay lines, without samples. Its controls sit right of the Blend knob and change with the Algorithm chooser.
- Algorithms: Dark Hall, Quartz, Shimmer, Tides, Prism. All have:
- Decay — time for the tail to fall by 60 dB
- Size — size of the virtual room
- Delay — extra predelay in ms for this engine
- Freeze — stops input and makes the decay infinite so the reverb sustains; Freeze In keeps adding input to the frozen sound, building it up
- A smooth, classic hall for medium to long halls.
- Damping — high-frequency filtering; higher is darker
- Mod — movement in the tail; more gives chorusing and fewer resonances
- Shape — from small and resonant to large and diffuse
- Bass X — crossover for the low end of the tail; Bass Mult scales its decay time
- Long decays with a very small Size give metallic, gong-like resonances.
- A hall-like reverb with audible echoes in the tail and clear early reflections; suits voices, drums, transient material and echo effects.
- Damping — high-frequency filtering; higher is darker
- Lo Damp — low-frequency filtering; higher is brighter
- Mod — movement in the tail
- Diffusion — density of the tail
- Distance — how far away the reflections are; closer is denser, farther spaces the echoes out
- Dense diffuse delays with a pitch shifter in the feedback; tails rise or fall in pitch. Low diffusion is a plain delay, high diffusion a lush reverb.
- Damping — high-frequency filtering
- Mod — movement in the tail
- Pitch — pitch shift in the feedback, in semitones
- Diffusion — density; below 10% gives dub-style delays, good on drums
- Shimmer — amount of pitch-shifted signal; 100% on melodic material gives harmonies
- Here Size sets the spacing of echoes on percussive material.
- A smooth reverb whose output is modulated by a multiband filter, giving rippling bands.
- Damping — high-frequency filtering
- Wave — modulation shape from noise (0%) through sine (50%) to square (100%)
- Tide — strength of the texture
- Phase — left/right offset; 180° is fully opposite
- Rate — modulation rate in beat divisions, with triplet, 16th and dotted variations
- A bright, clearly artificial diffuse reverb based on spectrally flat "velvet" noise. It adds depth without getting in the way, suits short non-linear decays on drums, and gives a clean digital sound on longer decays.
- Low Mult and High Mult — scale the decay of the low and high parts of the tail
- X over — crossover between those parts
- Small Decay and Size give a classic 1980s gated snare reverb.
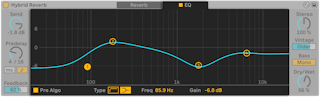
- The EQ lives in the display's second tab, with its own on/off toggle.
- By default it comes after both engines; Pre Algo puts it before the algorithmic engine in any routing.
- Four bands. The low and high bands switch between pass filters (6 to 96 dB/octave) and shelves; the two middle bands are peaks covering the whole range, from wide boosts to fairly narrow cuts.
- Stereo — width of the wet signal; 0% mono, above 100% wider
- Vintage — imitates the lower sample rates and bit depths of old digital reverbs; presets Subtle, Old, Older and Extreme
- Bass Mono — makes output below 180 Hz mono for a tighter low end
- Dry/Wet — set to 100% on a return track
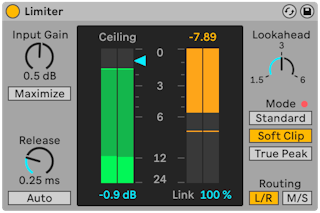
- Limiter is a mastering-grade limiter that keeps the output below a set level — a compressor with an infinite ratio. It belongs on the Main track to prevent clipping in the converters. Compression basics are in Ableton/Live/UG/29 Audio Effect Reference/09 Compressor.
- Ceiling — the maximum output level; signal that never reaches it is untouched
- Gain Reduction meter — current reduction at the ceiling or threshold
- Link — how much gain reduction the two channels share (L/R or M/S, per Routing Mode). 100% keeps the stereo image steady; 0% limits each channel separately, for split signals or a deliberate stereo wobble.
- Input Gain — level into the limiter
- Maximize — turns Ceiling into Threshold, so one control sets loudness: lowering it raises the output by the same amount. Input Gain becomes Output, the target level.
- Release — how long limiting continues after the signal drops. Fast is louder and punchier; slow is smoother but can flatten dynamics. Auto sets release from the material and disables Release.
- Lookahead — 1.5, 3 or 6 ms. Shorter allows more limiting but can distort, especially bass; longer catches very fast peaks. Longer lookahead adds latency.
- Ceiling Mode:
- Standard — default
- Soft Clip — soft-clips near the ceiling for color and punch; an LED flashes when clipping
- True Peak — prevents inter-sample peaks
- Routing Mode:
- L/R — channels limited separately; more limiting, some stereo image distortion
- M/S — limits in mid/side; keeps the stereo image but adds latency
- Anything after Limiter can raise the level again. To be sure the output never clips, put Limiter last on the Main track and keep the Main volume below 0 dB.
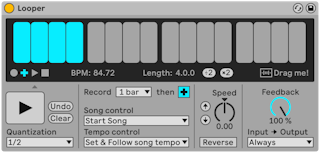
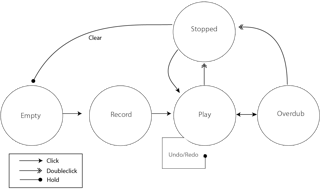
- Looper is modeled on hardware looping pedals: record audio and overdub endlessly in sync with the Set. With the Set stopped, it can detect the tempo of what was played and set Live's tempo, or fit a recording to a chosen number of bars. Audio can be dragged in as a bed for overdubs, or out as a new clip.
- The large display turns red while recording, then shows position and loop length in bars and beats.
- Transport buttons:
- Record — records until another button is pressed, replacing what was there
- Overdub — adds layers the length of the first recording
- Play — plays the buffer without recording
- Stop — stops
- With Live playing, Looper behaves like a clip and follows launch Quantization. With Live stopped, buttons act immediately.
- Clear — erases the buffer. In Overdub with Live playing, tempo and length are kept; otherwise they reset.
- Undo — removes everything overdubbed since Overdub was last turned on, keeping earlier passes; it then becomes Redo.
- The large Multi-Purpose Transport Button below them:
- Tempo Control:
- None — Looper keeps its own tempo
- Follow song tempo — playback speed follows Live's tempo
- Set & Follow song tempo — Live's tempo is set from the recording, then Looper follows later tempo changes
- Record Length:
- Live playing — "x bars" records until another button is pressed; a fixed length records that long, then switches to Play or Overdub (button next to the chooser)
- Live stopped — "x bars" guesses the tempo when Overdub, Play or Stop is pressed, possibly at double or half speed; a fixed length sets the tempo so the recording fits
- Song Control:
- None — Looper does not touch Live's transport
- Start Song — Play or Overdub starts Live; Stop does not stop it
- Start & Stop Song — Looper starts and stops Live
- Starting Live from Looper also lines up apps connected through Link.
- ×2 doubles the buffer, copying what is there — record one-bar ideas, then layer two-bar ones. ÷2 halves it, keeping the half that is playing.
- Drag me! — drag the buffer to the browser or a track as a new clip (Warp Mode Re-Pitch), or drag an audio file in to replace the buffer.
- Speed — playback speed and pitch; the arrow buttons jump an octave up or down. They follow Quantization.
- Reverse — plays the existing material backward; overdubs made while reversed play forward, and swap when Reverse is turned off. Follows Quantization.
- Feedback — how much of the loop survives each overdub pass: 100% never fades, 50% halves each pass. Changes apply from the next pass; no effect in Play.
- Input -> Output monitoring:
- Always — input always heard; usual on a single track
- Never — input never heard; usual on a return track fed by sends
- Rec/OVR — input heard only while recording or overdubbing; for several tracks each with its own Looper and footswitch
- Rec/OVR/Stop — input heard except in Play, like Beat Repeat's Insert mode — Ableton/Live/UG/29 Audio Effect Reference/05 Beat Repeat
- Looper can send to and receive from other tracks, so overdubs keep passing through another track's effects:
- 1. Put Looper on a track and record at least one pass.
- 2. Create another audio track.
- 3. Set its top Audio From and Audio To to the Looper track.
- 4. Set its bottom Audio From and Audio To to "Insert-Looper".
- 5. Set its Monitoring to In.
- 6. Add effects to the new track.
- 7. Put Looper in Overdub.
- Each pass goes through the other track's effects and back into Looper, getting more processed every time.
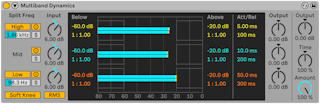
- Multiband Dynamics is a dynamics processor aimed at mastering. It compresses and expands, upward and downward, in up to three bands with adjustable crossovers and per-band envelopes. Each band has an upper and a lower threshold, so two kinds of processing can run in each band at once.
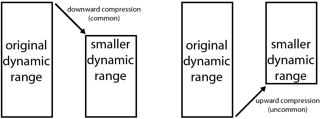
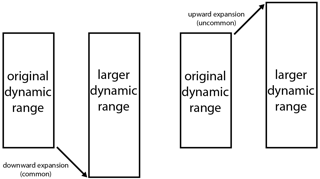
- Four ways to change dynamics:
- Both kinds of compression shrink the dynamic range; both kinds of expansion widen it.
- With three bands and two thresholds each, one Multiband Dynamics can apply six kinds of processing at once.
- High and Low switch those bands on; with both off it works as a single-band device using only the Mid controls. The sliders below them set the crossovers: at 500 Hz and 2000 Hz the bands are 0–500 Hz, 500–2000 Hz and above 2000 Hz.
- Each band has an activator (off bypasses its processing and gain) and a solo button. Input knobs set each band's level before processing, Output knobs after.
- In the display, large bars show each band's output and small bars its input; with no processing the input meters line up with the tops of the output meters. The scale is in dB.
- Thresholds: the blocks at the left and right of each band are the levels below the Below threshold and above the Above threshold. Drag their edges sideways to move the thresholds.
Cmd (Mac) / Ctrl (Windows) — same threshold on all bandsOption (Mac) / Alt (Windows) — Above and Below together for one bandShift — finer steps
- Ratios: drag up or down in the middle of a block to make that level range louder or quieter; the same modifier keys apply, and double-click resets.
- Above the Above threshold: down is downward compression, up is upward expansion.
- Below the Below threshold: down is downward expansion, up is upward compression.
- The column to the right of the display also shows the values. Buttons T, B and A switch it between Time (attack and release), Below (threshold and ratio) and Above (threshold and ratio).
- Attack and release:
- Above thresholds — Attack is the time to full effect once the signal rises past the threshold; Release the time to recover after it falls back
- Below thresholds — Attack is the time to full effect once the signal drops below; Release the time to recover after it rises again
- Soft Knee — processing starts gradually near the threshold
- RMS/Peak — Peak reacts to short peaks; RMS waits until the level has stayed past the threshold a little longer
- Output — overall output gain
- Time — scales all attack and release times together
- Amount — scales the strength of all processing; at 0% every ratio is effectively 1
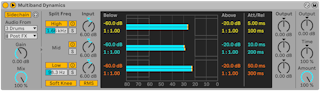
- The title bar button unfolds the sidechain.
- Sidechain picks any internal routing point as the trigger. Gain sets trigger level only (never heard); Dry/Wet mixes sidechain and own signal as the trigger.
- The headphones button plays only the sidechain signal.
- Practical starting points.
- Use only the upper thresholds for ordinary downward compression: set the crossovers for the material, then drag down in the upper blocks or set ratios above 1.
- For harsh, loud highs: enable only the high band, set its crossover near 5 kHz, and add gentle downward compression. Soloing the band helps; fairly fast attack and release usually work best.
- Upward expansion can bring some life back to a mix that was over-compressed and maximized:
- 1. Turn down Input for headroom.
- 2. Set the Above thresholds just under the highest peaks.
- 3. Add a little upward expansion per band — too much makes transients very loud.
- 4. Adjust attack and release per band. Here fast attack strengthens transients and slow attack sounds muffled, the reverse of normal compression.
- A limiter or maximizer afterward may flatten the restored peaks again.
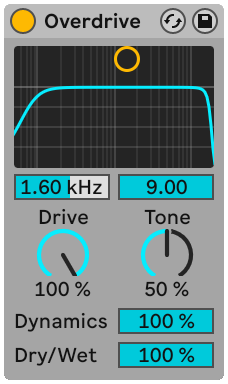
- Overdrive is a distortion modeled on classic guitar pedals. It can be pushed very hard while keeping dynamic range.
- A band-pass filter before the distortion is set with an X-Y controller: vertical for bandwidth, horizontal for frequency, or use the sliders below.
- Drive — amount of distortion; 0% still distorts
- Tone — EQ after the distortion; higher is brighter
- Dynamics — at low values more distortion brings more internal compression and makeup gain; at high values less compression
- Dry/Wet — set to 100% on a return track
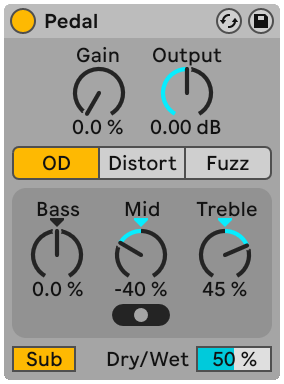
- Pedal is a guitar distortion. With Ableton/Live/UG/29 Audio Effect Reference/39 Tuner, Ableton/Live/UG/29 Audio Effect Reference/01 Amp and Ableton/Live/UG/29 Audio Effect Reference/06 Cabinet it covers guitar processing, and it also works on vocals, synths and drums.
- Gain — distortion amount; 0% still distorts. Start at 0% and raise it. Ableton/Live/UG/29 Audio Effect Reference/40 Utility before Pedal can lower the input further.
- Output — output gain
- Pedal Type:
- Overdrive — warm and smooth
- Distortion — tight and aggressive
- Fuzz — unstable, like a broken amp
- A three-band adaptive EQ after the distortion; Q rises with boost.
- Bass — peak at 100 Hz, for punch in bass and drums or to thin out guitars
- Mid — boost with a three-position Mid Frequency switch: 500 Hz (narrow), 1 kHz, 2 kHz (wide), as on guitar pedals
- Treble — shelf at 3.3 kHz, to remove or add harshness
- For finer EQ, leave these neutral and add Ableton/Live/UG/29 Audio Effect Reference/15 EQ Eight after.
- Sub — low shelf boosting below 250 Hz. Pair it with Bass: Sub on with Bass −100%, or Sub off with Bass 100%.
- Dry/Wet — balance of processed and dry signal
- Hi-Quality in the title bar's context menu reduces aliasing, for slightly more CPU.
- What comes before Pedal changes how it distorts. A Compressor first gives a more even result; a resonant, high-gain EQ or filter first gives a screaming distortion.
- Pick a kick with a long decay (such as Kit-Core 909 with decay raised), choose the Distortion type, turn on Sub and set Gain to taste.
- More whack: Mid Frequency fully right and Mid up. More thump: Bass up. Less air: Treble down.
- Fuzz, Gain 50%, Sub off; Bass and Mid at −100%, Mid Frequency to taste, Treble 100%; Output −20 dB. Then raise Dry/Wet from 0% until the drums fizz enough.
- Fuzz, Sub off, Bass all the way down, Treble 25%, Mid 100% with Mid Frequency fully right, Gain 100%.
- To warm a plain sub bass: Overdrive type, Sub on, Bass up, then raise Gain slowly; shape the mids with Mid.
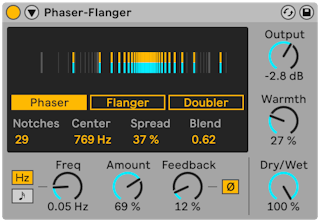
- Phaser-Flanger combines a phaser, a flanger and a doubler in one device, with two LFOs and an envelope follower.
- Modes, chosen in the display:
- Phaser — modulated all-pass filters feed a phase-shifted copy back in, creating moving notches. The display shows the notches. Notches sets how many; Center their center frequency; Spread their spacing (all-pass Q); Blend routes modulation between Center (0.0) and Spread (1.0).
- Flanger — a modulated, fed-back delay gives a moving comb filter. Time sets the delay; in the display, moving right shortens the delay and left lengthens it.
- Doubler — modulated delays imitate stacked takes. Time sets the delay; modulation is bipolar, so right lengthens and left shortens.
- The title bar button unfolds the device, showing more LFO options, LFO2, the envelope follower, Safe Bass and an LFO display.
- Main LFO:
- Freq/Rate — in Hz or synced, chosen with the Modulation Sync buttons
- LFO Waveform — Sine, Triangle (default), Saw Up, Saw Down, Rectangle, Random, Random S&H, plus Triangle Analog (a filtered square that changes shape and level with rate), Triangle 8 and Triangle 16 (stepped in 8 or 16)
- LFO Stereo Mode — Phase (left/right offset; 180° is inverted) or Spin (different rates per side)
- Duty Cycle — squeezes the wave toward the start (100%) or end (−100%) of its cycle, like pulse width; no effect on Random and Random S&H
- LFO2 is always a triangle. LFO2 Mix blends it with the main LFO (0% main only, 100% LFO2 only); LFO2 Freq/Rate sets its speed, free or synced with Modulation Sync 2.
- Global:
- Amount — modulation depth for both LFOs
- Feedback — output fed back for a stronger comb-filter sound; in Doubler it also keeps echoing after playback stops. Ø inverts it for a hollow sound. High feedback can jump in level quickly — protect ears and equipment.
- Env Fol with Envelope Amount (negative inverts) turns input level into modulation; Attack and Release set its response.
- Safe Bass — high-pass from 5 Hz to 3000 Hz that keeps the effect off the lows
- Output, Warmth (slight distortion and filtering), Dry/Wet (100% on a return track)
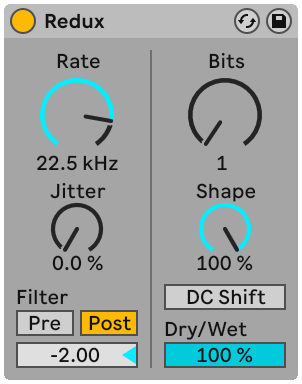
- Redux degrades sound with downsampling and bit reduction, from harsh aliasing to warm 8-bit grit. Noise, stereo width and filtering can be added, and the quantizer curve allows gentle or extreme bitcrushing.
- The downsampling controls are on the left. Without filters, downsampling adds inharmonic content that depends on the material and the chosen rate.
- Rate — the sample rate the signal is reduced to; lower adds more imaging and inharmonic tones
- Jitter — noise on the downsampler's clock, adding randomness, noise and stereo width
- Pre — filter before downsampling, narrowing what gets downsampled (and the Jitter width)
- Post — low-pass after downsampling to reduce imaging. Post-Filter Octave sets it in octaves above or below half the Rate value.
- The bit reduction controls are on the right. Fewer bits mean less dynamic range, more noise and distortion; at extremes everything becomes jagged square waves.
- Bits — bits used for the output
- Shape — the quantizer curve; higher values keep quiet parts finer than loud parts. The result depends on the input's dynamic range.
- DC Shift — offsets the signal before quantizing, changing the distortion a lot at low Bits: louder and crunchier
- Dry/Wet — set to 100% on a return track
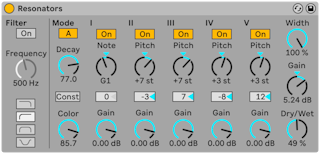
- Resonators is five resonators in parallel that give the input a pitched character, from plucked strings to vocoder-like tones. They tune in semitones, scale degrees or a tuning system — Ableton/Live/UG/15 Tuning Systems.
- Input filter first: low-pass, band-pass, high-pass or notch, with Frequency.
- Mode — A sounds more realistic; B is interesting with Resonator I set low.
- Decay — how long the resonators ring; longer is more sustained and tonal, like an undamped piano string. Low notes ring longer unless Const is on.
- Color — brightness
- Resonator I takes both channels; II and IV the left; III and V the right.
- Tuning:
- by default Resonator I sets the root and the others are intervals above it
- with scale awareness, Resonator I follows the clip's scale in octave 2
- with a tuning system, Resonator I is an absolute pitch from the tuning
- Note sets the root — semitones C-1 to C5, scale degrees, or tuning indices; Resonator I Fine Tuning in cents
- Each resonator has On/Off (off saves CPU; turning off I does not affect the others) and Gain. II–V follow Note and add their own Pitch (±24 semitones or ±21 scale degrees) and fine tuning.
- Output: Width (wet only; 0% folds II–V to mono), Gain (resonated level unless Dry/Wet is 0%), Dry/Wet.
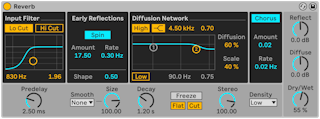
- Reverb imitates sound echoing in a space. Real reverb comes from reflections off hard surfaces, shaped by absorbent materials; Reverb approximates it with filters and modulated delays, for anything from a small room to a canyon.
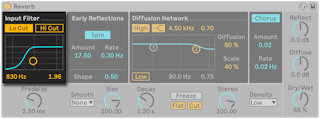
- Low and high cut filters come first. An X-Y controller sets the band's center (X) and width (Y), also available as sliders. Either filter can be turned off to save CPU.
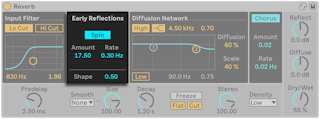
- Early reflections are the first echoes off the walls before the diffuse tail; their level and spacing suggest the room's character.
- Spin modulates them; Amount and Rate set it. More Amount gives a more neutral tail. Too high a Rate causes Doppler pitch shifts and odd panning. Turning Spin off saves some CPU.
- Shape — low values: reflections fade slowly and overlap the tail, for a smoother decay; high values: they fade fast and the tail starts later, which can help clarity.
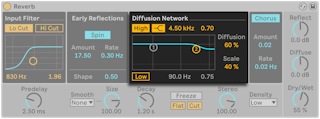
- The Diffusion Network makes the tail after the early reflections.
- High and low shelf filters make decay depend on frequency. The high shelf models absorption by air, walls, people and carpet; the low shelf thins the decay. Either can be turned off to save CPU.
- Diffusion and Scale set density and coarseness; in very small rooms they strongly color the sound.
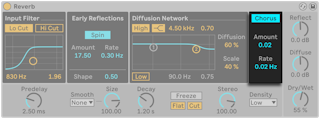
- Adds a little movement to the tail, with Amount and Rate, or switch it off.
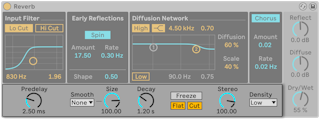
- Predelay — ms before the first early reflection; affects perceived room size. Natural values are about 1–25 ms.
- Smooth — how Size changes take effect: None jumps (may cause artifacts), Slow or Fast glide.
- Size — room volume; very large gives a shifting, diffuse delay, very small a colored, metallic sound
- Decay — time for the tail to fall by 60 dB
- Freeze — holds the diffuse sound almost forever.
- Flat — bypasses the shelf filters while frozen, so the frozen sound does not lose energy in those bands
- Cut — stops new input adding to the frozen sound
- Stereo — width, from mono up to 120°, where each ear gets an independent tail
- Density — quality versus CPU, from Sparse to High
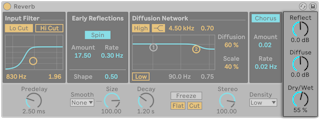
- Reflect and Diffuse set the levels of the early reflections and the tail; Dry/Wet sets the overall mix.
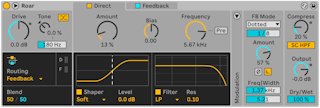
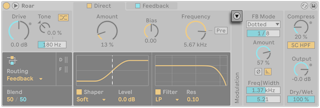
- Roar is a saturation and coloring device with up to three gain stages in several routings. Its shaper curves and filters cover warm saturation, moving harmonics and noisy glitches, and its feedback and built-in compressor add sounds no other Live device makes.
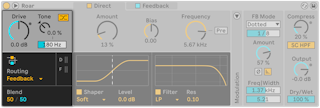
- Drive — input level into the gain stages; adds or removes distortion across all stages at once, or adjusts a signal so a preset behaves as intended
- Tone Amount — tilts the input: positive boosts highs and cuts lows, negative the reverse. Tone Frequency sets the shelf frequency. Positive Tone keeps heavily distorted guitar or bass from getting muddy.
- Color Compensation — applies the opposite Tone curve after the distortion, so Tone shapes only what gets distorted. With negative Tone it saturates drums without losing low-end punch.
- Routing Mode — seven routings. All but Single and Multi Band have a Blend control between the two stages.
- Single — one stage
- Serial — two shapers in a row; Blend goes from Stage 1 alone to both stages
- Parallel — two independent shapers; Blend goes from Stage 1 to Stage 2. Two very different curves (such as Half Wave Rectifier and Fractal) with Blend modulated make the sound move between them.
- Multi Band — Low, Mid and High bands processed separately, split by two crossover filters; for drums or saturating a whole mix
- Mid Side — mid and side processed separately, to enhance the stereo image without changing the center
- Feedback — signal and its feedback processed separately; can turn Roar into a distinctive delay. Modulating Shaper Amount with an envelope gives shuffled delays; small Shaper Bias offsets make delays that decay as they repeat.
- Delay — Stage 2 processes the delayed output of Stage 1. The first pass is not scaled by feedback, giving single distorted slapbacks; Stage 2 then feeds back into itself for longer tails.
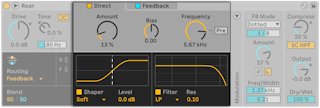
- Each routing has its own gain stages, each switched on with its Stage toggle. Every stage tab has Shaper Amount, Shaper Bias and Filter Frequency, plus shaper and filter type menus.
- Shaper Amount — saturation; also drag the curve in the display. Distortion happens where the signal reaches the curve's bends.
- Shaper Bias — offsets the signal for asymmetric distortion; high values sound like a broken circuit, extreme values silence it
- Shaper Type — twelve curves:
- Soft Sine — smooth, warm, analog-like even when pushed
- Digital Clip — hard clipping with harsh upper harmonics
- Bit Crusher — amplitude quantization like Ableton/Live/UG/29 Audio Effect Reference/30 Redux; more Amount means fewer bits and a stronger compander. Good with bias modulation; very audible on quiet signals.
- Diode Clipper — virtual analog clipping circuit; like Soft Sine with softer highs
- Tube Preamp — soft tube saturation that keeps transients and dynamics
- Half Wave Rectifier — fully asymmetric; adds crunch to drums
- Full Wave Rectifier — raises the signal an octave; adds harmonics to synths
- Polynomial — shifts from a sine curve to more complex shapes; good for modulation and metallic sounds
- Fractal — lots of high harmonics
- Tri Fold — triangle wavefolder; like Fractal but harsher
- Noise Injection — stereo noise then smooth distortion; saturation with grit
- Shards — constantly changing stereo curve segments that break the signal apart rhythmically
- The toggle under the display turns the shaper off; Shaper Level makes up level changes from the curve.
- Filter Frequency — cutoff. With Pre on, the filter comes before the shaper and leaves the shaper's harmonics alone.
- Filter types: LP, BP, HP, Notch, Peak (with Filter Peak Gain), Morph (low-pass through band-pass to high-pass, with a Morph control), Comb (notches; flanger-like when swept), Resampling (sample-rate artifacts like Redux), Dispersion (delays frequencies by different amounts without changing level, for metallic, spring-like tones). All but Resampling have Resonance.
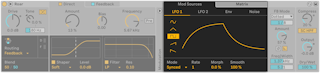
- The Modulation panel's toggle shows the Mod Sources and Matrix tabs.
- Sources, each with its own display:
- LFO 1 and LFO 2 — sine, triangle, square, up or down. Mode sets Free (Hz), Synced, Triplet, Dotted or Sixteenth; Rate, Morph (reshapes the wave) and Smooth (softens sudden changes).
- Env — envelope follower on Roar's input. Attack, Release, Envelope Hold (finish the attack before releasing), Threshold and Gain (sensitivity and strength), Frequency and Width (which band it listens to), and Envelope Input Listen. Example: follow the snare in a drum loop and push Dry/Wet or Shaper Amount on each hit.
- Noise — Simplex and Wander (smooth random, Simplex less regular; slow organic wandering at low rates), S & H (stepped random at the Noise Rate), Brown (filtered noise for a noise floor, crackle or hiss). Rate in Hz or synced, with smoothing.
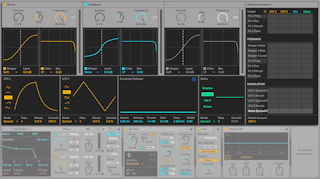
- Matrix — sources across, targets down. With the tab open, click a parameter to add it as a target, then drag a cell up or down to set the amount. Global Modulation Amount scales everything; X clears all modulation.
- The header toggle expands the matrix, showing all gain stages, sources and targets at once.
- Colored LEDs in the Modulation column show which sources are active.
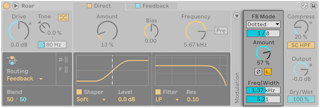
- Feeding Roar back into itself adds ringing, strange tones.
- Feedback Mode — Time, Synced, Triplet and Dotted use the feedback as a delay; Note makes it ring at a chosen pitch.
- Feedback Amount — how much is fed back. The compressor in the loop pulls feedback down on loud signals.
- Feedback Invert — inverts the feedback phase for cancellation effects
- Feedback Gate — feedback fades out once input stops; off, it continues forever
- Feedback Filter Frequency and Width — band-pass filter on the feedback
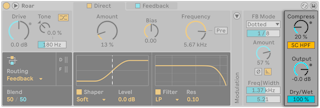
- Compression Amount — compression on the output, and so on what is fed back
- Compressor Sidechain HP Filter — high-passes the compressor's detection so lows cause less gain reduction
- Output Gain — wet level, followed by a hard clipper and then Dry/Wet; makes up for Drive and Shaper Amount
- Dry/Wet — balance of dry and wet output


- By default Roar's own input drives the envelope follower and the feedback pitch. The Sidechain Section toggle at the top left opens external audio and MIDI sidechain controls.
- External SC — External Source picks the audio source, External Tapping Point Post FX or Post Mixer. Mix blends internal (0%) and external (100%) as the trigger; SC Gain sets trigger level only.
- MIDI > FB Note — incoming MIDI sets the feedback pitch in Note mode. Pick the track under MIDI From and Pre FX or Post FX. Feedback Mode and Feedback Amount are disabled while this is on.
- Sidechain Listen — replaces the output with the sidechain signal for monitoring
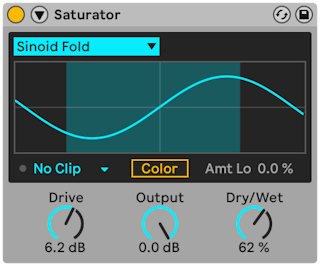
- Saturator is a waveshaper that adds dirt, punch or warmth, from soft saturation to heavy coloring. Each sample is mapped to a new value through a curve, so the effect depends on the signal's level at each moment.
- Curve Type — eight curves:
- Analog Clip — clips smoothly around the clipping point; Digital Clip clips hard. Both stay clean below it.
- Soft Sine, Medium Curve, Hard Curve — saturation with different characters
- Sinoid Fold — wavefolding: louder input folds back on itself
- Bass Shaper — like Analog Clip with smoother harmonics on heavily driven lows; made for 808 kicks and synth bass. Bass Shaper Threshold (0 to −50 dB) goes from soft clipping (low values, best for bass with high Drive) to hard clipping (high values).
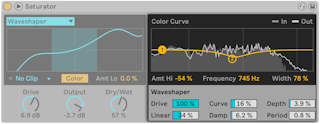
- Waveshaper — the most extreme, with its own controls in the expanded view (title bar button)
- The Shaper Curve display shows the curve and the live input against it.
- Post Clip Mode — Soft Clip or Hard Clip keeps the output under the Output level, catching extra boost from negative Color settings. Soft Clip applies an Analog Clip curve to the output.
- Color — two color filters: an EQ before the shaper and its inverse after. For example, cut the bass before saturating so only mids and highs distort while the bass comes through intact.
- Amt Lo — more or less saturation in the lows
- In the expanded view's Color Curve display: Amt Hi, Frequency and Width for the second filter. Drag the first handle for Amt Lo, the second sideways for Frequency or up and down for Amt Hi.
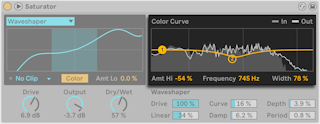
- Drive — input gain; its effect shows in the curve display
- Output — final level
- Dry/Wet — set to 100% on a return track
- Six more controls appear in the expanded view with the Waveshaper curve.
- Drive — how much the controls below shape the curve, 0% to 100%
- Curve — adds mostly third-order harmonics
- Depth — level of a sine wave added to the curve
- Linear — with Curve and Depth, changes the curve's linear part
- Damp — flattens signal near zero, like a very fast noise gate
- Period — how many ripples the added sine has
- Hi-Quality — less aliasing, especially in the highs, for slightly more CPU
- Pre-DC Filter — removes DC offset at the input
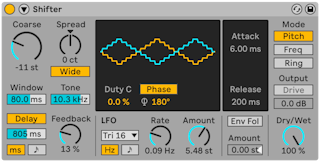
- Shifter shifts pitch or frequency in real time, or ring-modulates the input.
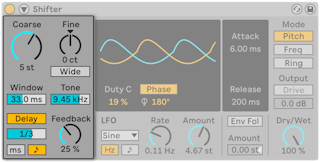
- Coarse and Fine — amount of shift, in units that depend on the mode in Ableton/Live/UG/29 Audio Effect Reference/35 Shifter/04 Shifter Mode Section
- Wide — inverts Spread on the right channel for a stereo effect: more Spread shifts left up and right down. No effect at Spread 0.
- Window (Pitch mode) — analysis window; longer suits low sounds, shorter suits high ones
- Tone — cuts highs in the delay's feedback
- Delay — adds a delay, in Hz or synced divisions (Delay Mode buttons); Delay Feedback sets how much repeats
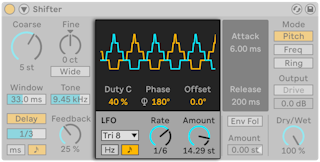
- The LFO modulates left and right channels.
- In the LFO display: Duty Cycle and Phase (left/right offset; 180° fully opposite). With synced Rate, Offset moves each LFO's start point.
- LFO waveforms — Sine, Triangle, Triangle Analog, Triangle 8, Triangle 16, Saw Up, Saw Down, Rectangle, Random, Random S&H
- The periodic waves can use Spin instead of Phase, running the two LFOs at different rates.
- Random uses Phase; Random S&H uses Width, from identical channels (0%) to fully opposite (100%).
- Rate — in Hz or synced; Amount — modulation depth
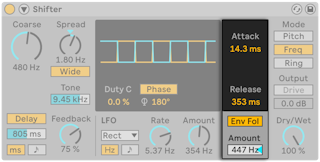
- Turns input level into modulation.
- Envelope Attack and Envelope Release — response to rising and falling levels
- Env Fol turns it on; Amount sets depth, in semitones (Pitch mode) or Hz (Freq and Ring)
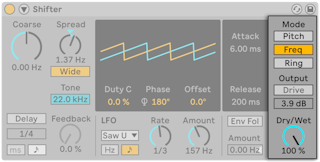
- Pitch — shifts pitch by Coarse semitones and Fine cents
- Freq — shifts every frequency by a set number of Hz. Small shifts give tremolo or phasing; large ones dissonant, metallic sounds.
- Ring — adds and subtracts the set frequency from the input (ring modulation). Drive, only in Ring mode, adds distortion.
- Dry/Wet — balance of dry and processed signal
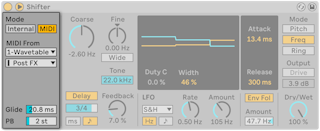
- The triangle at the left of the title bar unfolds the sidechain.
- Pitch Mode: Internal uses Coarse and Fine; MIDI uses incoming notes from a chosen source.
- In MIDI mode: Glide (ms between notes) and PB (pitch bend range, 0–24 semitones).
- Duplicate a drum track and put Shifter after its Drum Rack. In Pitch mode, move or automate Coarse with Delay on: high shifts give crisp metallic echoes, low shifts long drawn-out delays. Keep the copy quieter for movement in the background.
- In Freq mode, move Fine by no more than about 2 Hz. Phasing comes from the wet and dry signals interacting, so keep both audible; it is strongest at a 50% mix.
- In Ring mode, frequencies below hearing (about 20 Hz or lower) make a tremolo. Wide with a small Spread adds stereo movement.
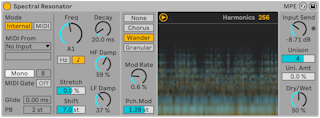
- Spectral Resonator adds tuned resonances to the input's spectrum, from short percussive ringing to long washes. Pitch comes from an internal setting or a MIDI sidechain, polyphonically with up to 16 voices, like a vocoder. Modulation modes add movement or break the sound into textures. It supports scale awareness and tuning systems.
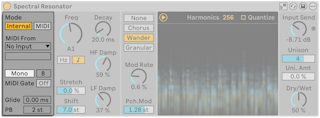
- Pitch modes: Internal (one fixed pitch) or MIDI (follows incoming notes).
- MIDI mode controls:
- External Source and Tapping Point — any MIDI track, before or after its MIDI effects. For a hardware controller, select it as a MIDI track's input and pick that track here.
- Mono/Poly — Poly accepts chords
- Polyphony — 2 to 16 voices
- MIDI Gate — on, it resonates only while notes are held, like an instrument; off, audio input still rings it without notes. Always on in Poly.
- Glide — ms between notes, Mono only
- PB — pitch bend range, 0–24 semitones. MPE is received too.
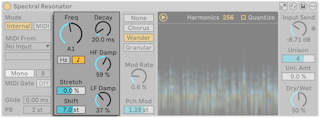
- Internal mode: Freq sets the pitch in Hz or as a note (Frequency Control Mode buttons). With Use Current Scale, it follows the clip's scale and Freq becomes SD Shift, transposing by scale degrees; with no scale active it uses the chromatic scale.
- MIDI mode: notes set the pitch; Transp. shifts them ±48 semitones, or becomes SD Shift (±28 scale degrees) with scale awareness.
- With a tuning system, Freq and Transp. use the tuning's note indices.
- Stretch — spacing of the harmonics; below 0% closer, above 0% wider. At 100% only odd harmonics remain, a square-wave sound.
- Shift — transposes the input's spectrum ±48 semitones before it reaches the resonator
- Decay — how long the resonances last
- HF Damp / LF Damp — damping of high and low partials; the ranges move with the current pitch
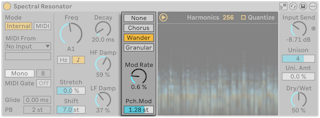
- Modulation mode for each harmonic's pitch and level:
- None
- Chorus — triangle modulation per partial; at Mod Rate 0 only levels move
- Wander — random sawtooth modulation per partial
- Granular — random decaying level envelopes; partials appear at irregular times, with density set by Mod Rate
- Mod Rate — modulation speed
- Pch. Mod — pitch modulation range in semitones; bipolar except in Granular
- The spectrogram shows dry (yellow) and wet (blue) frequencies over time, and can be hidden with the toggle at its top left.
- Harmonics — number of resonant harmonics; more is brighter and uses more CPU. In Poly they are shared among the voices.
- Quantize — snaps harmonics to the active scale or tuning, or to chromatic pitches if neither is active
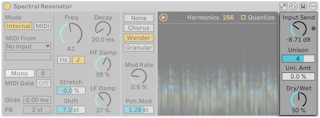
- Input Send — gain into the processing; a limiter prevents clipping, and its LED lights when it works
- Unison — number of detuned copies of the partials; Uni. Amt — detune amount. More voices thicken; more detune widens. In Wander and Granular each voice moves on its own.
- Dry/Wet — also changes how each signal shows in the spectrogram; 100% on a return track
- Pitched drum loops: put it on drums and drive specific pitches from the MIDI sidechain, so the drums match the bass line.
- Follow a melody: convert audio with Convert Harmony or Convert Melody to New MIDI Track (Ableton/Live/UG/13 Audio to MIDI) and route that track in.
- Reverb-like sound: low Freq, more Unison and Uni. Amt, Wander with low Mod Rate and Pch. Mod; Decay sets the tail.
- Vocoder-like: put it on a vocal and play it from the MIDI sidechain.
- Layers: two in series, each fed different MIDI.
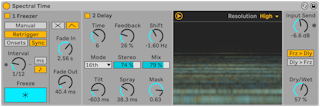
- Spectral Time combines spectral freezing and spectral delay. Filters, delays and frequency shifting resynthesize the input: sustain a sound forever, add timed fades, smear frequencies over time, or add metallic echoes.
- Two sections, Freezer and Delay, used alone or in series (freezer into delay), switched with Freezer On and Delay On.
- The spectrogram shows dry (yellow) and wet (blue) signals and can be hidden.
- Zero Dry Signal Latency in the context menu passes the dry signal with no delay instead of aligning it with the effect — useful when playing an instrument through it live.
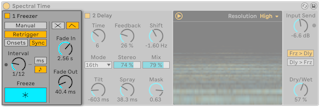
- The Freeze button must be on in both modes.
- Manual — click Freeze to freeze; Fade In and Fade Out in ms
- Retrigger — freezes automatically:
- Onsets — at each detected transient; Sensitivity 0–100%
- Sync — at regular intervals set by Interval, in ms or beat values (Freezer Time Unit)
- Fade shape for both:
- Crossfade — new freeze fades in as the old one (or dry signal) fades out; X-Fade sets the length as a percentage of the interval
- Envelope — each freeze fades in and out by Fade In and Fade Out; up to eight freezes can overlap
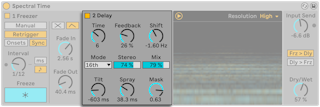
- Makes delayed copies of the spectrum; fed by the Freezer when it is on.
- Time — delay time; Mode sets the unit: Time (ms), Notes (beat divisions), 16th, 16th Triplet, 16th Dotted
- Feedback — more repeats
- Shift — each repeat moves up or down in frequency by this amount
- Stereo — width of Tilt and Spray
- Dry/Wet — affects the Delay section only
- Tilt — delays high frequencies more (positive) or low frequencies more (negative)
- Spray — scatters delay times across frequencies at random
- Mask — limits Tilt and Spray to highs (positive) or lows (negative)
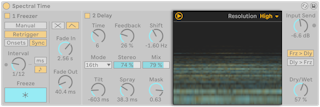
- Resolution, at the top right of the spectrogram, trades accuracy for latency. Lower it while recording to reduce latency.
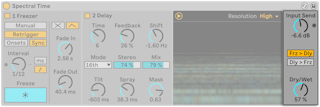
- Input Send — input gain
- Frz > Dly / Dly > Frz — order of the two sections
- Dry/Wet — overall mix; 100% on a return track
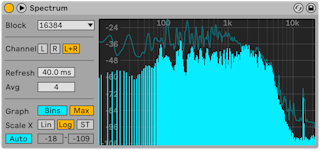
- Spectrum analyzes frequencies in real time and draws level (dB, vertical) against frequency or pitch (horizontal). Peaks stay on the graph until the song restarts. It measures only and never changes the sound.
- Block — samples per measurement; more is more accurate and uses more CPU
- Channel — left, right or both
- Refresh — how often it analyzes; faster is more accurate and uses more CPU
- Avg — how many blocks are averaged per update. 1 shows every block, good for finding short peaks; higher values give a smoother view closer to how we hear.
- Graph — a smooth line or discrete frequency bins
- Max — shows the accumulated maximum; click the display to reset it
- Scale X — linear, logarithmic or semitone. Log and semitone are the same scale with Hz or note names along the top; linear helps when studying the highs.
- Hovering shows level, frequency and note name at the pointer.
- Range/Auto — Range lets you scroll (drag vertically) and zoom (drag horizontally) on the level legend, or set limits with the Range sliders; Auto scales to the input and disables those.
- The title bar button, or double-clicking the display, moves the display into Live's main window.
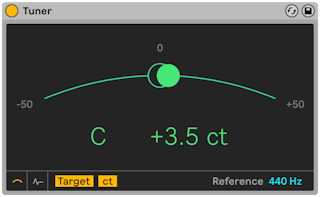
- Tuner shows the pitch of a monophonic input and how far it is from the nearest semitone. Its large display, modeled on guitar tuners, is readable on stage and suits tuning external instruments and synths.
- It measures only and never changes the sound. It works best on a clean, single-note signal; chords, noise or very rich harmonics can confuse it.
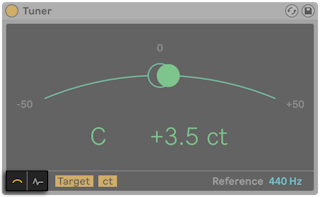
- Two buttons at the lower left switch between Classic View (like an analog tuner) and Histogram View (pitch over time). Green means in tune, red out of tune.
- The pitch is a colored ball on a curve, with the nearest note name in the middle; arrows beside the name show whether to tune up or down.
- Target Mode — a circle marks the target; the ball sits right of it when sharp and left when flat.
- Strobe Mode — the curve becomes a rotating band of lights, turning right when sharp and left when flat, faster the further off.
- Hertz/Cents — shows the frequency in Hz or the distance from the target in cents (also in Histogram View)
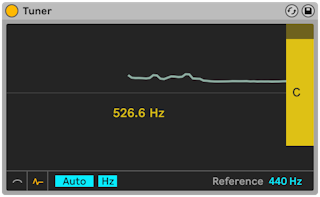
- Pitch is drawn over time. Note names run down the right side; gray bars mark the exact center of each note, with sharp notes above and flat notes below.
- Drag vertically to scroll and horizontally to zoom. Auto keeps the incoming pitch centered.
- Hertz/Cents — as in Classic View
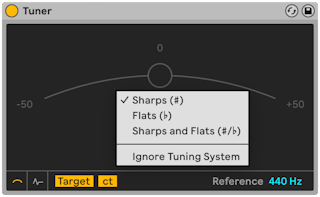
- Right-click the display to choose note names: Sharps (C#), Flats (D♭), or Sharps and Flats (C#/D♭).
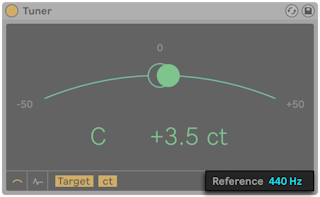
- Reference — the tuning reference, 440 Hz by default (standard concert pitch), adjustable from 410 to 480 Hz.
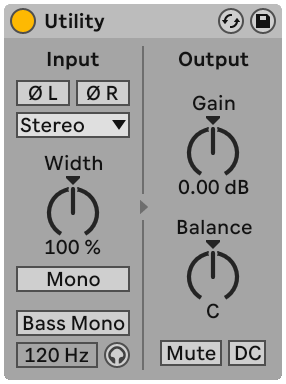
- Utility handles common signal tasks, often alongside other devices.
- Phase — one switch per channel to invert left or right
- Channel Mode — use only Left or only Right (on both outputs), for stereo files with different material on each side
- Width — stereo width; 0% mono, above 100% wider. Mid/Side Mode in its context menu swaps it for a Mid/Side control: toward 100M sums to mono, toward 100S leaves only the side signal (left and right 180° apart). Width and Mid/Side are disabled when Channel Mode is Left or Right.
- Mono — sums the input to mono
- Bass Mono — makes the lows mono below Bass Mono Frequency (50–500 Hz), so they hold up on mono playback; Bass Mono Audition plays only those lows for tuning the frequency
- Gain — −∞ to +35 dB. Handy for automating fades while leaving the track's Volume for mixing. Arrow keys step 1 dB from −18 to +35 dB and speed up below −18 dB.
- Balance — pans the signal
- Mute — silences the input at Utility's position. Since a track's own mute is at the end of the chain, Utility before a delay or reverb can cut its input and let the tail continue.
- DC — removes DC offset and inaudibly low frequencies; matters only when nonlinear devices such as compressors or waveshapers follow
- Related question: Ableton/Track/Q/How can I turn a mono signal into stereo in a channel?
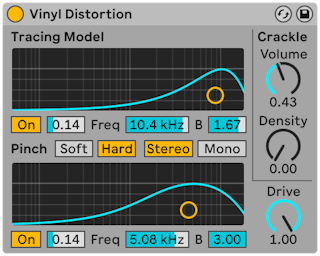
- Vinyl Distortion imitates the distortions of vinyl playback, which come from the geometry of needle and groove, and adds crackle.
- Tracing Model — even harmonic distortion. Drive or vertical drag in its X-Y display sets the amount; horizontal drag or the Freq field sets its frequency ("color");
Option-drag (Mac) / Alt-drag (Windows) vertically sets Q. - Pinch Effect — odd harmonics, typically 180° out of phase for a wider stereo image; same controls, different sound.
- Drive (global) — overall distortion from both sections
- Soft imitates a dub plate; Hard a standard record.
- Stereo/mono switch — whether the Pinch distortion is stereo (more realistic) or mono
- Crackle — noise with Density and Volume
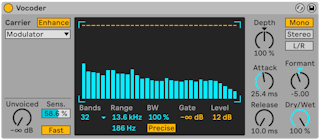
- Vocoder is not in the Intro and Lite editions.
- A vocoder imposes the level contour of one signal, the modulator (usually speech or drums), onto the frequencies of another, the carrier (usually a rich synth such as strings or a pad). The classic result is a talking synth or robot voice.
- Both signals pass through banks of band-pass filters; the level in each modulator band sets the level of the matching carrier band.
- Put Vocoder on the modulator's track. Carrier options:
- Noise — internal noise; its X-Y display sets downsampling (horizontal, left lowers the sample rate) and density (vertical, down thins it)
- External — any internal routing point; the usual choice for robot voices
- Modulator — the modulator carries itself, a resynthesized version shaped by Vocoder's controls
- Pitch Tracking — a monophonic oscillator that follows the modulator's pitch, limited by High and Low. Saw or three pulse waves, with Pitch for coarse tuning. It holds each detected pitch until it finds a new one, so changing its settings or resetting it (for instance by grouping the track) can change the sound unexpectedly. Best on single melodic lines or voice; unpredictable but interesting on chords and drums.
- Enhance — normalizes the carrier's spectrum and dynamics for a brighter sound, useful with external carriers
- Unvoiced — level of an extra noise source for pitchless sounds like "f" and "s"; Sens. sets detection (100% always on, 0% off); Fast/Slow how quickly it switches
- The center display shows each band's level; click in it to lower bands.
- Bands — number of filters; more is more accurate and uses more CPU
- Range — frequency span of the filters; narrow it if the sound gets too piercing or boomy
- BW — filter bandwidth; 100% is most accurate, other values can be interesting
- Precise/Retro — equal gain and width for every band, or narrower, louder bands toward the top
- Gate — bands below the threshold are silent
- Level — output boost or cut
- Depth — how much of the modulator's envelope reaches the carrier; 0% none, 100% classic vocoding, 200% only the loudest peaks
- Attack and Release — response speed; very fast keeps transients but can distort
- Channel switches — Mono (both mono), Stereo (mono modulator, stereo carrier), L/R (both stereo)
- Formant — shifts the carrier's filter bank; small changes on a voice can change its apparent gender
- Dry/Wet — balance of processed and dry signal
- Setups for the most common uses.
- 1. Put Vocoder on the vocal track — a recorded clip, or a live mic chosen as the track input.
- 2. Put a synth such as Ableton/Live/UG/31 Instrument Reference/01 Analog on another track, played from a clip or live.
- 3. Set Carrier to External and pick the synth track in Audio From (Post FX in the lower chooser works best).
- 4. For live input, arm both tracks.
- 5. Play the synth while speaking: the speech rhythm comes through with the synth's tone. Solo the voice track to hear only the vocoded sound.
- Bright, harmonically rich patches, such as saw-based ones, make the words clearer; Unvoiced and Enhance add more clarity.
- Carrier Modulator, Depth 100%, Enhance on — then turn Formant to change the source's character, and try the filter bank controls too.