Ableton/Live/UG/26 Automation
- Recording, drawing, editing and deleting automation in both views, and overriding it by hand.
- Automation records changes to a parameter over time so they replay the same way on every playback.
- Almost every mixer and device control can be automated, including tempo. An automated parameter shows a coloured LED, usually red depending on theme; blue LEDs mean modulation, not automation.
- Automation is stored as breakpoint envelopes: one of the clip envelope types in Session View, and automation lanes in Arrangement View.
- It can be recorded in Session clips or Arrangement tracks, or drawn and edited by hand.
- Session View automation can go into Session clips, or into the Arrangement's automation lanes when recording the Session to the Arrangement. Only the second can automate tempo.
- To record into Session clips, turn on Ableton/Live/UI/Control Bar/Button/Automation Arm in the Control Bar and arm the tracks.
- Setting Record Session automation in to All Tracks (Record, Warp & Launch Settings) records into every playing clip, armed or not — for instance adding automation to a MIDI clip without recording notes.
- Press Session Record and move controls. Press it again to stop recording and keep playing, or press Stop to stop both.
- Edit the result in Clip View's Envelope Editor.
- Copying Session clips into the Arrangement turns their automation into track automation. Recording the Session into the Arrangement captures existing clip automation along with live changes.
- Recording over existing automation for the same parameter replaces it, including on later passes of a looping clip.
- In Session View, mouse moves behave like "touch": the value returns to the recorded automation on release. Hardware knobs and faders behave like "latch": the last value holds until the clip or loop ends. A first recording into a clip always latches.
- Moving an automated parameter while not recording overrides its automation without erasing it. The LED turns grey.
- The Control Bar's Re-Enable Automation button lights up when anything is overridden; click it to bring all automation back.
- Re-Enable Automation in a parameter's context menu restores just that one. Relaunching a Session clip with automation also restores it.
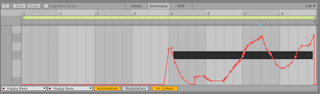
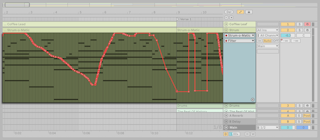
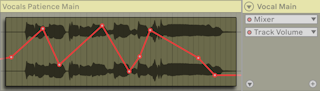
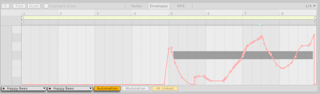
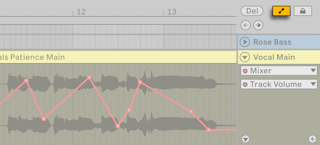
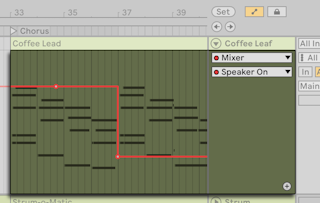
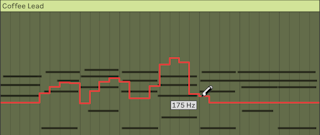
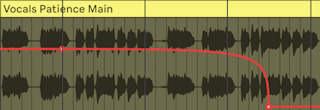
- An automation envelope is a line of breakpoints drawn over the clip or track: value on the vertical axis, time on the horizontal. Drawing it over the content helps line breakpoints up with audio or notes.
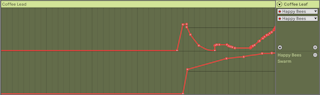
- In Clip View's Envelope Editor, turn on the Automation toggle and pick a device and control in the choosers beside it.
- The Device chooser lists the track's devices, the mixer and MIDI Ctrl (MIDI controller clip envelopes). LEDs mark automated controls and the devices holding them. A control without automation shows as a dashed line at its current value.
- Show Adjusted Envelopes Only shortens the lists to one combined Automated Control chooser; Show All Envelopes brings the full lists back.
- With Clip and Device View stacked, clicking any device or mixer control opens its envelope — unless Show Adjusted Envelopes Only is on and the control has no automation.
- Turn on Ableton/Live/UI/Arrangement View/Toggle/Automation Mode above the track headers, or press
A, to open each track's main automation lane. - The Device and Automation Control choosers in the lane pick what to show; Device set to None hides the envelope. LEDs and dashed lines work as in Session View, and Show Automated Parameters Only / Show All Parameters shorten or restore the lists.
- In Automation Mode, clicking a control shows its envelope. Show Automation or Show Automation in New Lane in a parameter's context menu turns on Automation Mode and focuses its lane.
More lanes
- Add Automation Lane moves the current envelope to its own lane and sets the main lane to None, ready for another parameter.
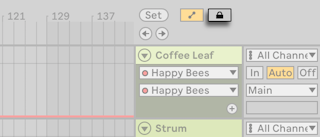
- A toggle in the main lane hides or shows the extra lanes; drag to reorder them.
- Up and down arrows move between lanes; left goes back to the main lane; left and right on the main lane hide or show extras.
Option-click (Mac) / Ctrl-click (Windows) Add Automation Lane duplicates the main lane's envelope, up to two duplicates. Cmd-click (Mac) / Alt-click (Windows) adds a lane for every automated parameter.- Remove Automation Lane removes a lane, or all selected lanes;
Cmd/Alt-click removes it and every lane below. - See also Ableton/Clip/Q/How can I see all MIDI CC clip envelopes stacked in Arrangement View?
26.5.2.1 Context Menu Options for Automation Lanes
- Lane header context menus offer Add Automation Lane (main lane), Add Lane for Each Automated Envelope, Remove Automation Lane (extra lanes), and commands to clear all envelopes for the track or one of its devices.
- Besides recording, envelopes can be built by adding breakpoints with mouse or keyboard, drawing in Draw Mode, or inserting shapes.
- Select the parameter, then click the dashed line to add the first breakpoint; the line turns solid. Drag before releasing to set the value, holding
Shift for fine control. Double-click away from the line to add a breakpoint there. - Breakpoints snap to the grid; hold
Cmd (Mac) / Alt (Windows) to place them freely. - Values show on hover and while dragging. Right-click the line → Add Value to place a breakpoint at an exact value.
- On/off and other stepped parameters get stepped envelopes instead of slopes.
- Keyboard entry is covered in Ableton/Live/UG/41 Accessibility and Keyboard Nav.
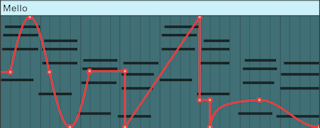
- In Draw Mode, drag to draw the whole envelope freehand. Toggle it from the Options menu, the Control Bar, or
B; hold B to use it temporarily. - Drawing makes steps as wide as the visible grid. Change the grid with shortcuts or the Options or context menu.
- For smooth lines, turn off Snap to Grid (
Cmd+4 / Ctrl+4), or hold Cmd (Mac) / Alt (Windows) while drawing.
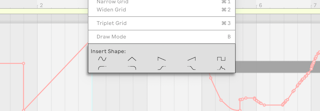
- Shapes from the Envelope Editor's or lane's context menu fill the time selection, or one grid step at the insert marker, scaled to the parameter's range. Useful for rhythmic patterns, swells and builds.
- The top row holds sine, triangle, sawtooth, inverse sawtooth and square; the bottom row holds two sets of ramps and an ADSR.
- Waveforms go in as drawn; ramps connect to the values on either side of the selection, so they look different depending on their surroundings.
- Stepped parameters accept only the square shape.
- Existing envelopes can be edited by moving breakpoints and segments, by stretching or skewing, or by simplifying.
- Drag a breakpoint to move it; a vertical line shows its grid position.
Cmd/Alt bypasses snapping; Shift locks horizontal moves and gives fine vertical control. - Click a breakpoint to delete it; its neighbours join up.
- Drag in the background to select several breakpoints, then drag one to move them all, or Delete from the context menu.
- Drag near a segment to move it, or
Shift-click it, then release Shift and drag. Moving a segment in or out of a time selection adds breakpoints at the selection's edges. - Dropping onto existing breakpoints overwrites them, but only when you release.
Option-drag (Mac) / Alt-drag (Windows) a diagonal segment to curve it; double-click with the same key to straighten it.- Edit Value in the context menu types an exact value; other selected breakpoints move by the same amount.
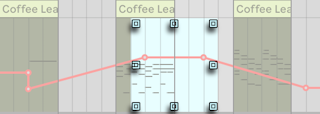
- Hovering over a time selection shows handles around it.
- Top and bottom centre handles stretch vertically (
Shift for fine control); left and right centre handles stretch in time; corner handles skew. An outline previews the result and snaps to the grid unless you hold Cmd/Alt. Option/Alt-drag mirrors the move on the opposite handle.- Dragging over breakpoints outside the selection removes them.
- Simplify Envelope in the context menu, on a time selection, replaces dense breakpoints with the fewest straight or curved segments that keep the shape.
- Delete Automation in a parameter's context menu, or
Cmd+Delete (Mac) / Ctrl+Backspace (Windows) with it selected, removes all its automation; the LED goes away and the value returns to default. - Context menus in the Envelope Editor or lane headers also offer Clear Envelope, Clear All Envelopes of… (one device; lane headers only) and Clear All Envelopes (the whole Set).
- To remove only part of an envelope, edit its breakpoints.
- Tempo automation, locking envelopes to the timeline, and Edit menu commands.
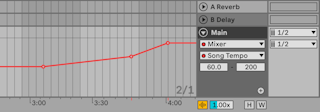
- Tempo can be automated like any control: tempo changes made while recording the Arrangement are saved.
- To see or draw it, turn on Automation Mode and choose Mixer → Song Tempo in the Main track's lane.
- The Tempo Minimum and Maximum sliders set the BPM range shown, which is also the range of a MIDI controller mapped to tempo.
- With a time selection in an automation lane, Cut, Copy, Duplicate and Delete act only on the envelope inside it, leaving clips alone. A selection across several lanes affects all of them.
- Envelope segments can be pasted to a different parameter, with unpredictable results.