Ableton/Live/UG/23 Instruments and Effects/02 Using Devices
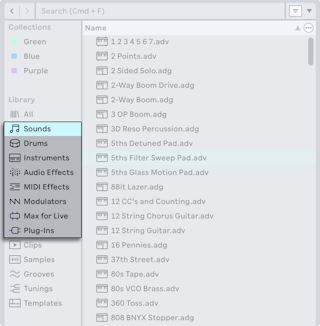
- The browser sidebar has labels for Live's devices, Max for Live devices and plug-ins.
- Double-click a device to add it to the selected track (or a new track), select it and press
Enter, or drag it to a track, a drop area or the Device View. Dropping a sample into a MIDI track's Device View creates a Ableton/Instrument/Simpler with it. - With Auto monitoring, a track must be armed to hear an external input through its devices; adding an instrument to a MIDI track usually arms it. See Ableton/Live/UG/17 Routing and IO/01 Monitoring for other setups.
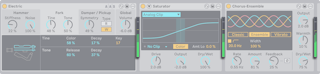
- Signals run left to right, so order matters. In a MIDI track, everything before the instrument is MIDI and everything after is audio, so a chain can go MIDI effects → instrument → audio effects.
- Select a device's title bar and press
Delete to remove it; drag title bars to reorder, or into another track to move. Cut, copy, paste and duplicate work too; pasted devices go before the selected one, or at the end if you click after the last device. Changes don't interrupt the audio. - Meters between devices show where a signal drops out or gets too hot.
- There's no clipping between devices; it only happens at physical outputs or in rendered files.
- Clip envelopes can automate or modulate device parameters per clip; see Ableton/Live/UG/27 Clip Envelopes.
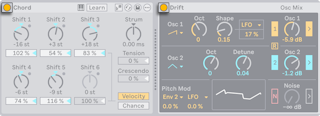
- The title bar turns the device on and off, saves and hot-swaps presets, saves defaults and opens the context menu. Some devices add controls, such as a scale awareness toggle or the Chord device's Learn toggle.
- The Activator toggle switches a device off as if removed: the signal passes untouched and it uses no CPU. Freezing tracks helps with heavy devices.
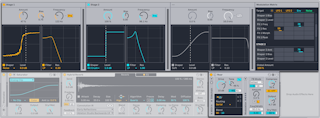
- An arrow next to the Activator opens a view above the Device View, such as Roar's Gain Stage and Modulation Matrix or EQ Eight's frequency display.
- A triangle in the title bar expands a view inside the device, such as Phaser-Flanger's LFO and Envelope Follower.
- Right-click the title bar or use the Show Options toggle for the context menu: general commands like Cut, Copy and Rename, plus device-specific ones such as Auto Filter's Mono Sidechain.
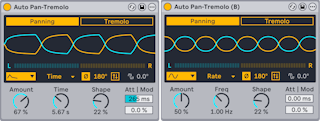
- Every built-in device holds two states, A and B, with separate parameter values, for comparing edits — useful for presets, EQ and compression.
- On loading, A and B are the same. Edits go to A while B keeps the starting values.
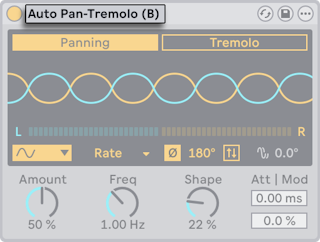
- Compare: Copy A to B (Edit menu, context menu or Show Options) copies values across; Compare: Switch to B, or
P, switches state. The title bar shows "(B)" while B is active. - Not available for Racks, Max for Live devices or plug-ins.
- Automation belongs to one state: switching disables it, and switching back doesn't re-enable it. Use Re-Enable Automation in the parameter's context menu in the state you want.
- Copying a device, or saving it as a preset, takes only the active state's values and uses them for both A and B.
- Max for Live can reach the states through the Live API.
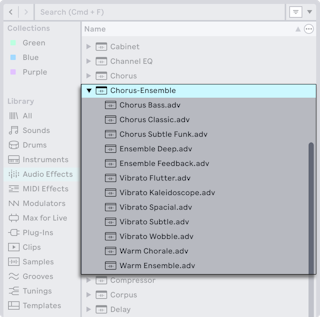
- Each device shows as a folder in the browser's content pane. The folder itself is the default preset (factory or your own default); the presets inside have custom settings. Presets come from the Core Library, Packs, or your own saves.
- Browse with the arrow keys: up and down to move, left and right to close and open folders,
Enter to load onto the selected track. Double-click or drag also work. - Live device files (Ableton/File/.adg, Ableton/File/.adv, Ableton/File/.amxd) can be dragged in from Finder or Explorer, though the browser is preferred.
- Drop a preset over an existing one in a device chain to replace it.
- Hot-Swap links a device to the browser so you can audition and load other presets in its place. Press
Q or click the Hot-Swap Presets button in the title bar. Q swaps the selected device, or else the first audio effect on an audio track or the instrument on a MIDI track.- The browser opens at the device's folder. Any preset of the same device type can be swapped in — an audio effect can't be swapped for a MIDI effect. Arrow keys browse;
Enter or double-click loads. Load the parent folder for the device's default settings. - Adding
-EnableHotSwapOnSelection to Options.txt loads each preset as soon as it's selected. - Leave with
Q, Esc, the X in the browser's Hot-Swap bar or in the title bar, or by moving to another view. 23.2.4.1 Hot-Swapping Samples
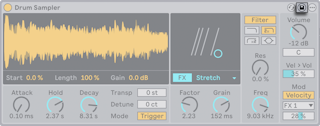
- Drum Rack pads, Drum Sampler, Impulse, Sampler and Simpler have a Hot-Swap Sample button: bottom right of each pad, of Drum Sampler's waveform, of each Impulse slot and of Simpler's sample display; top left of Sampler's expanded Zone Editor. Except in Sampler, it appears only on hover.
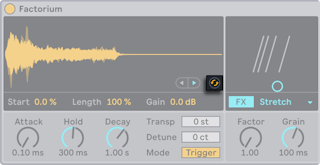
- It opens the sample's folder in the browser; load another with
Enter or double-click. - Leave by clicking the button again, the X in the Hot-Swap bar,
Esc, Q, or moving to another view.
- The Save Preset button in the title bar saves the current settings, and any Info View text, as a new preset in the User Library's Presets folder. Name it and press
Enter, or Esc to cancel. - Dragging a device by its title bar into any folder under Places saves it there.
- If Collect Files on Export (Library Settings) is set to Ask, saving a preset that uses samples asks whether to copy them.
- More in Ableton/Live/UG/04 Browser and, for Project-specific presets, Ableton/Live/UG/05 Managing Files and Sets.
- Defaults apply your most-used settings automatically. They can:
- load devices with set parameter values;
- load VST and Audio Units plug-ins with set parameter configurations;
- create audio and MIDI tracks with set devices and mixer settings;
- choose the presets used for dropping samples, slicing and converting audio to MIDI.
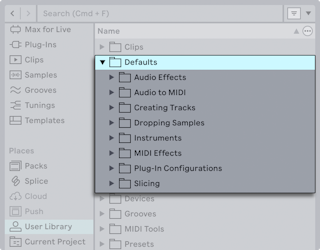
- They live in the User Library's Defaults folder. Delete one from its context menu, or select it and press
Delete, to return to factory settings. 23.2.6.1 Default Presets
- Set a device up and choose Save as Default Preset from its Options or context menu (instruments, MIDI and audio effects, and Racks). It is saved under Defaults in Audio Effects, Instruments or MIDI Effects, and loads every time the device is added — samples included for instruments.
- Dragging a device into those folders works too, as long as it keeps the device's own name, such as "Simpler". Saving a new default asks before overwriting.
23.2.6.2 Default Plug-in Configurations
- For a VST or Audio Units plug-in, add parameters in Configure Mode and choose Save as Default Configuration. It is saved to Plug-In Configurations → Audio Units or VSTs; VST and AU versions can have separate defaults.
- Only the list of parameters is saved, not their values. To keep values too, put the plug-in in a Rack and save the Rack as a default preset.
23.2.6.3 Track Defaults
- Set up a track's devices and mixer settings (routing, volume, pan, sends) and choose Save as Default Audio Track or Save as Default MIDI Track from its title bar's context menu. It goes to Creating Tracks → Audio Track or MIDI Track and applies to every new track of that kind.
- Dragging a track there also works if it is named Default Audio Track or Default MIDI Track.
23.2.6.4 Sample Dropping Defaults
- To choose the instrument made when a sample is dropped into an empty MIDI track's Device View or onto a Drum Rack pad, set up an empty Sampler or Simpler and drag it to Dropping Samples → On Device View or On Drum Rack. A pad's Save as Default Pad adds to On Drum Rack too.
- If a folder holds several, the last one added is used.
23.2.6.5 Slicing Defaults
- Build an empty Drum Rack with one chain holding an empty Sampler or Simpler, plus any effects and Macro mappings, and drag it into the Slicing folder. It then appears in the Slicing Preset chooser of Slice to New MIDI Track; see Ableton/Live/UG/13 Audio to MIDI.
23.2.6.6 Converting Audio to MIDI Defaults
- Custom Racks for Harmony, Melody and Drums to MIDI go in the matching Audio to MIDI folder. Use an Instrument Rack (or a single instrument) for Harmony and Melody; Drums needs a top-level Drum Rack with Sampler or Simpler on its pads, not one nested in an Instrument Rack.
- If a folder holds several, the last one added is used.
23.2.6.7 Project-Specific Defaults
- A Defaults folder, with the same subfolders, inside the Current Project overrides the User Library defaults for Sets in that Project. Create folders in Finder/Explorer or with New Folder in the browser, then drag devices or tracks in.
- Plug-ins can't be dragged into the Project. Instead, create Plug-In Configurations/Audio Units and VSTs folders there, save a configuration as usual, and move its folder with the Default.appc file from the User Library into the Project.
- The Save as Default menu commands always save to the User Library, not the Project.