Ableton/Live/UG/22 Stem Separation
- Splitting recorded audio into separate stems such as vocals, drums and bass.
- Stem separation splits recorded audio — a song, loop or sample — into parts you can warp, chop, rearrange and process like any audio clip.
- Uses include isolating vocals for remixes, pulling apart melodies and rhythms, sampling single instruments, and blending stems in DJ mixes.
- Separation analyses the spectral and time characteristics of a signal and extracts the parts it detects as stems.
- Live uses a deep learning model trained for source separation that runs locally, with no internet connection or extra tools.
- Any mono or stereo file splits into four stems: Vocals, Drums, Bass and Others (everything else).
- Choose Separate Stems to New Audio Tracks from the context menu or Create menu, on a file in the browser or a clip in either view.
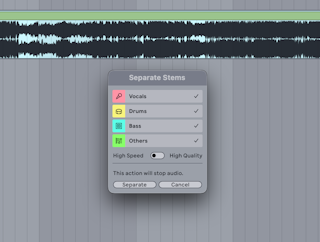
- In the dialog:
- toggles pick which of the four stems to make;
- Merge to Single Track combines two or three chosen stems into one;
- the quality selector picks High Speed or High Quality;
- Separate starts the process and stops playback.
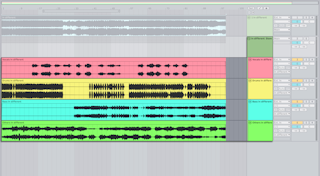
- Each stem gets its own track inside a new Group Track, coloured to match the dialog's toggles; the group takes the source track's colour. A single stem, or a merged one, goes on one track instead.
- Only the clip's audible region is processed — between its start and end markers, or from the start marker through the loop of a looped warped clip.
- In the Arrangement, Separate Stems for Time Selection on a clip splits it at the selection's edges and separates only that part.
- Source track effects move to the Group Track; track automation is copied to the group, and clip envelopes and modulation to each stem clip.
- The source clip is deactivated to avoid doubling; select it and press
0 to turn it back on. - From the browser, stems land in whichever view has focus. In an empty Set with warping on for samples, the Set tempo follows the source.
- Files go to the Project's Samples/Processed/Stems folder (merged stems keep their individual files too), in the File Type from the Record, Warp & Launch Settings, at 44.1 kHz and the source's bit depth.
- High Speed separates every stem in one pass. It can still take several minutes on older computers.
- High Quality gives cleaner results (a higher signal-to-distortion ratio) by running separate passes for Vocals, Drums and Bass, then deriving Others from what remains.
- Crop the clip first to save time: Crop Clip Sample to Time Selection in the Sample Editor, or Crop Clip in the Arrangement, both
Cmd+Shift+J (Mac) / Ctrl+Shift+J (Windows). - In High Quality, choosing fewer stems saves time unless Others is included, since Others needs all three other passes. Unused stems from those passes are still saved in the Stems folder.
- Older Windows computers and Intel Macs separate on the CPU only, so they're slower than Apple silicon Macs, which also use the GPU.
- Some sounds land in an unexpected stem, such as hi-hat highs in Others or chorused synths in Vocals. Trying both modes can show which suits the material.