Ableton/Live/UG/21 Comping
- Recording takes into take lanes and combining the best parts into one comp.
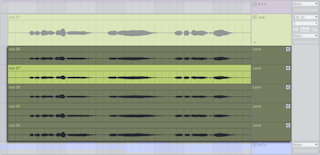
- Comping combines the best parts of several recorded takes into one composite. Live records takes onto take lanes, which can also hold alternative arrangements of clips, or samples dragged in from the browser for chopping.
- Every audio or MIDI track in Arrangement View has a main lane, heard by default, and any number of take lanes, heard only when auditioned.
- Take lanes appear automatically when recording in the Arrangement and can be added by hand.
- Show or hide them with Show Take Lanes in the track header's context menu, the toggle on the main lane, or
Cmd+Option+U (Mac) / Ctrl+Alt+U (Windows). - The left arrow key moves from a take lane to the main lane and folds the take lanes.
- Take lanes are hidden in Ableton/Live/UI/Arrangement View/Toggle/Automation Mode; showing or inserting them leaves that mode.
- Insert: Create → Insert Take Lane, the header context menu, or
Shift+Option+T (Mac) / Shift+Alt+T (Windows), for one or several selected tracks. Max for Live can also create lanes and add clips. - Duplicate:
Cmd+D / Ctrl+D or the header's Duplicate command. - Delete:
Delete/Backspace or Edit → Delete. Delete All Take Lanes clears a track; Delete All Unused Take Lanes removes lanes that contribute nothing to the main lane's comp. - Resize:
Option++/- (Mac) / Alt++/- (Windows), Option/Alt+mouse wheel, or drag a lane's edge; works on all selected lanes. - Reorder: drag, or
Cmd/Ctrl+up/down arrow. - Rename:
Cmd+R / Ctrl+R; several at once, with Tab and Shift+Tab to move between lanes.
- Recording in Arrangement View adds take lanes to armed tracks and puts the new clips in them.
- Each pass over existing material, whether separate passes or loop recording, gets a new lane. An existing lane is reused when nothing sits after the punch-in point.
- The latest take is always copied to the main lane, so it plays back right away.
- Takes share the track colour unless Clip Color is set to Random in Theme & Colors Settings.
- Drag samples or MIDI files onto take lanes from the browser or Finder/File Explorer. Hold
Cmd (Mac) / Ctrl (Windows) while dragging several to place each on its own track.
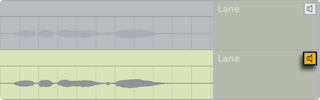
- Click a take lane's speaker button, or press
T, to audition it. - Lanes on different tracks can play at the same time, but only one lane per track. With several selected, the last-selected lane on each track plays.
- Press
Enter, or use Copy Selection to Main Lane, to copy selected take material to the main lane. - Select clips or a time range and press
Cmd/Ctrl+up/down arrow to swap in the same span from the next or previous non-empty take. On a take lane the selection moves with it. - In Draw Mode, click and drag across a take to copy it to the main lane in one gesture, or click a take to fill a main-lane time selection from it.
- Main-lane clips are independent copies, so either can be edited without changing the other. Take clips edit like any Arrangement clip and can be copied or dragged to Session slots.
- Create Fades on Clip Edges (Record, Warp & Launch Settings) adds 4 ms crossfades between adjacent clips to prevent clicks;
Cmd+Option+F / Ctrl+Alt+F adds them by hand.
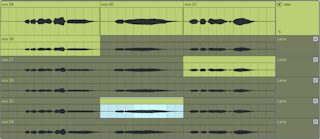
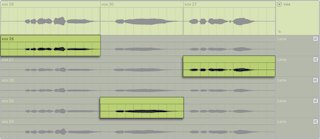
- Take material used in the main lane's comp is highlighted in the track colour; unused material is desaturated. Highlights only show when position and clip properties match.
- Drag the edge of a highlight to move the split point between two adjacent parts of the comp.