Ableton/Live/UG/14 Grooves
- The Groove Pool: applying a groove's timing and feel to clips and editing grooves.
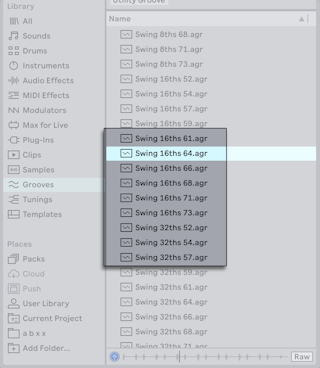
- Grooves change the timing and feel of a clip. Live's library grooves are Ableton/File/.agr files in the browser.
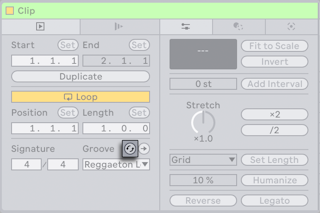
- Drag a groove from the browser onto a clip to apply it. To audition several, turn on the Hot-Swap button above the clip's Clip Groove chooser and step through grooves while the clip plays.
- Grooves work on MIDI clips and on audio clips; on audio they act through warping, so Warp must be on.
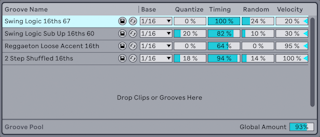
- The Groove Pool holds every groove in use or loaded by double-clicking it in the browser. Grooves not used by any clip show greyed-out parameters.
- Open it from the browser's view control menu, or with
Cmd+Option+6 (Mac) / Ctrl+Alt+6 (Windows). - Each groove in the pool has buttons to save and hot-swap it, and these parameters, which change playback in real time:
- Base — the note grid the groove is measured against, such as 1/4 or 1/8. Groove notes that fall on that grid don't move your notes.
- Quantize — straight quantization applied before the groove: 100% snaps to the Base grid, 0% leaves notes where they were.
- Timing — how strongly the groove's timing moves the clip.
- Random — random timing offsets, different for each voice; small amounts loosen tightly quantized loops.
- Velocity — how much the groove's velocities affect the clip, from −100 to +100. Negative values invert loud and quiet.
- Global Amount — scales Timing, Random and Velocity for every groove, up to 130%. It also appears in the Control Bar once any clip has a groove.
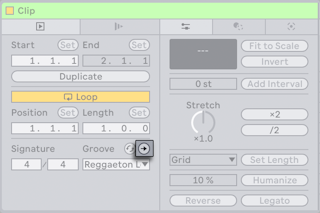
- Commit, above the Clip Groove chooser, writes the groove into the clip — moving MIDI notes, or adding Warp Markers to audio — and then sets the clip's groove to None.
- What a groove does depends on its Groove Pool settings and on the note positions inside the groove file.
- Drag a groove from the browser or Groove Pool onto a MIDI track to get its notes as an ordinary MIDI clip, edit them, then turn the clip back into a groove.
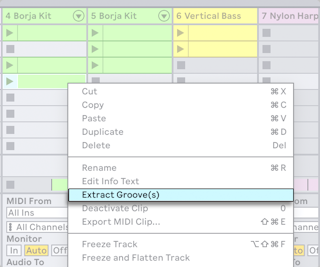
- Drag any audio or MIDI clip into the Groove Pool, or choose Extract Groove from its context menu, to make a groove from its timing and volume.
- Only the playing part of the clip counts.
- Ways to get more from grooves.
- A groove applies to a whole clip, so placing one drum voice behind the beat needs that voice in its own clip.
- In a Drum or Instrument Rack, extract the chain for that voice (the snare, say) to its own track and clip, then give it a different groove.
- Set a groove's Timing, Random and Velocity to 0% and use only Quantize and Base for quantization that can be changed or undone at any time. Which groove file you use then doesn't matter.
- Duplicate a track, apply a groove with Random turned up to one copy, and play both: every note lands slightly apart from its twin, which thickens single string voices into a section.