Ableton/Live/UG/02 First Steps
- Installing and authorizing Live, where to learn it, and the Settings window.
- Download the installer from your ableton.com User Account, install it, then authorize Live.
- Each license comes with two authorizations, so Live can run on two computers, one at a time.
- Live has two built-in learning tools, the Learn View for guided lessons and the Info View for help on whatever is under the mouse. Outside the application there are this manual, videos and interactive web apps.
- The Learn View holds learning modules made of lessons. Each lesson has a video walkthrough, a short text on its key concepts, and links to related lessons.
- New modules arrive without a Live update. The view needs an internet connection; press Reload after reconnecting.
- It opens by default on first launch. Close it with the X button and reopen it from the Help menu or with
Cmd+Option+7 (Mac) / Ctrl+Alt+7 (Win). It returns to the last page visited until Live quits. - Filter lessons by topic, and mark a lesson finished with the Complete Lesson button; finished lessons show a check mark on the home page.
- The video player can open a picture-in-picture window that stays on top of every application, so you can follow along while working. Its Learn View → button closes it and reopens the Learn View.

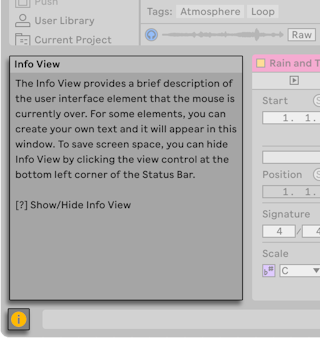
- The Info View shows the name and function of the interface element under the mouse.
- Show or hide it with the toggle in the bottom-left corner of the window or with the
? key. - Choose "Edit Info Text" from the context menu of a track, clip, device and more to write your own note for it; the text is saved with the Set. See Ableton/Info Text.
- The manual recommends reading Ableton/Live/UG/03 Live Concepts first; the remaining chapters expand on it.
- Ableton's YouTube channel has musicians talking about their workflows. The Learning Music and Learning Synths websites teach music-making and synthesizer basics interactively in the browser.
- The Settings window customizes Live. Open it from the Live menu (Mac) or the Options menu (Win), or with
Cmd+, (Mac) / Ctrl+, (Win). See Ableton/Setting. - Settings are spread across the tabs below.
- Language and zoom for the main window, a second window and the Settings window.
- Display Options: "Outline View in Focus" draws a border around the selected view; scroll bar style; Follow behavior for Arrangement View and clips; interface labels.
- Navigation and Keyboard: Tab key focus movement, continuous Tab navigation within a section, and moving clips with the arrow keys.
- Mouse and Pen Input: Pen Tablet Mode, permanent scrub areas, and pitch-locked drawing for MIDI notes.
- Application Options restores "Don’t Show Again" warnings you switched off.
- Theme: color scheme; light, dark, or follow the operating system; warm, cool or neutral tone; high contrast.
- Customization: grid line opacity, brightness, and the color intensity and hue of the interface.
- Track and Clip Colors: automatic track colors on or off, a default track color, Reduced Automatic Colors, and whether new clips get random colors or the track's color.
- Connects Live to an audio interface: input and output devices, sample rate, latency, and a test section for calibrating the interface.
- On macOS, Live can use any CoreAudio device, and the Use System Device option follows whatever output macOS Sound settings select. On Windows, an ASIO driver is recommended, and devices are managed in the driver's own program.
- Create Analysis Files: whether Live writes Ableton/File/.asd files when it imports audio.
- Sample Editor: an external program for destructive sample editing.
- Temporary Folder: where recordings sit until their Set is saved.
- Max Application: the bundled Max or an external one. Max for Live comes with Live Suite and also works with Live Standard.
- Decoding Cache: where Live keeps decoded copies of compressed samples.
- Default locations for installed files such as Packs and the User Library, whether dependent files like samples are copied when clips, tracks or presets are dragged to the browser, and whether the Cloud, Push and Splice labels show in Places.
- Plug-in folder locations, which folders Live scans, and how plug-in windows behave.
- Default file type for new recordings, Warp and Fade defaults for samples, and settings for clip and scene launching, selection and recording.
- Authorization, automatic updates and usage data.